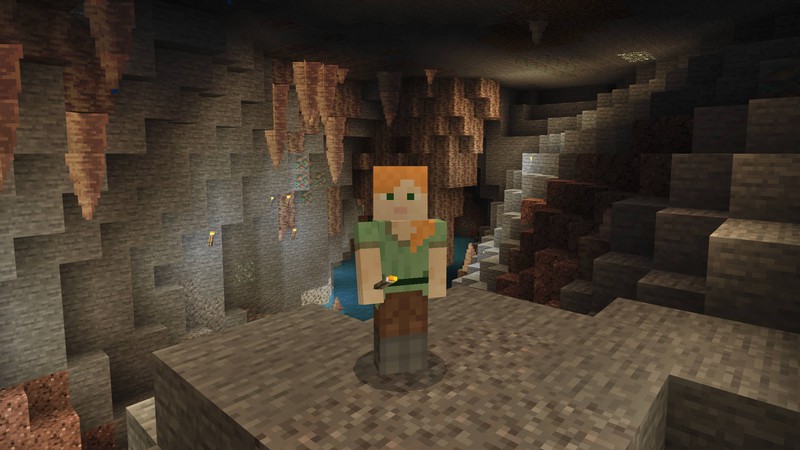
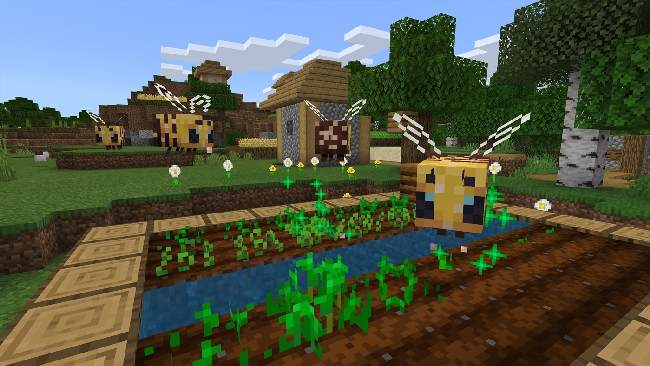
После месяцев ожидания, вторая часть крупного обновления Minecraft “Пещеры и Скалы” выходит сегодня. И среди всех прочих изменений и улучшений, апдейт включает новые пещеры — в том числе те, в которых есть сталактиты и сталагмиты.
When Caves & Cliffs: Part II arrives tomorrow, who’s to say what wonders those walls will reveal? pic.twitter.com/ZqOADQ3KZ4
— Minecraft (@Minecraft) November 29, 2021
Что это за новые пещеры?
Как определить, что ты попал в нужную пещеру, если большинство из них выглядят одинаково? Главное отличие карстовых пещер от обычных темных пространств или пышных пещер в наличии сталактитов и сталагмитов — отложений, формирующих каменные конусы. Одни свисают с потолка и острым краем направлены вниз, другие, словно растут из пещерного пола. У них коричневый цвет, некоторые могут быть сконцентрированы, другие распределены.
Если источники воды или лавы находятся над сталактитом, то небольшие капли воды или лавы будут скатываться и падать на пол. На это место можно разместить котел, чтобы собрать капли.
Еще один признак, что пещера может содержать образования — это небольшие лужи воды, распределенные по пещере. Это не гарантия обнаружения сталактитов, но хороший признак.
Как найти пещеры со сталактитами?
Увы, в игре нет указателей или специальных компасов для поиска таких пещер. Но если помнить ряд факто о них, то найти подобную пещеру может быть проще, чем копать в случайном месте.
С обновлением Minecraft 1.18 новые пещеры станут самыми обычными. Если вы играете на PC, то можно нажать клавишу F3, чтобы открыть страницу с характеристиками — в левой части будет небольшой текст, указывающий на биом. Используйте этот функционал под землей, чтобы проверять, в какой пещере вы находитесь. Если в пещере есть сталактиты, то будет указано “Biome: minecraft: dripstone_caves”.
Помимо сталактитов, также есть Пышные пещеры и Шумные пещеры.
Зачем искать пещеры со сталактитами?
Никакой действительно значимой пользы от таких пещер нет. По крайней мере сейчас единственное применение блокам из таких пещер сводится к декорациям. У блока приятный естественный цвет, который может подойти тематическим сооружениям.
Апдейт Minecraft 1.18 будет доступен для скачивания начиная с сегодняшнего дня.
Больше статей на Shazoo
- Minecraft получит цветущий вишневый биом в обновлении 1.20
- Для Minecraft вышла крутая бесплатная карта в честь Лунного Нового Года
- В The Witcher 3 теперь можно погладить Плотву
Тэги:
- ПК
- Экшен
- Приключение
- PS4
- Игры
- Minecraft
- iOS
- Android
- Update
- Xbox One
- PS5
- Nintendo Switch
- Xbox Series X

Гайды
Автор Marusya На чтение 2 мин Просмотров 350 Опубликовано 4 декабря, 2021
Узнайте, как найти пещеры Капельного камня в обновлении Minecraft 1.18 из этого руководства.
Пещеры Капельного камня — один из новых биомов, представленных в версии 1.18. обновление Майнкрафт. Это один из биомов, которые образуются под землей. Пещеры Капельного Камня полны ресурсов, и найти их будет очень полезно. В сегодняшней статье я покажу вам как найти пещеры капельного камня в Minecraft 1.18 .
Где найти пещеры капельного камня в обновлении Minecraft 1.18
Как я уже упоминал ранее, Пещеры Капельного Камня — это Подземный биом . Это означает, что, в отличие от большинства биомов, вы можете бегать по поверхности с активным меню F3 и найти биом Капельной пещеры. Таким образом, в чанке может быть более одного биома. В отличие от биома пышных пещер , здесь отсутствуют индикаторы уровня поверхности , указывающие на биом капельных пещер. Пещеры Капельного Камня могут появляться где угодно на любой высоте, под землей или хотя бы внутри горы .
Майнкрафт 1.17 Пещеры и Скалы Обновление! 20w48a | Сталагмиты и сталактиты | Майнкрафт Открытия
Вы можете легко найти их в Minecraft 1.18, выполнив поиск в Deep Ravines . Обычно они вырезают землю достаточно глубоко, чтобы можно было увидеть пещеры Капельного камня. В противном случае они найдут Большие пещерные образования , которые в конечном итоге приведут вас к пещере Капельного камня. Исследование будет вашим самым большим другом. Блуждание и исследование подземного мира также приведет к пещерам Капельного камня. Как только вы найдете их, соберите несколько сталактитов , чтобы вы могли сделать возобновляемая лавовая ферма .
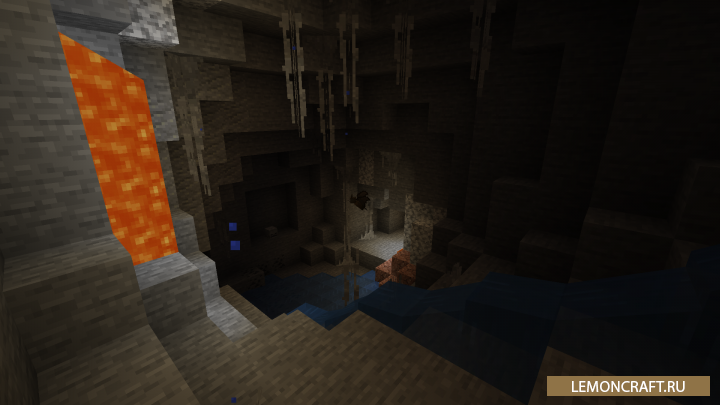
Пещеры капельного камня похожи на другие пещеры, но в них есть блоки капельного камня, разбросанные по поверхности с сталактитами, свисающими с потолка и Сталагмиты, растущие из земли . Здесь очень часто встречается медная руда , которая генерирует большие капли . В пещерах Дрипстона могут появляться мобы: Светящийся кальмар, Паук, Зомби, Утопленный, Зомби-сельский житель, Скелет, Крипер, Слизь, Эндермен, Ведьма, Паучий жокей, Куриный жокей и Летучие мыши . Слаймы будут появляться, только если это Кусок слизи . Утопленники могут появляться в водоносных горизонтах , которые создаются в биомах пещер Дрипстоун.
Это все о поисках пещер Дрипстоунов в обновлении Minecraft 1.18, Пещеры Обновление скал. Надеюсь, это руководство вам помогло. Вы также можете ознакомиться с нашими руководствами по Поиск угля и Удаление тумана в Minecraft.
Источник: guideer.ru
Мод на сталагмиты и сталактиты Wild World [1.16.1] [1.15] [1.14.4]
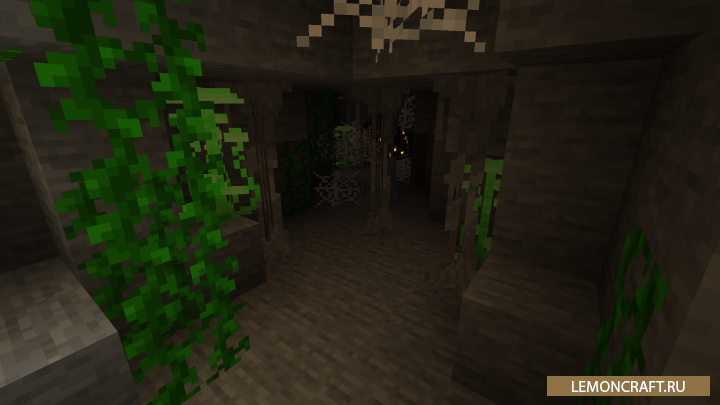
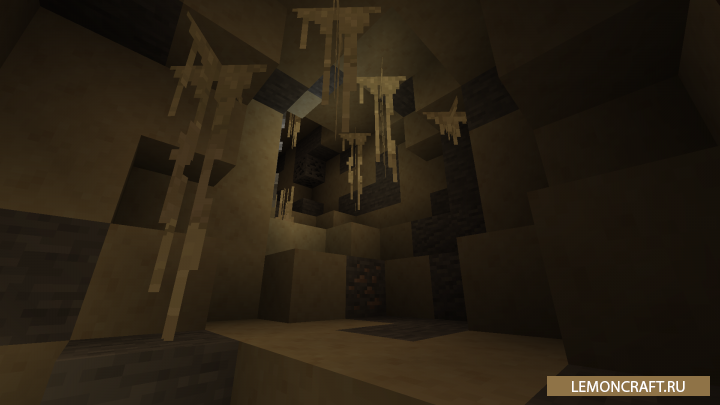
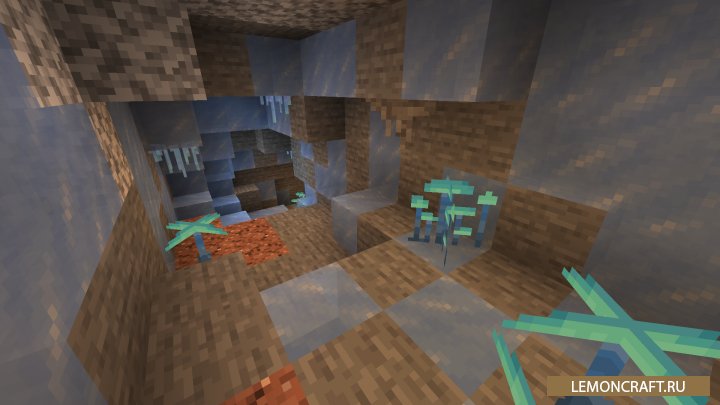
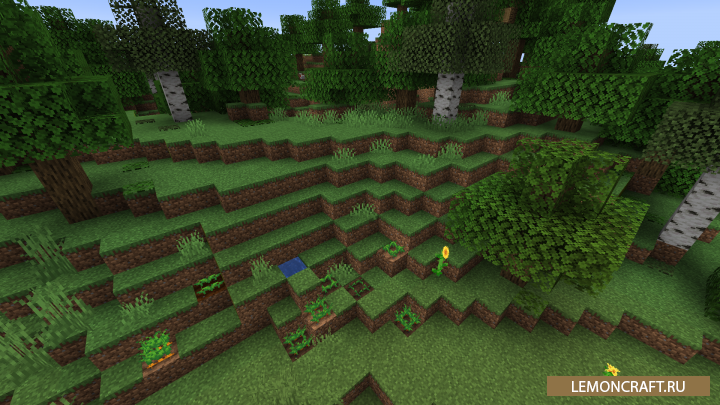
Мод на сталагмиты и сталактиты Wild World сделает природу в игре более разнообразной и реалистичнее. В игре появятся сталактиты, которые будут свисать с потолка, светящиеся грибы, на стенах появятся растения, в пещерах появятся образования льда. Наверху, в самих биомах, появится много новых растений, которые сделают ваш мир более живописнее.
Скриншоты
Как установить
1. Для forge версии: Скачай и установи Minecraft Forge
2. Для rift версии: Скачай и установи Rift
3. Для Fabric версии: Скачай и установи Fabric и Fabric API
4. Скачай мод
5. Не распаковывая, скопируй в C:UsersИМЯ_ПОЛЬЗОВАТЕЛЯAppDataRoaming.minecraftmods
6. Готово
Скачать мод Wild World
wildworld_1.2.1_1.16.jar [148,17 Kb] (cкачиваний: 49)
wildworld_1.2.01.15.jar [155,8 Kb] (cкачиваний: 16)
wildworld_1.14.4_1.1.2.jar [143,02 Kb] (cкачиваний: 89)
Источник: lemoncraft.ru
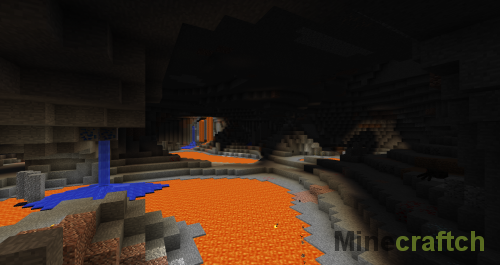
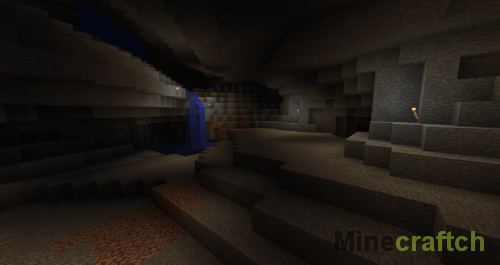
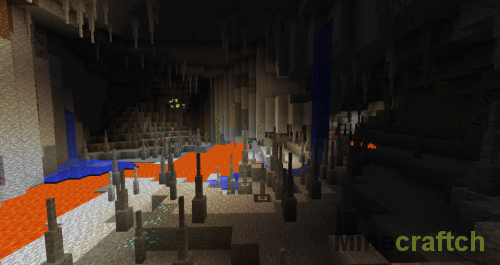
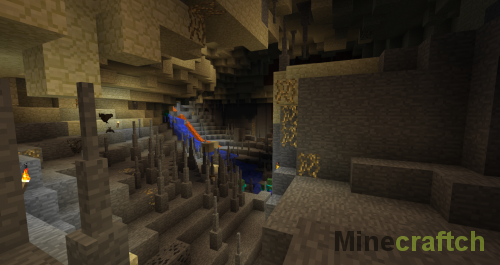
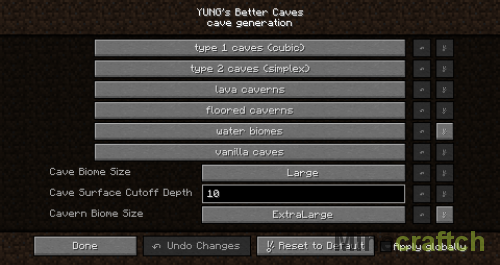
YUNG’s Better Caves Mod [1.14.4] [1.12.2]
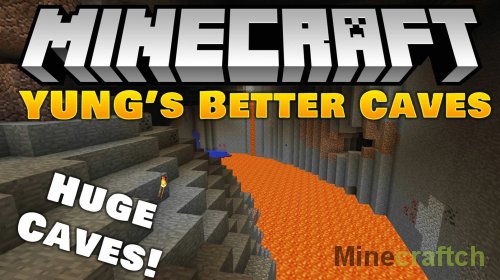
Mojang давно не обновляли подземный мир, поэтому модификации берутся за дело. Мод YUNG’s Better Caves генерирует реалистичные пещеры с ходами. Число узких запутанных коридоров уменьшится, а пространства станет больше. Вы обнаружите крутые места, как на картинках из туристических путеводителей.
Дополнение разработал YUNGNICKYOUNG. Он сверялся с фотографиями во время работы над ним. Вы увидите тоннели, сталактиты, сталагмиты, лавовые реки и остальные причуды природы.
Скриншоты
Примечания
- Настройки спрятались в меню.
- Там же отображаются виды биомов под землей.
Установка
- Загрузите Forge тут.
- Скачайте мод на пещеры для Minecraft на ПК.
- Положите файл в «mods».
Скачать YUNG’s Better Caves Mod
yungs-better-caves-mod-1_14_4.jar [381.74 Kb] (24 ноября 2019, ️ 93)
Источник: minecraftch.ru
![]()
Download Article
![]()
Download Article
A cave (or cavern) is a type of area found in Minecraft that are underground and often contain either valuable or highly useful resources. Though they frequently hold many dangers, such as creepers, cave spiders, zombies, skeletons, and endermen, they also contain gold, diamonds, and emeralds that will make exploring them worth the risk. Each player has their personal preference about locating and then mining caves, but with preparation, finding a cave can be a breeze.
-

1
Gear up. You never know where a cave in Minecraft is going to take you, or where exactly you could end up while exploring. Caves are some of the most dangerous areas in the whole game, and it’s important you have all the essential items you need for survival before you set out.
- Weapons: Some players like avoiding combat whenever possible while others seek it out. No matter your preference on this, it’s a good idea to bring at least one weapon with you just in case. The easiest weapons to craft are swords and a bow and arrow. Swords are a bit easier to get the hang of while bows can do ranged damage. You can either take both, or choose the one that best fits your preferred playing style.
- Armor: This is completely optional, but it can prevent you from taking as much damage should you find yourself in combat, and that can mean the difference between life and death. You can have a helm, a chest piece, and boots all equipped at the same time, and the best part is that it doesn’t even take up inventory space.
- Torches: These are probably the most important item to have with you if you plan on entering a cave. Since caves are underground, they often contain areas that are either poorly lit or not lit at all, so you’ll need to be able to provide your own lighting. Bring a lot of torches, and keep a stack in your item bar for easy access.
- Pickaxes: Caves are primarily made of stone, so it’s a good idea to have a couple pickaxes on you just to help you get around. Caves will also have a lot of good resources that you’ll need a pickax in order to mine.
- Bucket of water/bucket: Depending on what exactly you’re aiming to find in the cave, it can be useful to carry a bucket of water with you. You can pour water onto lava, which not only neutralizes the lava as a threat but will also create obsidian. Alternatively, an empty bucket will allow you to pick up water from its spawn point, which can sometimes make it easier to explore areas of a cave that would otherwise be flooded or waterlogged.
- Food: You could be out exploring for a while, and if you’re successful in finding a cave, you could be out even longer. While caves are rich in many resources, they’re not good for finding food, so you’ll want to bring your own. You want to keep your fullness meter filled because that will ensure that you are able to regenerate any health that you might lose along the way.
-
2
Learn the location of your base. The last thing you want to do is lose the way back to your base, so before you leave you need to make sure you know exactly where you’re at. If getting lost is still something you’re worried about, there are a couple options to ensure you’ll be able to find your way back.
- If there are any memorable land formations or decorations you’ve added around your base, be sure to take note of that so you have something to look for.
- Leaving a trail can be a good way to not get lost. You can put down torches, or even decorative blocks like flowers, and then follow the trail back to your base when it’s time to return.
- Using a map is also an option if you either have one already or have the tools needed to craft one. Maps are a great way of knowing where you are in relation to your base.
Advertisement
-
3
Set out. Some caves are exposed, meaning that they have entrances you can find just by walking around the surface. Walk in any direction you like, keeping in mind not to get lost, and keep an eye out for caves.
- Exposed cave entrances are usually stone and are most typically found in the mountain biomes.
- Exposed caves will often have at least one ore block near the entrance, so you can be tipped off if you see a lot of coal or iron while you’re walking, and you should investigate.
- Don’t just look for caves, listen for them. In addition to the ambiance music that plays when you get close to a cave or a cave entrance, you can also frequently hear monsters making noise from the cave, and sometimes you can hear lava and waterfalls as well.


Advertisement
-
1
Pick a location. One of the benefits of looking for caves by digging is that you can decide where to put the entrance, picking somewhere that is convenient for you.
- When choosing a location, it’s probably best to pick somewhere near your base so that you won’t have very far to travel when you’re going between your cave and your base.
- You can put your cave entrance inside your base if you want, and then you don’t have to go outside when you’re trying to return, which could be dangerous, particularly if you’re exiting the cave at night.
- If you plan on putting your cave entrance inside your base, you might want to either seal it off or mark it so that you don’t just have an open hole that you could risk falling into.
-
2
Gear up. Preparing yourself to tunnel down into a cave is a little bit different than just looking for a cave. If you’re digging into one, your entrance is somewhere that you picked and is probably a lot easier to find than a naturally exposed cave entrance. This means that it will be a lot more convenient to get supplies. Instead of preparing yourself for what you’ll find in the cave, you just need to have the supplies needed to make the entrance.
- Torches: Since you’ll be digging down, you’re going to run out of natural light very quickly, so it’s important that you have lots of torches so you can see what you’re doing. It’s not going to be very easy to get lost this way, but if it’s too dark you won’t be able to see if you come across any valuable materials that would be worth mining.
- Ladders: Ladders are made from sticks, and while they’re not the only method of getting back up once you’ve dug this hole, they are definitely the most efficient.
- Pickaxes: Since you’ll be coming across a lot of stone as you dig, it’s important that you have at least a couple pickaxes with you. They’ll also be important to have if you find anything to mine along your way.
- Shovels: While you don’t technically need shovels, there’s a good chance you’ll come across either dirt or gravel on your descent, and shovels will really speed up the process for moving those blocks.
-
3
Dig down. Simply begin your descent by making sure your pickax is highlighted (or shovel if the blocks your mining are dirt) and left-clicking on the block you want to remove and holding down the left mouse button until the block is gone.
- Keep in mind: you never ever want to dig straight down from the block that you’re standing on. Although it’s one of the quickest ways to tunnel downward, it’s also the most dangerous and can result in the death of your character.
- If you happen to be tunneling toward a cave ceiling and you remove the block you’re standing on, you would fall and could take a lot of damage. You could also tunnel yourself into lava.
- Instead of digging straight down, you’ll need to make your entrance two blocks wide. Stand on one of the blocks as you dig the other and switch back and forth. That way if you remove a block that is directly above either nothing or lava, you can stop, climb out of the hole, and find another place to dig.
- Put down ladders as you dig. To do this, you simply make sure that the ladder section in your toolbar is highlighted and right-click on the block where you’d like to place it. You can highlight the slot that an item is in either by scrolling to it with your mouse wheel, or pressing the number that corresponds to that slot. (If your ladders are in your third item slot for instance, you’ll want to press the 3 on your keyboard to highlight that item.)
- Since you’re going to have to use ladders to get out of the hole and back to your base, it’s important that you put them down as you dig deeper and deeper. It’s easier to put them down as you’re dig than as you’re climbing, and this will also make sure you don’t run short on ladders.
- If you run out of ladders at any point, you should resurface and make some more before continuing your descent, as running out of ladders could get you stuck.
- In addition to putting down ladders, you should also be putting down torches. It’s a good idea to put torches on the opposite wall of your ladder as this will offer the best visibility.
- You won’t need to put a torch on every block, just put them down when you feel that your surroundings are getting too dark. You need to be able to see as it will help you avoid falling should you find a cave.
- You can easily put torches on the wall just like you would with a ladder, making sure that your torches are highlighted from your toolbar and then right-clicking where you’d like to place it.
- Keep in mind: you never ever want to dig straight down from the block that you’re standing on. Although it’s one of the quickest ways to tunnel downward, it’s also the most dangerous and can result in the death of your character.
-
4
Don’t get discouraged. Digging straight down like this will only lead you directly into a cave about 50% of the time. If you keep digging down all the way until you hit bedrock (which is the bottom layer and impossible to dig past) and you still haven’t found a cave, don’t worry. You haven’t wasted your time, and you can still find what you’re looking for.
- Keep listening. If you hear anything as you’re climbing up and down on your ladder, it could be a sign that you’re near a cave. You can often hear monsters, water, lava, and ambiance music to let you know when you’re close. If you hear anything, you can start tunneling in the direction that it’s coming from, which should lead you to a cave.
- If you don’t hear any cave sounds, then the best tactic is to tunnel straight in any direction from 10–12 layers above the bedrock. Go all the way to the bottom of the hole you dug and place down 9 blocks directly beneath you. Start tunneling from there.
- The reason for this is that the most valuable resources usually spawn in the layers 10–12 blocks above bedrock, so searching for a tunnel from this point will not only lead you to a cave, but it also has the best chance of leading you to a cave with gold and diamonds.


Advertisement
-
1
Pick a spot to start digging. Much like with digging straight down, you can choose where the entrance to your cave starts. It’s good to pick somewhere that is easy for you to find and is either connected to your base or close by. That way you can avoid getting lost and you have easy access to your base when you’re returning from mining the cave once you’ve found one.
- When you’re digging down diagonally, you’re essentially creating a staircase that goes straight into the cave. For this reason, it’s a good idea not to create the entrance inside your base without blocking it off, or adding some kind of barrier since enemies would be able to follow you back up from the cave.
-
2
Gear up. Like with digging straight down, it’s most important that you just focus on the tools needed to get you to the cave, not the tools you’ll need once you’re in the cave. This is because it’s much easier to return to your base to restock on supplies. These are the most essential tools to bring when looking for a cave in this fashion.
- Pickaxes: Most of the blocks in between you and the cave you’re looking for are going to be stone, so you’re going to need one very durable pickax at the least.
- Torches: While this method can sometimes provide more light than digging straight down, you’re still going to be underground, and torches are still going to be extremely useful.
- Shovel: You’ll most likely encounter a lot of dirt blocks and a lot of gravel blocks, which can be tedious to move out of the way by hand. Though a shovel isn’t required, bringing one could save you a lot of time.
- Food: Digging out steps into the ground is a lot more time consuming than just digging a hole, so you might want to bring some food to help keep your fullness meter up.
-
3
Start digging. Like with any aspect of Minecraft, there are a lot of personal preferences involved in how you want to dig. If you tend to get claustrophobic while playing, for instance, you may want to make your staircase more than a single block wide and make the ceiling above each of your steps higher. There is no wrong way to do it, but here are a few things to keep in mind.
- You need to have at least three blocks of blank space above each of your steps in order to be able to get up and down the stairs smoothly.
- The wider your staircase is, the more time it’s going to take to dig out, but the easier it’s going to be to find, and the more ground you’ll cover. You should weigh those thoughts before deciding what you’re comfortable with.
- If you’re building any structures where you’ll be using a lot of cobblestone, a wider staircase will help you collect more of it to work with.
- If you’re hoping to find a cave more quickly, a single block staircase is going to get you to one the fastest, and might be a better option for you.
- If you’re unsure of how wide you’d like your staircase, you can always start small and then expand later if you find yourself wanting more space, or wanting your entrance to be easier to find.
- Signs are also a great way to mark your stairs so you don’t lose them from inside the cave and are a faster alternative to making a wide, easily visible staircase.
-
4
Stay attentive. If you have to dig down any length of time before you find a cave or anything of interest, it can get tedious, but you need to pay attention for the following things:
- Music: When you’re near a cave, there’s ominous music that will play. If you hear the music before finding a cave, it might mean that you’re right next to a cave and should start heading in that direction.
- Water/lava: You can hear both running water and lava when you’re close enough to them. If you hear the sound of rushing water, it would be a good idea to mine in that direction. If you hear the sound of lava, it probably does mean there’s a cave nearby, but you should exercise more caution when mining in that direction to avoid actually touching any lava.
- Monsters: Monsters such as skeletons and zombies will make noises that you’ll be able to hear through a couple blocks, so if you hear them, digging in their direction will most likely lead you to a cave, but prepare yourself for combat before heading in that direction.
-
5
Find a cave. This is the most effective method for cave finding. If you reach bedrock, and still have not located a cave, there are a number of options of where to go from there.
- When you hit the bedrock, you can ascend until you’re 10–12 blocks above that and keep mining. 10–12 blocks above bedrock is where things like diamonds and gold naturally spawn, and they’re most commonly found at the bottom level of the biggest caves, so this is a good place to continue your search at.
- You can always start this process over, digging yourself another staircase from a different starting point.
- Another option would be to continue forward, and dig yourself a staircase that goes up, the opposite direction from the way you came in.
- If you’re tired of digging, you can always resurface and try to find an exposed cave entrance.


Advertisement
Add New Question
-
Question
Can I find a cave in a single Minecraft day?

It is possible. Caves are randomly generated. You can spot them fairly easily from an elevated area. Head to a mountain or hill, and look around for a stony pit in the earth.
-
Question
Can I find more than 7 diamonds in 1 vein?
You can find up to 16 diamonds in one vein. This is because when diamonds generate, they may overlap in veins, resulting in two veins of 8 forming a single vein of 16 diamonds.
-
Question
Will a monster cave (Monster spawner cave) have things like gold, diamonds, iron, coal?
Dungeons, the cobblestone areas with mob spawners, may have chests that contain coal, iron ingots, gold ingots, and redstone dust. You can’t find diamonds in them, but you can find diamond horse armor.


See more answers
Ask a Question
200 characters left
Include your email address to get a message when this question is answered.
Submit
Advertisement
-
When crafting your items and deciding what to bring with you, you need to keep in mind inventory space, durability, and practicability. You want to have as much inventory space open as possible for any resources in the cave that you wish to collect, but you also want to have enough tools with you to handle any situation you could find yourself in.
-
If your inventory gets filled up while you’re in a cave, you’ll either need to rid yourself of items or go back to your base to drop some off, both of which could be an inconvenience. For that reason, it’s a good idea to make the tools you take with you as durable as possible, so that you don’t need to bring multiples or worry about them breaking.
-
Crafting materials in ascending order of durability are as follows: gold, wood, stone, iron, diamond.
Thanks for submitting a tip for review!
Advertisement
About This Article
Thanks to all authors for creating a page that has been read 45,448 times.
Did this article help you?
Get all the best how-tos!
Sign up for wikiHow’s weekly email newsletter
Subscribe
You’re all set!
Как сделать сталактит в майнкрафт — Советы и Инструкции
Чтобы сделать сталактит в Minecraft, выполните следующие шаги:
1. Найдите подходящий подземный регион с высоким потолком.
2. Возьмите с собой обычный камень и установите его на потолок в желаемом месте, где вы хотите создать сталактит.
3. Создайте лестницу или используйте блоки, чтобы добраться до камня.
4. Установите водяной вёдер под камнем, чтобы создать ледяную форму.
5. Ожидайте, пока вода замерзнет, чтобы стать каменной формой.
6. Удалите ледяную форму и вы увидите сталактит, который можно использовать в декоративных целях.
Помните, что для создания сталактита вам может потребоваться несколько попыток, так как вода может замерзнуть в неправильной форме. Для более стабильного создания ледяной формы стоит использовать блоки с насыщенностью света менее 7, так как это поможет избежать растаяния льда, вызванного окружающим светом.

Исследование окружающего мира в Minecraft само по себе является увлекательным приключением, которое пещеры – это совсем другой опыт. Найдёте ли вы красивую пышную пещеру или ужасающий древний город, вы обязательно проведёте захватывающее время, копаясь в земле и обнаруживая спрятанные жемчужины. Если вам повезет, вы можете найти настоящие драгоценные камни, такие как лазурит или алмазы. В этом руководстве объясняется, как легко находить пещерные биомы в Minecraft Java и Bedrock Editions.
Как легко находить пещерные биомы в Minecraft Java и Bedrock Editions

Изображение из Minecraft Java Edition
С выходом новых обновлений в Minecraft нам открываются совершенно новые биомы, которые мы можем исследовать. Начиная с Minecraft 1.19, есть три пещерных биома для исследования. Ниже приведен список каждого из них, их основные особенности и простые способы их найти:
- Пещеры из капельного камня:Массивные подземные области имеют большие каменные колонны, сталагмиты и сталактиты, разбросанные вокруг. Хотя они не отдают предпочтение одному конкретному биому, вы, скорее всего, найдете их далеко от океанов, особенно под горами.
- Глубокая тьма и древний город: Пещеры Deep Dark, появляющиеся ниже Y = 0, являются единственным подземным биомом, в котором есть блоки черепа! К ним также относятся крикуны, датчики и катализаторы, на которые стоит обратить внимание. Вы также должны следить за блоками Deepslate, чтобы указать, что вы движетесь в правильном направлении.
- Пышные пещеры: Самый простой способ найти Пышные пещеры — искать вокруг, пока не найдете деревья азалии. Они очень похожи на дубы, за исключением того, что на их листьях есть розовые цветы! Как только вы найдете дерево азалии, копайте под ним, пока не увидите пещеру Пышной.
Хотя в Minecraft есть только три пещерных биома, есть также несколько подземных биомов. структуры и пещеры, которые вы можете найти. Ниже приведены некоторые примеры:
- Подводные пещеры:Как следует из названия, это пещеры, заполненные водой! Хотя они не появляются исключительно в океанских биомах, гораздо больше шансов найти их под океанами и другими большими водоемами.
- Подземелья:Подземелья известны тем, что в них есть замшелый булыжник и спавнеры монстров. Если вы начинаете слышать несколько экземпляров одного монстра, например, зомби, скелета или паука, идите в этом направлении, чтобы узнать, не из-за ли это подземелья! Если вы начнете видеть булыжник, вы поймете, что приближаетесь к нему.
- Шахта: В шахтах есть деревянные туннели, освещенные факелами! Вы также найдете следы вагонеток, паутину и сундуки, разбросанные по пути. Если вы начнете замечать какой-либо из этих блоков, когда копаетесь, вы будете знать, что приближаетесь к тому, чтобы найти его. Вы также можете иногда находить их в ущельях, поэтому проверяйте все ущелья, с которыми вы сталкиваетесь, чтобы увидеть, не торчат ли где-нибудь туннели Шахты.
Как найти пещерные биомы в Minecraft с помощью команд
Несмотря на то, что для некоторых это может показаться мошенничеством, существует очень простой способ найти, где определенные биомы используют команды. Для этого убедитесь, что у вас включены читы, и используйте одну из двух команд ниже:
- /locate biome <biome> – Например, используйте /locate biome minecraft:dripstone_caves, чтобы найти пещеру Dripstone.
- /locate Structure <structure>, чтобы найти определенные здания &# 8211; Например, используйте структуру /locate minecraft:ancient_city, чтобы найти древний город!
Используя эти команды, вы найдете координаты биома или структура, и сколько блоков от них. Затем вы можете отправиться в этот район и начать копать, пока не найдете их!
Связано:
Minecraft: Best PlayStation Seeds (сентябрь 2022 г.)
Minecraft доступен на платформах ПК, Android, iOS, Xbox One, Xbox Series X|S, Nintendo Switch и PlayStation.
