Just bought the game today, tried launching the game and got the error “Directx11 unsupported on this device”.
First of all, I know I have DirectX 12 installed on my computer.
I’ve done everything I can think of to try and troubleshoot, including in the “Known Issues & Fixes” post. I’ve tried validating the integrity of the game files through steam, I’ve tried uninstalling and reinstalling via steam, I’ve manually deleted the entire game folder and tried reinstalling the game, as well as restarting my computer multiple times and trying each of the things above each time.
I’ve also tried running all the applications in the “Dependencies” folder but when I tried to run vcredist_x64 and vcredist_x86 I got the message “A newer version of Microsoft Visual C++ 2010 Redistributable has been detected on the machine”
I also went on the Microsoft site and did the DirectX installer application too to no avail.
Nothing worked, I get the same message upon trying to launch the game every time. It doesn’t even crash, it just never even opens and I get the error.
Sorry if this is an already existing topic but I tried searching and no one had the same error message as I did.
- 2019
Если у вас старый компьютер HP, при загрузке компьютера иногда может появляться следующая ошибка:
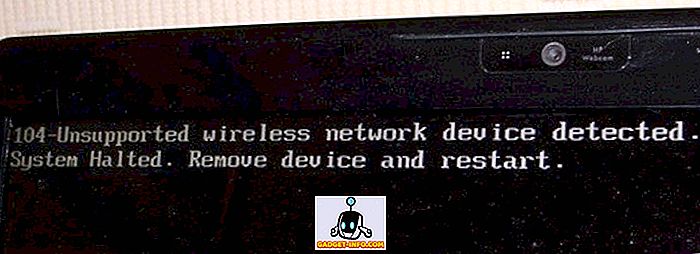
Сообщение об ошибке: 104-Обнаружено неподдерживаемое беспроводное сетевое устройство. Система остановлена. Извлеките устройство и перезапустите.
Это одна из тех технических ошибок, которую, к сожалению, не так просто исправить. Тем не менее, стоит попробовать, прежде чем отправить свой компьютер обратно в HP или потратить много денег на Geek Squad.
Есть несколько шагов, которые вы можете предпринять, чтобы попытаться решить эту проблему на ноутбуках и ноутбуках HP. Обратите внимание, что только некоторые беспроводные карты будут работать с вашим компьютером HP, поэтому, если вы попытались установить стороннюю карту, вам, вероятно, придется следовать методу 3 или приобрести другую беспроводную карту. Удачи!
Способ 1 – обновить BIOS
Во-первых, если вы можете устранить ошибку и действительно загрузиться в ОС, то вы хотите попробовать загрузить последнюю версию BIOS. Если вы не можете устранить ошибку, убедитесь, что вы пытаетесь загрузить компьютер в безопасном режиме и посмотрите, загружается ли ОС.
Еще одна вещь, которую вы можете попробовать – войти в программу установки и отключить беспроводной компонент на ноутбуке. Затем попробуйте перезагрузить компьютер и посмотреть, можно ли обойти ошибку «неподдерживаемое беспроводное сетевое устройство».
Если это так, перейдите на сайт поддержки HP (//www.hp.com/#Support) и введите номер модели своего ноутбука HP. Загрузите последнюю версию BIOS и установите его!
Способ 2 – сброс BIOS
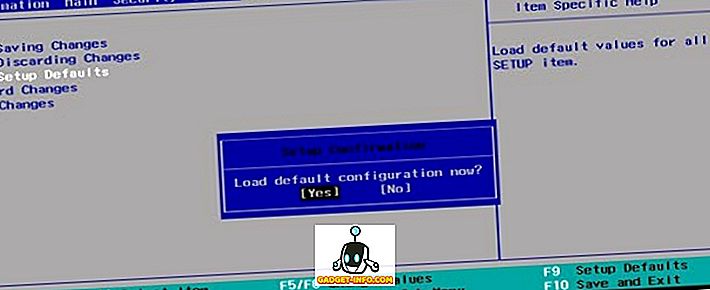
Если это не сработает, попробуйте перезагрузить BIOS. Для этого необходимо перезагрузить компьютер HP, а затем нажать клавишу F10, пока отображается логотип HP. Нажмите на нее пару раз во время начальной загрузки, если вы не можете войти сразу.
Теперь перейдите в меню « Выход» и выберите « Загрузить настройки по умолчанию» . Наконец, выберите Exit, сохраняя изменения .
После сброса BIOS вам придется выполнить установку восстановления ОС. Само по себе это довольно длинное руководство, поэтому я направлю вас к моей предыдущей статье о выполнении чистой установки Windows. Обратите внимание, что он НЕ удалит ваши данные или программы.
Способ 3 – вынуть карту WiFi
Если два вышеописанных метода не сработали, вы как бы облажались. На данный момент у вас действительно нет другого выбора, кроме как вынуть карту WiFi. Если он внешний, это должно быть легко, но если он внутренний, вам придется поискать в Google и найти инструкции для вашего компьютера.
Некоторые пользователи добились успеха, вынув карту и вставив ее заново. Если это не сработает, вам придется проверить Lenovo, Amazon и eBay и попытаться найти работающую заменяющую беспроводную карту.
Если у вас возникли проблемы с любым из вышеперечисленных методов, оставьте комментарий здесь, и я постараюсь помочь! Наслаждайтесь!
Fortnite is a free-to-play Battle Royale game developed by Epic Games in 2017. It received so much popularity and downloads after getting launched and didn’t take a long time to catch the attention of 350 million active players. The amazing graphics, sophisticated features, and wonderful theme helped the developer to achieve overnight success.

While most Android users have already downloaded and started playing Fortnite, others find it challenging to run this game as Fortnite is a High Graphics online multiplayer game, it needs a powerful device.
If you are unable to play this game on your smartphone, you have come to the right place! Here you can find complete on how to fix Fortnite device not supported.
In fact, these are the same strategies you can use to play Fortnite on unsupported android device.
Does Your Device Compatible with Fortnite?
You can easily download Fortnite Battle Royale from the Fortnite installer. However, if the error “Device Not Supported” pops up on your screen, then your smartphone hardware isn’t compatible with the game’s graphics.
If your device’s hardware is not compatible with the game, then you will come across the device not supported error.

The Fortnite Battle Royale can be played on devices that meet the following eligibility criteria:
- Android with at least 4GB of RAM
- 3GB of available space
- Android 8.0 Oreo
- Qualcomm Adreno 530 or more
If your device doesn’t meet the above requirements, then you will get a “device not supported” error.
But you can follow the below steps to fix the fortnite device not supported error.
- First, download Fortnite apk for unsupported device from below link.
Fortnite Apk for Unsupported Android Device
- Install the game on your phone and launch it.
- If it doesn’t support your Android phone, you will receive an error “Device does not have a compatible GPU”.
- You can either quit the app or tap the more info option to know more.
- After that, install APK Editor Pro and open it on your device.
APK Editor Pro App
- Press the “Select APK” option and pick Fortnite from the installed apps.
- Tap on the Full Edit (Resource Re-Build) option.

- Head to the files and tap on the Dex > Smali option.
- Now browse Smali > com > epicgames > Ue4 and choose the GameActivity.smali.
- Search for the “ProcessSystemInfo” and write the following lines after “.register32”.
Const/4 v0, 0x1
Return v0
- Save the file, go one step back and tap on the Build button at the top.

- After that, tap on the remove button to uninstall the older app then tap on the Install button.
- That’s it, now you can enjoy Fortnite on unsupported android device.
Also Read:
- How to Recover Deleted Bumble Account
- How to Transfer Money from Chase to Bank of America
Ошибка в Nox «Не поддерживается на вашем устройстве» появляется у пользователей эмулятора, когда они пытаются скачать какое-либо приложение из официального магазина «Play Маркет». При этом стандартная кнопка «Установить» куда-то пропадала. Ситуация довольно неприятная, но с ней можно разобраться.
Содержание
- Решение проблемы
- Случай №1: Чистка кэша для магазина приложений
- Случай №2: Смена версии Android
- Случай №3: Смена виртуального устройства
- Случай №4: Установка приложения через АПК-файл
Решение проблемы
Существует четыре действенных метода для решения данной проблемы. Предлагаем вам кратко с ними ознакомиться:
- Чистка кэша для магазина приложений.
- Смена версии Android.
- Смена виртуального устройства.
- Установка приложения через АПК-файл.
А теперь перейдем к более детальным инструкциям.
Случай №1: Чистка кэша для магазина приложений
Нередко ошибка совместимости связана с тем, что магазин «Play Маркет» по каким-либо причинам функционирует неправильно. И для его сброса нужно выполнить чистку данных. Производится она следующим образом:
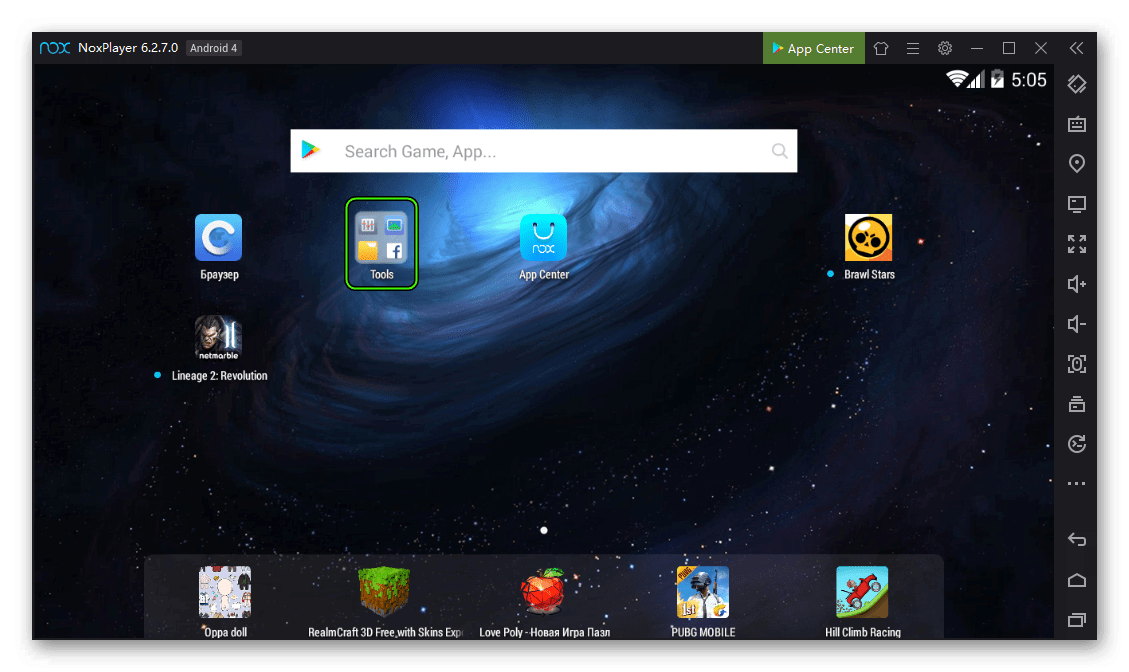
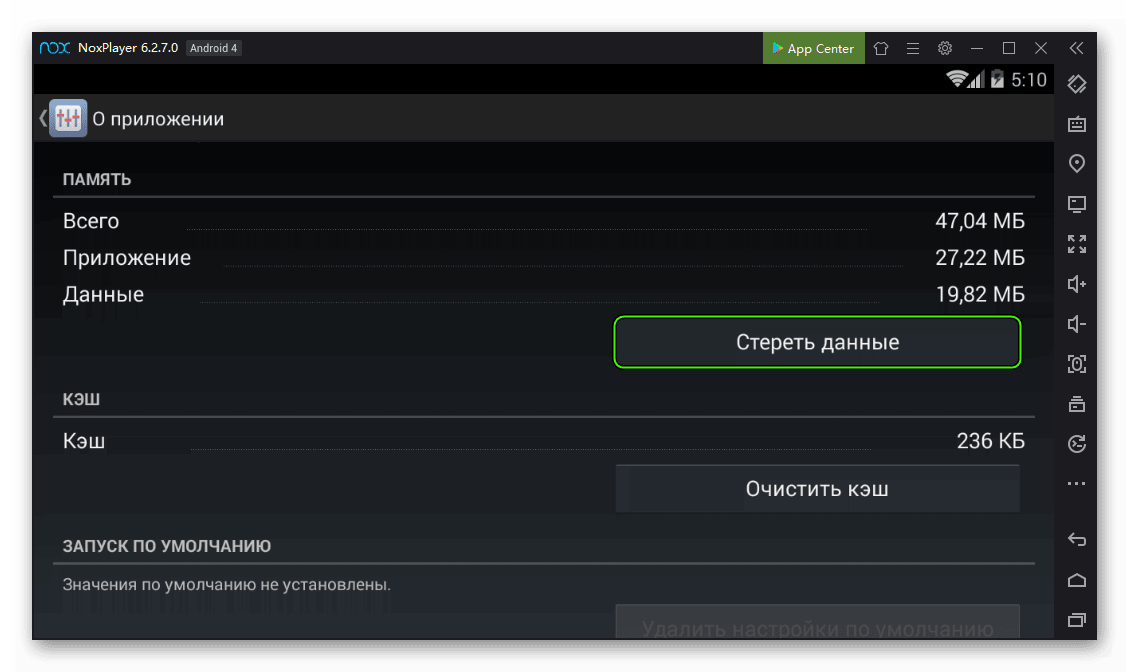
- На виртуальном рабочем столе откройте каталог Tools или «Инструменты».

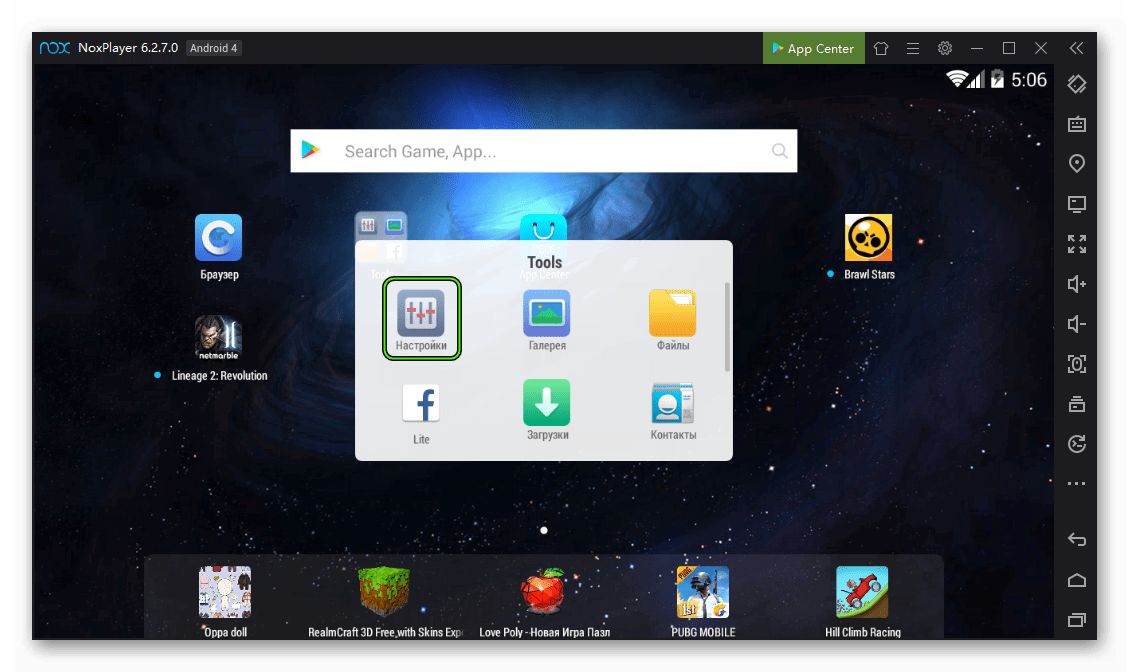
- Теперь щелкните ЛКМ по иконке «Настройки».
- В самом конце раздела «Устройства» расположен пункт «Приложения», который и следует открыть.
- Теперь перейдите во вкладку «Все» и пролистайте ее до графы «Google Play Маркет», расположенной ближе к концу списка, а затем нажмите на нее.
- Здесь кликните по опции «Стереть данные».
- Нажмите на «ОК».
- Дождитесь завершения чистки и перезапустите программу (просто закройте и вновь откройте ее).

Стоит понимать, что в зависимости от версии Нокс Плеера, порядок действий может несколько различаться. Но в целом все так, как и описано в нашей инструкции.
Случай №2: Смена версии Android
В определенных случаях сбой с поддержкой программ возникает из-за того, что эмулятор работает на слишком старой версии Андроида. К счастью для многих пользователей, ее можно без каких-либо сложностей сменить с помощью инструмента Multi-Drive. Инструкция по работе с ним была разобрана в отдельной статье, ознакомиться с которой вы можете здесь.
Случай №3: Смена виртуального устройства
В принципе, тут все понятно из заголовка. Нокс обозначает виртуальное устройство Android как одно из существующих. И не факт, что на выбранный эмулятором смартфон или планшет можно загрузить нужное приложение. Но мобильный девайс можно задать и самостоятельно. А делается это следующим образом:
- В окошке эмулятора кликните на иконку шестеренки.
- Перейдите в раздел «Свойства».
- Смените данные, что записаны в «Модель телефона».
- Щелкните ЛКМ по кнопке «Сохранить изменения».
- Перезапустите Нокс.

Случай №4: Установка приложения через АПК-файл
Вовсе не обязательно заниматься чисткой кэша магазина Гугл Плей, ведь существует альтернативный вариант инсталляции приложений для Android. И, разумеется, для Nox App Player он тоже вполне подходит. Речь об apk-файлах, в которых записаны всевозможные программы для данной мобильной платформы. Их довольно легко найти в интернете, но мы рекомендуем проверенный агрегатор APKPure. Порядок действий при этом следующий:
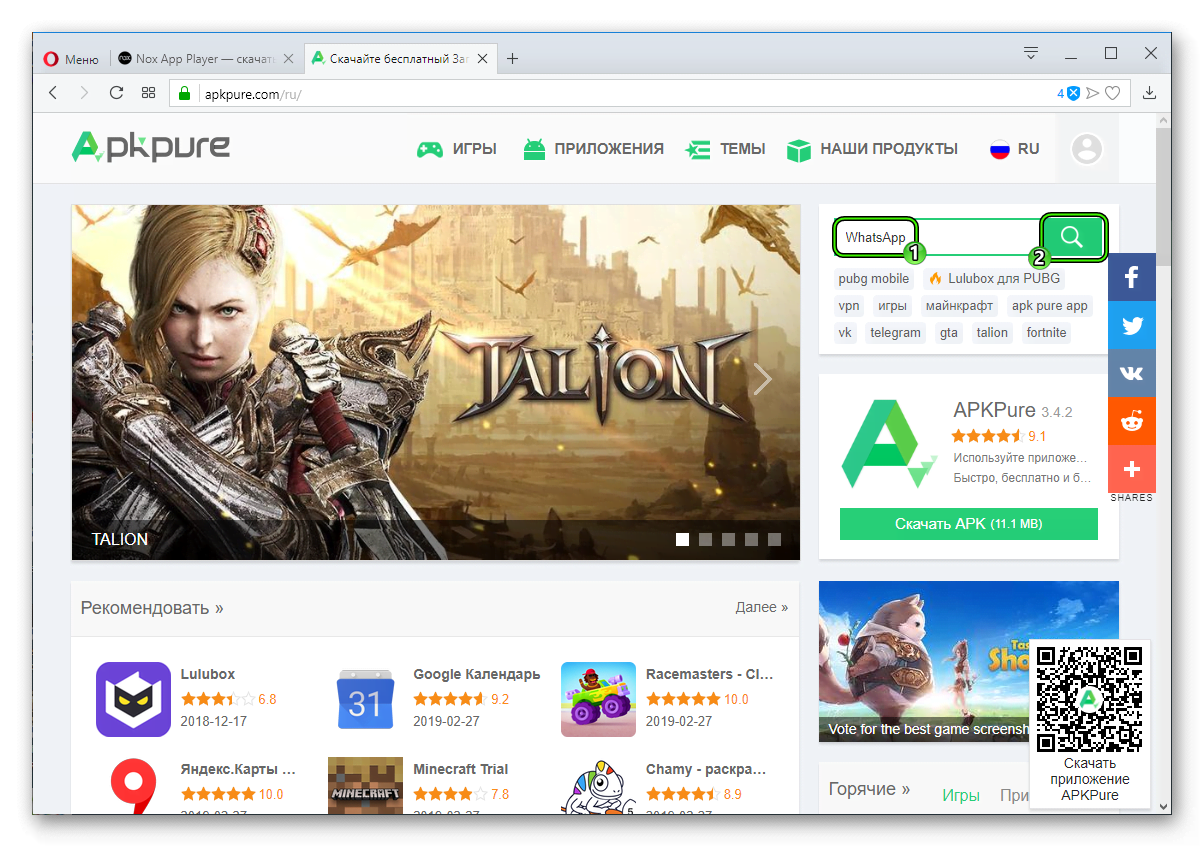
- В браузере на компьютере перейдите на сайт https://apkpure.com/ru/.
- Кликните ЛКМ по поисковой строке, расположенной в правой части страницы.
- Введите название нужного приложения (в нашем случае им будет мессенджер WhatsApp) и нажмите на иконку в виде увеличительного стекла или клавишу Enter на клавиатуре.

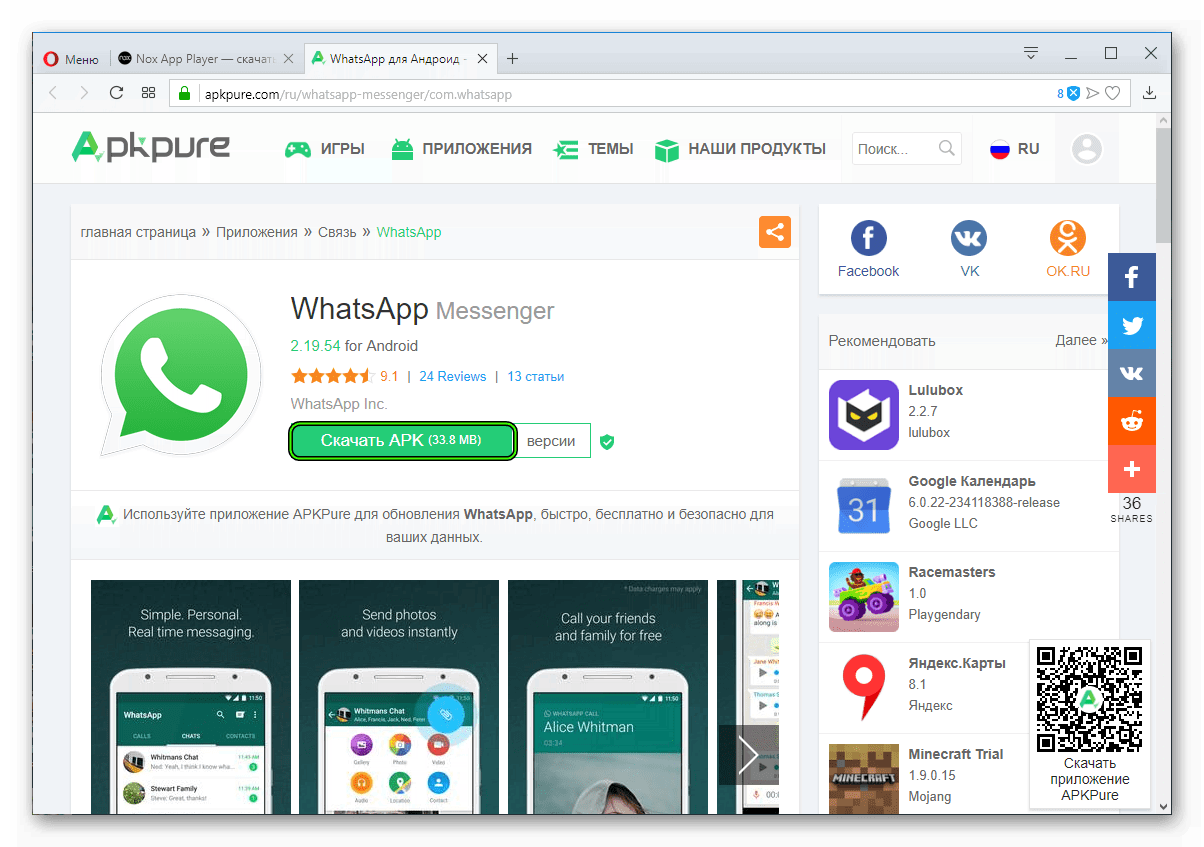
- Откройте подходящую ссылку в поисковой выдаче.
- Кликните на зеленую кнопку загрузки и сохраните предложенный файл.
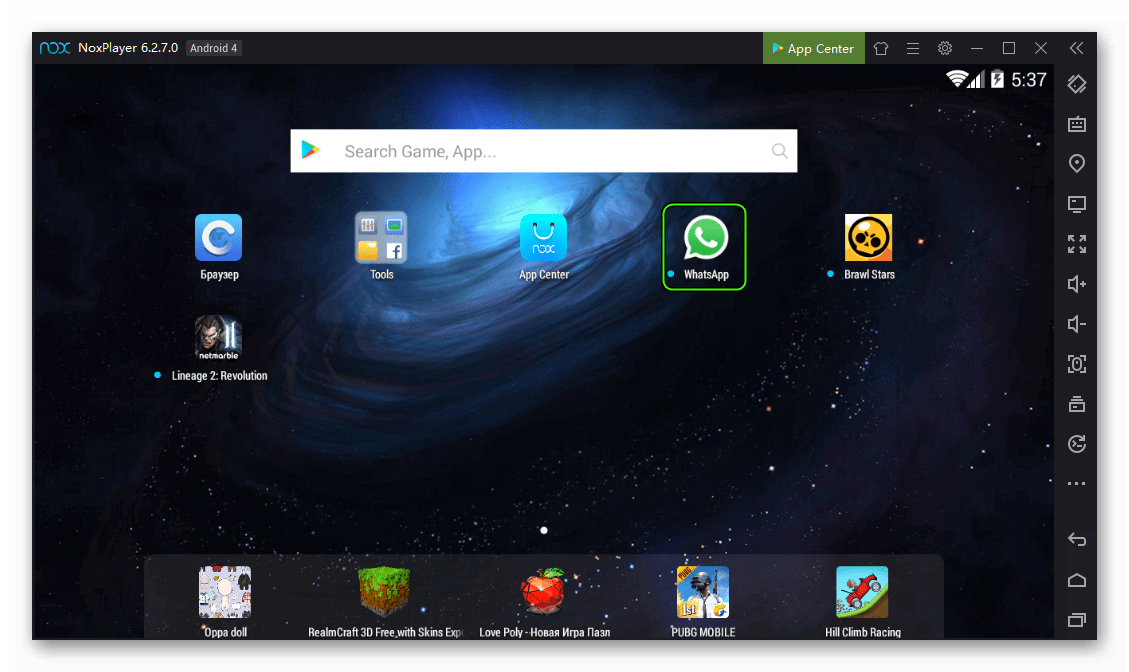
- Вернитесь к окну Нокса.
- Перетащите загруженный apk из Проводника прямиком на область виртуального рабочего стола Андроид.
- Дождитесь окончания процедуры инсталляции, в результате на экране появится новая иконка.
Guide to fix the error
- SD card is suddenly unsupported in Samsung Galaxy S8 S7 S9 S10 OR NOTE
- 5 ways to fix unsupported sd card
- FAQs
- How to recover data from unsupported SD card
- Format unsupported sd card in android without computer
- Fix unable to format unsupported sd card
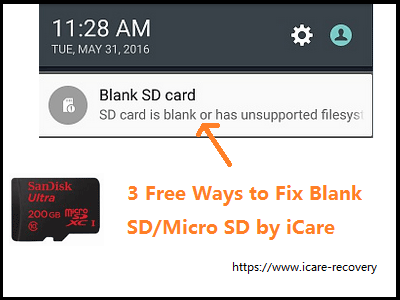
Also read: 5 Free WAYS to fix SD card is blank with unsupported file system
Why Unsupported SD Card Error showed in Samsung Phone/Tablet
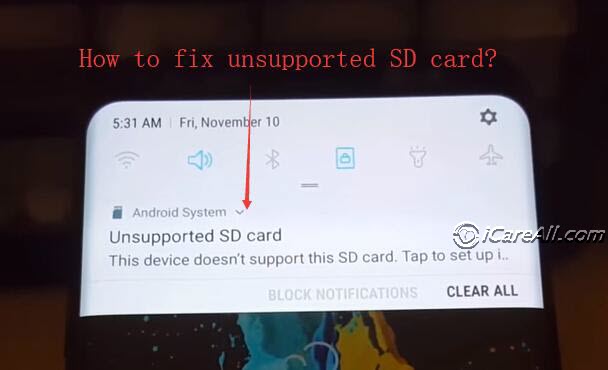 Unsupported sd card, no sd card
Background
“Today I finally had time to work on moving my media from my old 32 GB card that I had in my Galaxy S4 to the new 64 GB card that came with my Galaxy S7 Edge. I got the phone/card/VR device all on release day at Best Buy. When I put the card in the phone, it says it’s an unsupported card, touch to set up in a supported format. So I do, and on the next screen I touch Format, and it appears that it’s doing what it should. But then I get an error message, which says the sd cannot be formatted.” — from J_rae_p on Androidcentral.com
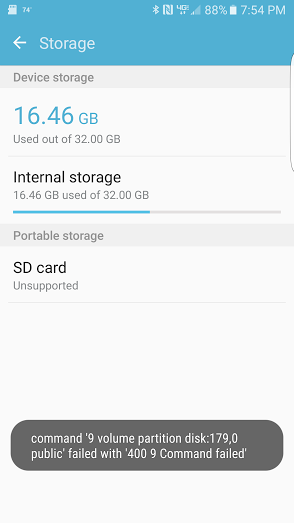 Unsupported sd card said commond 9 volume partition disk:179,0 public’ failed with ‘400 9 Command failed’
SD card is suddenly unsupported in mobile or camera could leave the owner blank in the brain and dried out if there were important data inside the memory card. What a bad story all of a sudden.
Why sd card, microSD card, mini SD could be unsupported in phone or even camera? The causes may be complicated due to so many elements involved such as, the phone, the camera, the memory card, logical damage on phone/memory card? Physical damage may be there too…
5 ways to fix unsupported sd card free
Solution 1 – Power off and get the sd card out of the phone/camera, and then clean the memory card and then reinsert it back to the slot and try it again.
This solution was found useful by some user on the net.
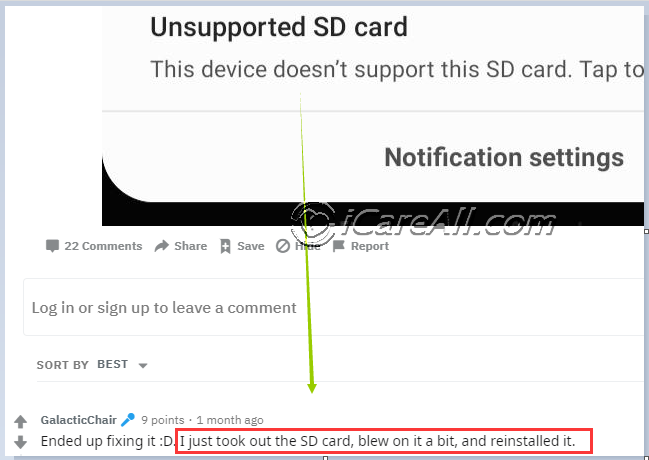 Unsupported sd card solved
Credit: https://www.reddit.com/r/samsunggalaxy/comments/dv8jno/sd_card_is_suddenly_unsupported_how_can_i_fix/
Solution 2 – Format sd card FAT32 using an sd card adaptor
“Unsupported SD format renders my micro SD card useless. Is there a way to fix it?” This is quite an common problem happened to many users and this time the user finally fixed the error by simply formatting the unsupported sd card fat32 with the help of sd card adaptor when the sd card was not recognized in mobile, computer and the formatting was done by ROM earlier but was not recognizable neither.
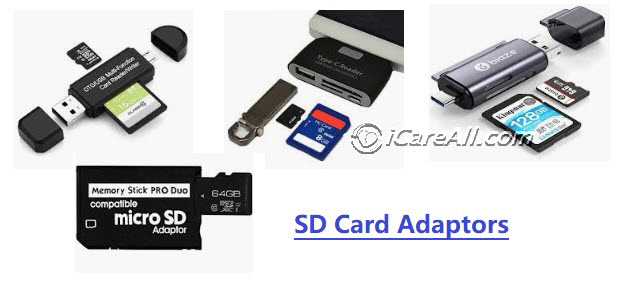 SD card adaptor to fix unsupported SD
And here are the steps:
- Step1 – connect the unsupported memory card to computer via an sd card adaptor
- Step2 – right click memory card -> property -> Format (when it is seen in your computer Windows 10/8/7)
- Step3 – format it to be fat32 in the format screen (you may select quick format plus scan and repair bad blocks or not, we would recommend you get them selected)
- Step4 – wait everything to be finished
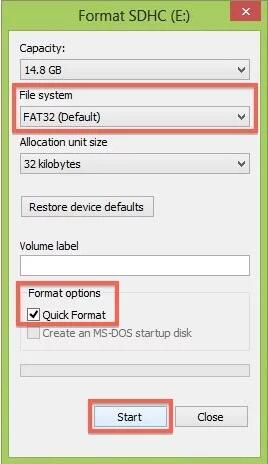 Format sd card fat32
Credit:
https://android.stackexchange.com/questions/166424/unsupported-sd-format-renders-my-micro-sd-card-useless-is-there-a-way-to-fix-it
Solution 3 – Replace a new sd card adaptor
If the sd card is unsupported in computer with your sd card adaptor, change a new one and test whether it was the error coming from the adaptor.
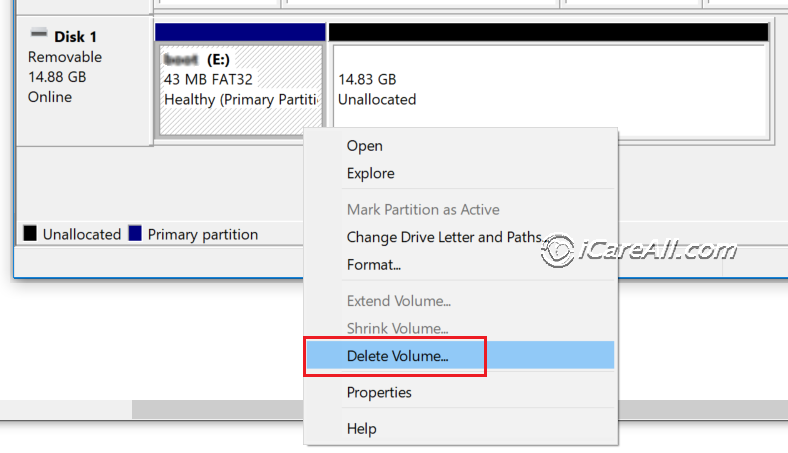
Solution 4 – Delete SD card Partition and then Create a partition on SD card with Windows Disk Management.
It is a special magic as a part of casting by Windows built in function or some free partition programs may also do the job. The job is to delete sd card under Disk management, and then create a partition on the SD card to make it work on your phone/camera. And here are the steps.
Note: Do backup your data onto another disk before this step since the creation partition on memory card based on erasing all old data.
Step 1 – connect sd to Windows 10/8/7 via a card reader/adaptor
Step 2 – Load sd card under Disk Management by
This PC, right click -> Manage -> Disk Management, and then the sd card would be load there.
Step 3 – Right click sd card once it is loaded in Disk Management -> Delete Volume, and then confirm the deleting on the next message box to get it started.
 Delete volume for sd card disk management
Step 4 – Right click the SD card, and then Create NEW Simple Volume once the sd card is completely deleted by the previous step.
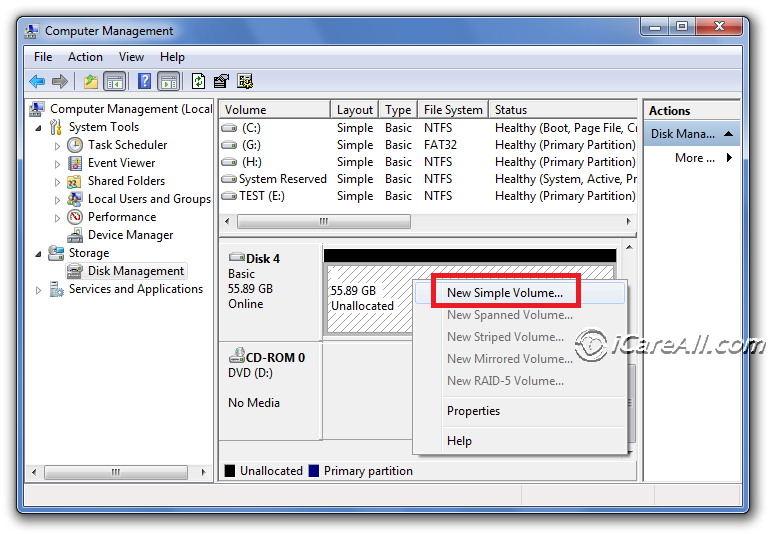 Create NEW Simple Volume for sd card disk management
Step 5 – Create sd card to be fat32/fat or any other file system exfat, ntfs depends on your own preference and fat32 would be recommended for most phones. Please also note that old phones do use fat sd card file system. You may come back here to format it FAT if the FAT32 does not work on the phone/camera.
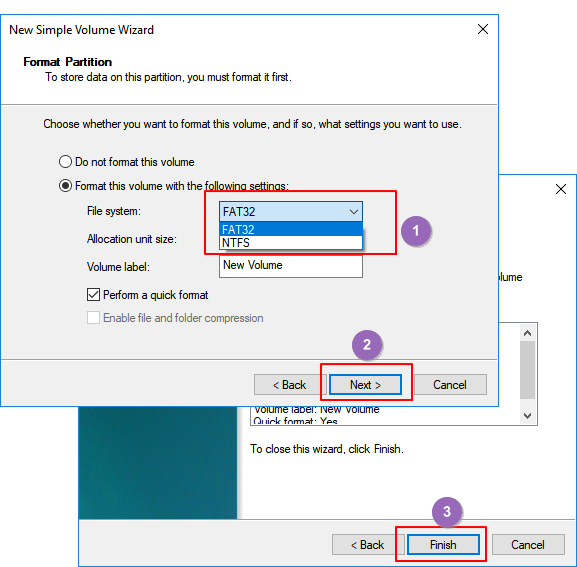 FAT32 for sd card disk management
Windows failed to format the sd card? Check out free solution here: how to fix Windows was unable to complete the format for SD card.
Solution 5 – Format SD card as external storage by factory reset
Power off the phone and press volume +, home key and power on key together for 5 seconds, then Android System Recovery is here
Select wipe data/factory reset and then yes — delete all user data (This is phone format)
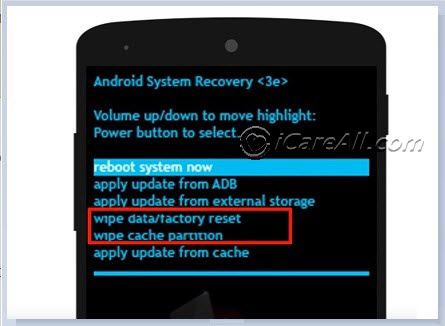 Factory reset to fix sd card
And then format SD card as external storage once the factory reset was done.
- 1, Touch Settings on Home screen.
- 2, Tap Storage & USB.
- 3, Tap SD card.
- 4, Tap the icon at top right.
- 5, Tap Settings.
- 6, Tap Format.
- 7, Tap ERASE & FORMAT to delete all the data stored in SD card.
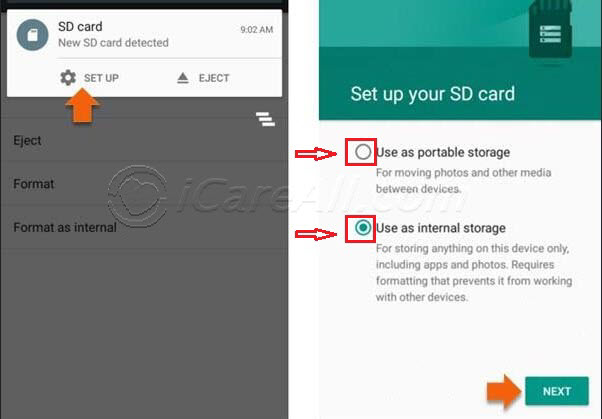 You should select the first option – Use as portable storage
More detailed tutorial of formatting SD card as internal/external storage could be found here
https://support.lenovo.com/us/en/solutions/ht500506
A video that includes some but not all solutions mentioned above.
![]() More methods? Here are more than 10 free ways you may try: How to fix mobile corrupted sd card
More methods? Here are more than 10 free ways you may try: How to fix mobile corrupted sd card
FAQ
There are some most concerned questions from users that we would like to share with similar users.
How to recover/backup data from unsupported SD card
What if mobile Samsung galaxy or Nova 3e suddenly unsupports sandisk sd card, what may we do to rescue the data inside of the memory card???
If the memory card for example unsupported Sandisk Ultra SDXC 64GB memory card is not working on mobile, however it could work on Windows laptop, you may directly backup data from the SD to a computer volume (any drive on the computer is recommended.), or you may also back it to a Google Drive, any cloud service that is applicable.
The question: how to backup data from unsupported memory card when it is not accessible
Resolution – recover data from unsupported sd with iCare Pro Free. And here are the steps.
- Step 1 – install iCare Pro Free on your PC and connect memory card to PC with an sd card adaptor.
- Step 2 – select a recovery mode ‘Deep Scan Recovery’
- Step 3 – save found files onto another hard disk volume instead of the memory card
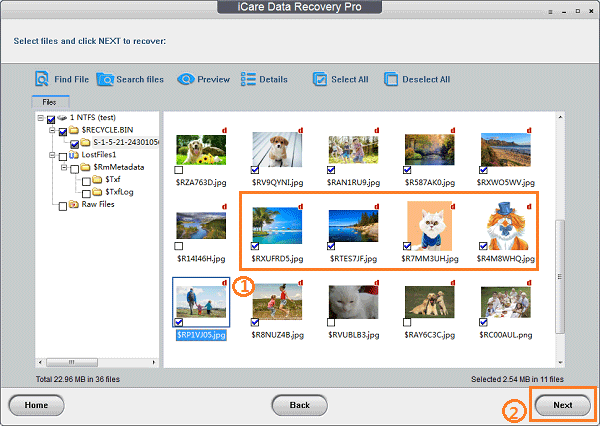 Recover data from blank sd card
Free Download iCare Pro
![]() More tools that can help: 5 free sd card recovery software download
More tools that can help: 5 free sd card recovery software download
How to Format unsupported SD card with Android phone without computer
If you want to format sd card on Android mobile, you may go through the following steps.
Settings -> Storage -> SD card -> Format SD Card -> Confirm formatting
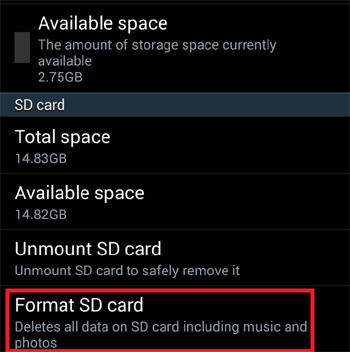 Formatting sd card option under Storage
Detailed steps, be free to watch it here: How to format sd card on Android (Tutorial with video)
Note: there is no option to format sd fat32 or exfat on the mobile, so we would recommend you format it on an Windows computer, which offers several options for you to format the memory card.
Can’t or Unable to format unsupported sd card solution
What shall we do when formatting sd card failed by phone or camera? or Windows was unable to complete the format? Many users may see a message when the format SD card stopped during the process of formatting.
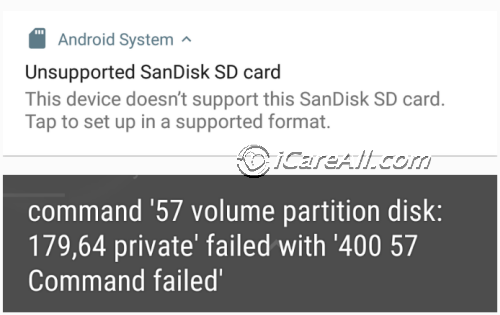 Unable to format unsupported sd card- command 57 vlume partition disk: 179,64 private failed with 400 57 Command failed
Here is a video that may guide you out of the format failure.
![]() Note: you may also see solution on this page that introduces ways to fix memory card failed to be formatted: how to fix unable to format sd card problem
Note: you may also see solution on this page that introduces ways to fix memory card failed to be formatted: how to fix unable to format sd card problem
Solution update on Jan 19, 2020
Related Articles
- Repair damaged file system on sd card
- SD card is damaged fix
External resource
