Contents
-
Package management with APT
- Introduction
-
Commands
-
Installation commands
- auto-apt
- Maintenance commands
- Removal commands
- Search commands
-
Installation commands
- Typical usage example
-
Setting up apt-get to use a http-proxy
- Temporary proxy session
- APT configuration file method
- BASH rc method
- How to login a proxy user
- Useful additional packages
- Additional links
- Troubleshooting
![]() This article applies to all supported versions of Ubuntu
This article applies to all supported versions of Ubuntu
Package management with APT
 Package management via apt-get runs hand-in-hand with the /etc/apt/sources.list file. For information on editing or updating your sources list see SourcesList.
Introduction
This page describes how to handle the packages on your system using apt-get and related commands. For example, you can install a new package, remove an installed package, or update all installed packages to the latest versions.
Commands
 All these commands except the search commands must be run as root or with superuser privileges, see sudo for more information.
-
 Example:
 sudo apt-get install ubuntu-desktop
 Example:
 Installation commands
-
apt-get install <package_name>
This command installs a new package.
-
apt-get build-dep <package_name>
This command searches the repositories and installs the build dependencies for <package_name>. If the package is not in the repositories it will return an error.
-
aptitude install <package_name>
Aptitude is an Ncurses viewer of packages installed or available. Aptitude can be used from the command line in a similar way to apt-get. Enter man aptitude for more information.
- APT and aptitude will accept multiple package names as a space delimited list. For example:
apt-get install <package1_name> <package2_name> <package3_name>
Use the -s flag to simulate an action. For example: “apt-get -s install <package_name>” will simulate installing the package, showing you what packages will be installed and configured.
 Use the -s flag to simulate an action. For example: “apt-get -s install <package_name>” will simulate installing the package, showing you what packages will be installed and configured.
 auto-apt
-
auto-apt run <command_string>
This command runs <command_string> under the control of auto-apt. If a program tries to access a file known to belong in an uninstalled package, auto-apt will install that package using apt-get. This feature requires apt and sudo to work.
- Auto-apt keeps databases which need to be kept up-to-date in order for it to be effective. This is achieved by calling the commands auto-apt update, auto-apt updatedb and auto-apt update-local.
- Usage example
-
You’re compiling a program and, all of a sudden, there’s an error because it needs a file you don’t have. The program auto-apt asks you to install packages if they’re needed, stopping the relevant process and continuing once the package is installed.
# auto-apt run ./configure
It will then ask to install the needed packages and call apt-get automatically. If you’re running X, a graphical interface will replace the default text interface.
-
Maintenance commands
-
apt-get update
Run this command after changing /etc/apt/sources.list or /etc/apt/preferences . For information regarding /etc/apt/preferences, see PinningHowto. Run this command periodically to make sure your source list is up-to-date. This is the equivalent of “Reload” in Synaptic or “Fetch updates” in Adept.
-
apt-get upgrade
This command upgrades all installed packages. This is the equivalent of “Mark all upgrades” in Synaptic.
-
apt-get dist-upgrade
The same as the above, except add the “smart upgrade” checkbox. It tells APT to use “smart” conflict resolution system, and it will attempt to upgrade the most important packages at the expense of less important ones if necessary.
-
apt-get check
This command is a diagnostic tool. It does an update of the package lists and checks for broken dependencies.
-
apt-get -f install
This command does the same thing as Edit->Fix Broken Packages in Synaptic. Do this if you get complaints about packages with “unmet dependencies”.
-
apt-get autoclean
This command removes .deb files for packages that are no longer installed on your system. Depending on your installation habits, removing these files from /var/cache/apt/archives may regain a significant amount of diskspace.
-
apt-get clean
The same as above, except it removes all packages from the package cache. This may not be desirable if you have a slow Internet connection, since it will cause you to redownload any packages you need to install a program.
-
The package cache is in /var/cache/apt/archives . The command
du -sh /var/cache/apt/archives
will tell you how much space cached packages are consuming.
-
-
dpkg-reconfigure <package_name>
Reconfigure the named package. With many packages, you’ll be prompted with some configuration questions you may not have known were there.
-
For example:
dpkg-reconfigure fontconfig-config
will present you with a “wizard” on configuring fonts in Ubuntu.
-
-
echo "<package_name> hold" | dpkg --set-selections
This command places the desired package on hold.
-
This command may have the unintended side effect of preventing upgrades to packages that depend on updated versions of the pinned package. apt-get dist-upgrade will override this, but will warn you first. If you want to use this command with sudo, you need to use echo “<package_name> hold” | sudo dpkg –set-selections not sudo echo “<package_name> hold” | dpkg –set-selections.
-
-
echo "<package_name> install" | dpkg --set-selections
This command removes the “hold” or “locked package” state set by the above command. The note above about sudo usage applies to this command.
Removal commands
-
apt-get remove <package_name>
This command removes an installed package, leaving configuration files intact.
-
apt-get purge <package_name>
This command completely removes a package and the associated configuration files. Configuration files residing in ~ are not usually affected by this command.
- + operator
-
If you want to remove package1 and install package2 in one step:
apt-get remove <package1> <package2>+
.
-
- + operator
-
apt-get autoremove
This command removes packages that were installed by other packages and are no longer needed.
-
apt-get autoremove <package_name>
This command removes an installed package and dependencies.
-
-
While there is no built in way to remove all of your configuration information from your removed packages you can remove all configuration data from every removed package with the following command.
dpkg -l | grep '^rc' | awk '{print $2}' | xargs dpkg --purge
Search commands
-
apt-cache search <search_term>
Each package has a name and a description. This command lists packages whose name or description contains <search_term>.
-
dpkg -l *<search_term>*
This will find packages whose names contain <search_term>. Similar to apt-cache search, but also shows whether a package is installed on your system by marking it with ii (installed) and un (not installed).
-
apt-cache show <package_name>
This command shows the description of package <package_name> and other relevant information including version, size, dependencies and conflicts.
-
dpkg --print-avail <package_name>
This command is similar to “apt-cache show”.
-
dpkg -L <package_name>
This command will list files in package <package_name>.
-
dpkg -c foo.deb
This command lists files in the package “foo.deb”. Note that foo.deb is a pathname. Use this command on .deb packages that you have manually downloaded.
-
dlocate <package_name>
This command determines which installed package owns <package_name>. It shows files from installed packages that match <package_name>, with the name of the package they came from. Consider this to be a “reverse lookup” utility.
In order to use this command, the package dlocate must be installed on your system. -
dpkg -S <filename_search_pattern>
This command does the same as dlocate, but does not require the installation of any additional packages. It is slower than dlocate but has the advantage of being installed by default on all Debian and Ubuntu systems.
-
apt-file search <filename_search_pattern>
This command acts like dlocate and dpkg -S, but searches all available packages. It answers the question, “what package provides this file?”.
-
apt-file needs to be updated regularly like apt-get. Use the command:
apt-file update
In order to use this command, the package apt-file must be installed on your system. -
-
apt-cache pkgnames
This command provides a listing of every package in the system
-
A general note on searching: If searching generates a list that is too long, you can filter your results by piping them through the command grep. Examples:
-
apt-cache search <filename> | grep -w <filename>
will show only the files that contain <filename> as a whole word
-
dpkg -L package | grep /usr/bin
will list files located in the directory /usr/bin, useful if you’re looking for a particular executable.
-
For more information on apt-get, apt-cache and dpkg consult their manual pages by using the man command. These manuals will provide a wider scope of information in addition to all of the options that you can use with each program.
-
Example:
man apt-get
.
Typical usage example
I want to feel the wind in my hair, I want the adrenaline of speed. So let’s install a racing game. But what racing games are available?
apt-cache search racing game
It gives me a lot of answers. I see a game named “torcs”. Let’s get some more information on this game.
apt-cache show torcs
Hmmm… it seems interesting. But is this game not already installed on my computer? And what is the available version? Which repository is it from (Universe or Main)?
apt-cache policy torcs
Ok, so now, let’s install it!
apt-get install torcs
What is the command I must type in the console to launch this game? In this example, it’s straightforward (“torcs”), but that’s not always the case. One way of finding the name of the binary is to look at what files the package has installed in “/usr/bin”. For games, the binary will be in “/usr/games”. For administrative programs, it’s in “/usr/sbin”.
dpkg -L torcs | grep /usr/games/
The first part of the command display all files installed by the package “torcs” (try it). With the second part, we ask to only display lines containing “/usr/games/”.
Hmmm, that game is cool. Maybe there are some extra tracks?
apt-cache search torcs
But I’m running out of space. I will delete the apt cache!
apt-get clean
Oh no, my mother asked me to remove all games from this computer. But I want to keep the configuration files so I can simply re-install it later.
apt-get remove torcs
If I want to also remove config files :
apt-get purge torcs
Setting up apt-get to use a http-proxy
These are three methods of using apt-get with a http-proxy.
Temporary proxy session
This is a temporary method that you can manually use each time you want to use apt-get through a http-proxy. This method is useful if you only want to temporarily use a http-proxy.
Enter this line in the terminal prior to using apt-get (substitute your details for yourproxyaddress and proxyport).
export http_proxy=http://yourproxyaddress:proxyport
If you normally use sudo to run apt-get you will need to login as root first for this to work unless you also add some explicit environment settings to /etc/sudoers, e.g.
Defaults env_keep = "http_proxy https_proxy ftp_proxy"
APT configuration file method
This method uses the apt.conf file which is found in your /etc/apt/ directory. This method is useful if you only want apt-get (and not other applications) to use a http-proxy permanently.
On some installations there will be no apt-conf file set up. This procedure will either edit an existing apt-conf file or create a new apt-conf file.
gksudo gedit /etc/apt/apt.conf
Add this line to your /etc/apt/apt.conf file (substitute your details for yourproxyaddress and proxyport).
Acquire::http::Proxy "http://yourproxyaddress:proxyport";
Save the apt.conf file.
BASH rc method
This method adds a two lines to your .bashrc file in your $HOME directory. This method is useful if you would like apt-get and other applications for instance wget, to use a http-proxy.
gedit ~/.bashrc
Add these lines to the bottom of your ~/.bashrc file (substitute your details for yourproxyaddress and proxyport)
http_proxy=http://yourproxyaddress:proxyport
export http_proxy
Save the file. Close your terminal window and then open another terminal window or source the ~/.bashrc file:
source ~/.bashrc
Test your proxy with sudo apt-get update and whatever networking tool you desire. You can use firestarter or conky to see active connections.
If you make a mistake and go back to edit the file again, you can close the terminal and reopen it or you can source ~/.bashrc as shown above.
source ~/.bashrc
How to login a proxy user
If you need to login to the Proxy server this can be achieved in most cases by using the following layout in specifying the proxy address in http-proxy. (substitute your details for username, password, yourproxyaddress and proxyport)
http_proxy=http://username:password@yourproxyaddress:proxyport
Useful additional packages
-
Deborphan
-
Debfoster
Additional links
-
Repositories/CommandLine
-
PinningHowto
-
AutoDeb
-
Synaptic Package Manager
-
Ubuntu Community Forums: Installations and Upgrades
-
What is apt-fast and should I use it?
Troubleshooting
-
https://help.ubuntu.com/community/PackageManagerTroubleshootingProcedure
CategoryPackageManagement CategoryCommandLine
Если вы начали использовать Ubuntu или любой дистрибутив Linux, основанный на Ubuntu, такие как Linux Mint, ElementaryOS и др., вы, должно быть, уже столкнулись с командой apt-get.
На самом деле, первым в списке вещей, которые необходимо сделать после установки Ubuntu является использование apt-get update и apt-get upgrade. Теперь вы знаете о нескольких командах apt-get и их использовании, но вы можете быть не осведомлены о некоторых других.
В этом руководстве для начинающих, я собираюсь объяснить использование различных команд apt-get с примерами, чтобы Вы могли использовать их так же, как и опытный пользователь Linux.
Ubuntu основана на Debian Linux. Debian использует систему пакетов dpkg. Система пакетов – это способ предоставления программ и приложений для установки. Таким образом, вам не придётся собирать программу из исходного кода.
APT (Advanced Package Tool) – инструмент командной строки для взаимодействия с этой упаковочной системой. Для управления им уже существуют команды dpkg, но apt является более удобным способом работы с пакетами. Вы можете использовать его для поиска и установки новых пакетов, обновления пакетов, очистки пакетов и т.д.
У APT есть два основных инструмента: apt-get и apt-cache. apt-get предназначен для установки, обновления и очистки пакетов, в то время как команда apt-cache используется для поиска новых пакетов. Мы рассмотрим все эти команды с примерами позже в этом руководстве.
В этом руководстве я использую Linux Mint 18, но вы можете использовать любой другой дистрибутив Linux, основанный на Ubuntu, например, ElementaryOS, Linux Lite и т.п.
Использование apt-get команд
Давайте начнем с команды apt-get. Нельзя просто уйти от этой команды. Лучше ее понять, чтобы Вы могли работать с Вашей системой Linux немного более эффективно.
Обновление базы данных пакетов с помощью apt-get
apt-get в основном работает с базой данных доступных пакетов. Если вы не обновите эту базу данных, система не будет знать, есть ли более новые пакеты или нет. Фактически, это первая команда, которую вам нужно выполнить на любой Linux-системе, основанной на Debian, после свежей установки.
Обновление базы данных пакетов требует привилегий суперпользователя, поэтому вам нужно использовать sudo.
sudo apt-get updateКогда вы запустите эту команду, вы увидите информацию, полученную с различных серверов.
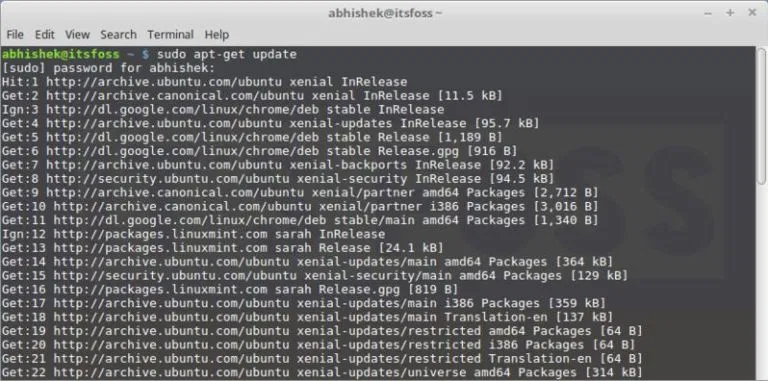
Здесь вы увидите три типа строк: hit, bit и ign. Позвольте мне объяснить их вам:
- Hit: нет никаких изменений в версии пакета по сравнению с предыдущей версией.
- Ign: пакет игнорируется. Либо пакет слишком свеж, чтобы его даже не надо было проверять, либо произошла ошибка при получении файла, но ошибка была тривиальной, и поэтому ее игнорируют. Не волнуйтесь, это не ошибка.
- Get: Доступна новая версия. Она скачает информацию о версии (а не о самом пакете). Вы можете видеть, что есть информация о загрузке (размер в Кб) со строкой ‘get’ на скриншоте выше.
Обновление установленных пакетов с помощью apt
После обновления базы данных пакетов вы можете обновить установленные пакеты. Самый удобный способ – это обновить все пакеты, которые имеют доступные обновления. Вы можете просто использовать команду ниже:
sudo apt-get upgrade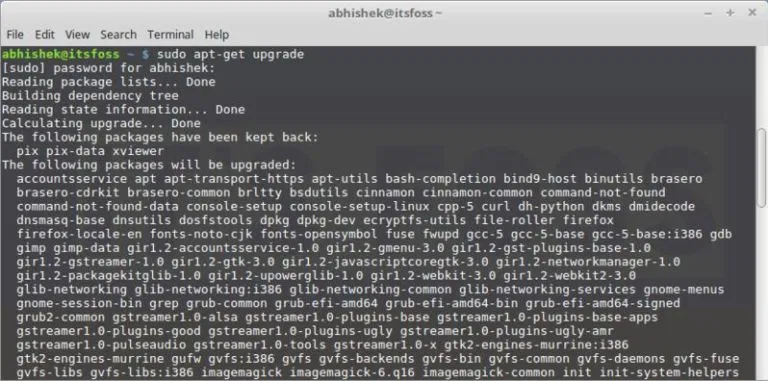
Чтобы обновить только определенную программу, используйте команду ниже:
sudo apt-get upgrade <package_name>Есть еще один способ выполнить полное обновление, используя команду ниже:
sudo apt-get dist-upgrade
Но вы должны избегать использования этой команды. Я объясню, почему в следующем разделе.
Разница между upgrade и dist-upgrade
Команда apt-get upgrade очень послушна. Она никогда не пытается удалить какие-либо пакеты или установить новый пакет самостоятельно.
Команда apt-get dist-upgrade, с другой стороны, проактивна. Она ищет зависимости с более новой версией устанавливаемого пакета и пытается установить новые пакеты или самостоятельно удалить существующие.
Похоже, что команда apt-get dist-upgrade более мощная и интеллектуальная, не так ли? Но в этом и есть риск.
Смотрите, у нее есть “умная” система разрешения конфликтов. Она будет пытаться обновлять наиболее важные пакеты за счет менее важных. Это может привести к удалению некоторых пакетов, чего Вы, возможно, не захотите. Это основная причина, по которой следует избегать ее использования на рабочих станциях на предприятиях.
sudo apt-get update && sudo apt-get upgrade -y
Использование команд apt-cache для поиска пакетов
Скажу честно, это не лучший способ поиска пакетов. Но это очень удобно, когда вы ищете какую-то определенную библиотеку.
Все, что вам нужно сделать, это использовать следующую команду (здесь вам даже не нужно sudo):
apt-cache search <search term>
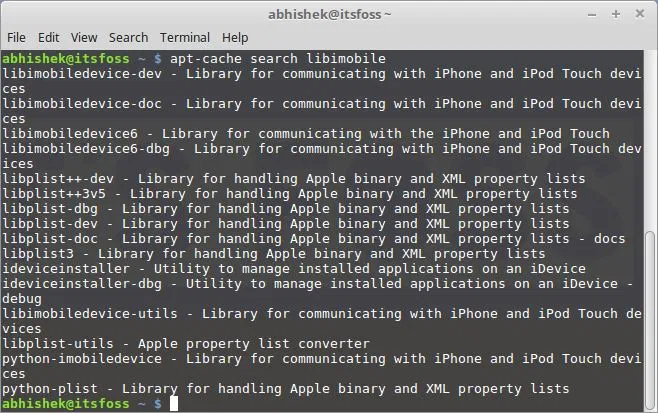
Здесь не нужно знать точное название пакета. Команда ищет в именах пакетов и их кратких описаниях, затем показывает результат, основанный на этом.
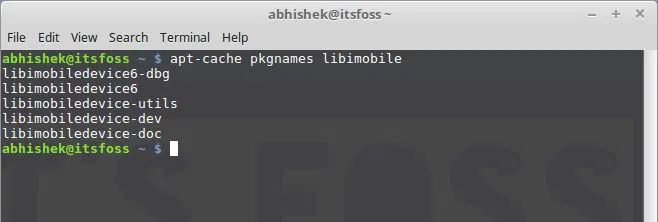
Если вы просто хотите искать в apt-пакетах с определёнными именами пакетов, вы можете воспользоваться командой, приведённой ниже:
apt-cache pkgnames <search_term>
Команда выдаст список всех пакетовпо, удовлетворяющие вашему поисковому запросу.
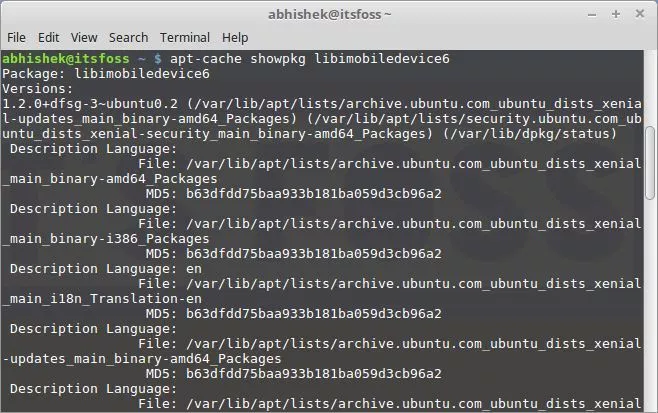
Как только вы узнаете точное имя пакета, вы можете получить дополнительную информацию о нем, например, о версии, зависимостях и т.д., с помощью команды, приведенной ниже:
apt-cache showpkg <package_name>
Как установить новые пакеты с помощью apt-get
Если вы знаете имя пакета, вы можете легко установить его с помощью команды ниже:
sudo apt-get install <имя_пакета>
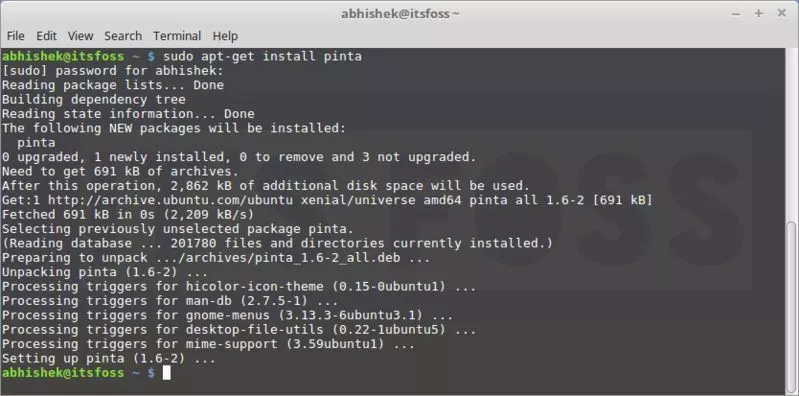
Просто замените <имя_пакета> на нужный вам пакет. Предположим, я хотел установить редактор изображений Pinta. Все, что мне нужно будет сделать, это использовать команду:
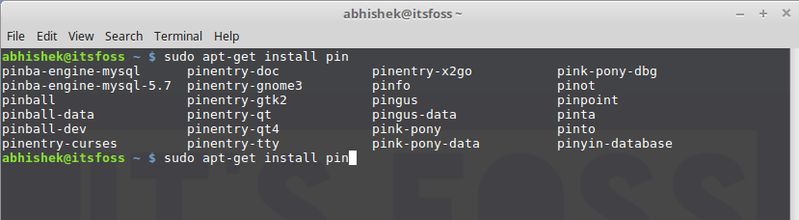
sudo apt-get install pinta
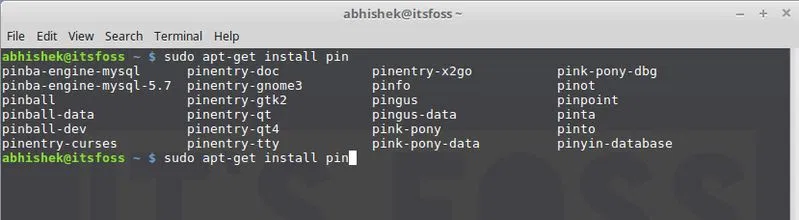
Хорошо, что в этой команде есть автозавершение. Поэтому, если вы не уверены в точном названии пакета, вы можете набрать несколько букв и нажать клавишу табуляции, и она предложит все пакеты, доступные с этими буквами. Например:
Как установить сразу несколько пакетов
Вы не ограничены установкой только одного пакета за раз. Вы можете установить несколько пакетов за раз, указав их имена:
sudo apt-get install <package_1> <package_2> <package_3>
Что если запустить установку, а пакет окажется уже установлен
Предположим, что у вас уже установлен пакет, но вы все равно использовали для него команду install. apt-get на самом деле посмотрит в базу данных, и если будет доступна более новая версия, то обновит установленный пакет до более новой. Таким образом, использование этой команды не причинит никакого вреда – если только вы не хотите, чтобы пакет не был обновлен.
Как установить пакеты без обновления
Предположим, по какой-то причине вы хотите установить пакет, но не хотите обновлять его, если он уже установлен. Звучит странно, но у вас могут быть на то причины.
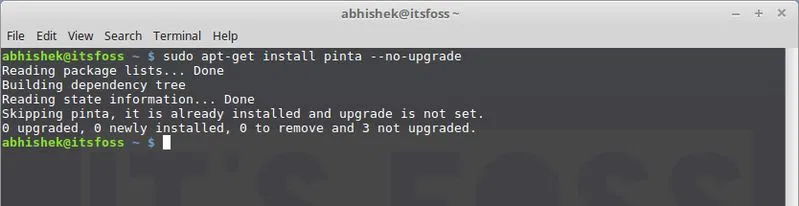
В этом случае вы можете использовать флаг no-upgrade следующим образом:
sudo apt-get install <package_name> --no-upgrade
Как обновить пакет, не установливая его
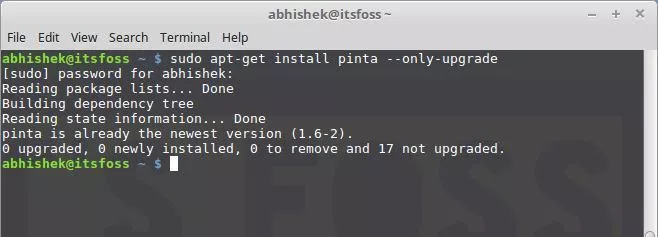
Если вы хотите обновить пакет при условии, что он уже установлен, но не хотите устанавливать его снова, вы можете сделать это с помощью следующей команды:
sudo apt-get install <package_name> --only-upgrade
Как установить конкретную версию приложения
По умолчанию, последняя версия, доступная в репозитории, будет установлена для любого приложения. Но если по какой-то причине вы не хотите устанавливать последнюю версию, вы можете указать номер версии пакета. (Вам нужно будет знать точный номер версии, которую вы хотите установить).
Все, что вам нужно сделать, это добавить номер версии к названию пакета:
sudo apt-get install <package_name>=<version_number>
Как удалить установленные пакеты с помощью apt-get
Установка пакетов – не единственное, что можно сделать с apt-get. С помощью этой команды также можно удалять пакеты. Всё, что вам нужно сделать, это использовать команду таким образом:
sudo apt-get remove <package_name>
Автозавершение работает и здесь. Поэтому просто начните набирать имя пакета и нажмите клавишу табуляции, и терминал предложит все установленные пакеты, начиная с этих букв.
Другой способ деинсталляции пакетов – использование очистки. Команда используется следующим образом:
sudo apt-get purge <package_name>
Какая разница между apt-get remove и apt-get purge?
- apt-get remove просто удаляет двоичные файлы пакета. Она не трогает конфигурационные файлы
- apt-get purge удаляет все, что связано с пакетом, включая конфигурационные файлы
Таким образом, если вы “удалили” (removed) определенный кусочек программного обеспечения и затем установите его снова, ваша система будет иметь те же самые конфигурационные файлы. Конечно, вас попросят переопределить существующие конфигурационные файлы при повторной установке.
Очистка особенно полезна, когда вы испортили конфигурацию программы, когда вы хотите полностью стереть ее следы из системы и начать все заново.
В большинстве случаев простого удаления более чем достаточно для удаления пакета.
Как очистить систему с помощью apt-get
Ах, да! Вы также можете очистить систему с помощью apt-get и освободить некоторое место на диске.
Вы можете использовать команду ниже для очистки кэша apt (локально сохраненных файлов пакета):
sudo apt-get clean
Другой способ – использовать автоочистку. В отличие от вышеприведенной команды автоочистки, autoclean удаляет только те файлы пакета, которые имеют более новую версию, и поэтому больше не будет использоваться.
sudo apt-get autoclean
Другой способ высвобождения дискового пространства – использование автоудаления. С помощью него можно удалить библиотеки и пакеты, которые были установлены автоматически для удовлетворения зависимостей другого установленного пакета. Если этот пакет удален, то эти автоматически установленные пакеты бесполезны в системе. Эта команда удаляет такие пакеты.
sudo apt-get autoremove
В завершение
Есть еще кое-что, но и этой информации достаточно для начала. Вы всегда можете просмотреть man-страницы, чтобы получить больше информации.
Как вам это руководство по apt-get командам в Linux? Было ли оно полезным для Вас и достаточно понятным для понимания? Ваши отзывы помогут создать больше подобных руководств в ближайшем будущем.
Пакетный менеджер Apt или Advanced Package Tool используется во множестве дистрибутивов, основанных на Debian или Ubuntu, а таких дистрибутивов сейчас очень много. Этот пакетный менеджер поддерживает все необходимые функции, вы можете устанавливать и удалять пакеты, обновлять то, что было уже установлено, искать пакеты, устанавливать их из файла или загружать без установки. При этом все зависимости будут разрешаться автоматически.
Утилита apt ничем не уступает пакетному менеджеру yum, используемому в RPM дистрибутивах, да, здесь все ещё не поддерживается частичное обновление пакетов, как в Zypper, но в целом всё выглядит очень неплохо. В этой статье мы подробно рассмотрим как пользоваться apt в Linux для решения задач работы с программами.
Синтаксис команды apt очень простой и похож на другие команды Linux:
$ apt опции команда параметры_команды
Опции указывают общее поведение утилиты, команда – действие, которое надо выполнить, а в параметрах команды обычно передается имя пакета, с которым следует работать, например, установить или удалить. Вот основные опции утилиты:
- -v, –version – выводит версию утилиты;
- -h, –help – выводит справку по использованию утилиты;
- -y, –yes – автоматически отвечать “да” на все возникающие вопросы;
- –assume-no – автоматически отвечать “нет” на все возникающие вопросы;
- -d, –download-only – только скачать пакеты и больше ничего не делать;
- -f, –fix-broken – исправить недостающие зависимости;
- –no-download – ничего не загружать, использовать только пакеты из кэша;
- -s, –simulate – режим симуляции, никакие операции не выполняются, только выводится информация на экран;
- –allow-unauthenticated – позволяет установить пакеты, из репозиториев, для которых нет GPG подписи;
- –no-install-recommends – не устанавливать рекомендованные пакеты, по умолчанию будут установлены;
- -m, –ignore-missing – игнорировать пакеты, которые существует;
- -q, –quiet – выводить минимум информации, не показывать прогресс бар;
- -V, –verbose-versions – показывать полные версии обновленных пакетов;
- –only-upgrade – не устанавливать новые пакеты, только обновлять;
- –allow-downgrades – разрешить откатывать версию пакетов;
- –reinstall – переустановить пакет если он уже установлен;
А теперь давайте пройдёмся по командам apt, которые вы можете использовать:
- install – установить пакет;
- remove – удалить пакет, конфигурационные файлы, которые были изменены в вашей системе удалены не будут;
- purge – полностью удалить пакет, вместе со всеми его конфигурационными файлами;
- autoremove – очистить ненужные пакеты;
- autoclean – очистить кэш пакетов;
- update – обновить списки пакетов из репозиториев;
- upgrade – обновить версию пакета до последней, если пакет не указан будут обновлены все пакеты;
- full-upgrade – полное обновление системы, включая удаление несовместимых или больше ненужных пакетов;
- list – список установленных пакетов;
- search – поиск пакетов;
- show – посмотреть информацию о пакете;
- download – скачать пакет в текущую папку;
- edit-sources – открыть с настройками репозиториев в текстовом редакторе.
- source – скачать исходный код пакета в текущую папку;
- build-dep – установить зависимости необходимые для сборки выбранного пакета;
Дальше рассмотрим несколько примеров работы с apt, которые пригодятся как начинающим, так и более опытным пользователям.
Как пользоваться apt
1. Обновление пакетов
Сначала давайте обновим список пакетов apt из репозиториев. Репозитории находятся на удалённых серверах и когда утилита apt ищет пакет для установки, естественно, что она не обращается ко всем репозиториям подряд чтобы узнать где он находится. В системе уже есть сохранённых кэш информации о том, какие пакеты вообще есть и где их можно скачать. Для обновления этого кэша используйте команду update:
sudo apt update
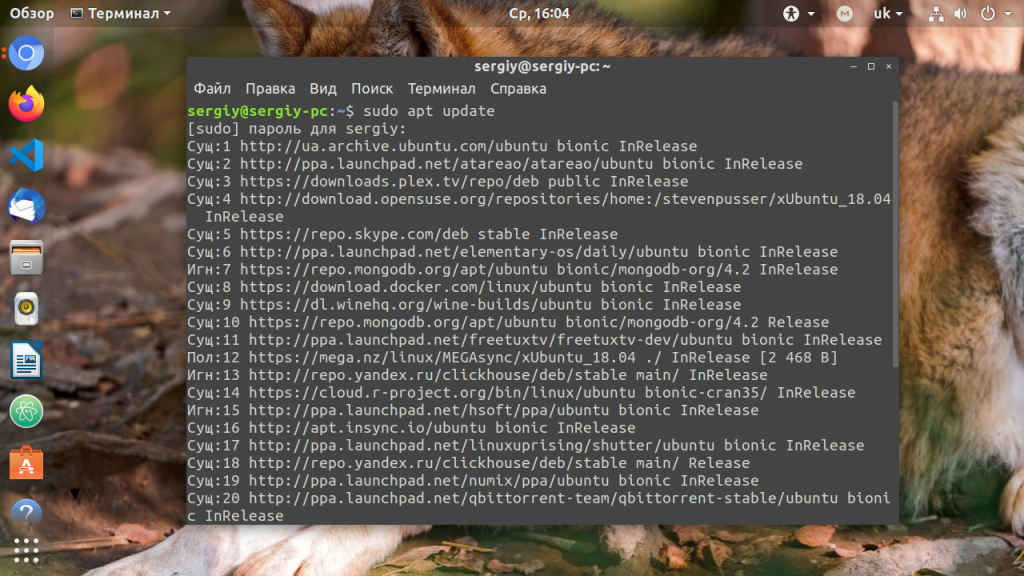
Во время загрузки URL репозиториев обозначаются специальными префиксами, вот что они означают:
- Hit (Сущ) – список не изменился с момента предыдущей загрузки;
- Ign (Игн) – репозиторий игнорируется, либо он слишком новый, либо произошла незначительная ошибка во время загрузки;
- Get (Пол) – доступна новая версия и она будет загружена.
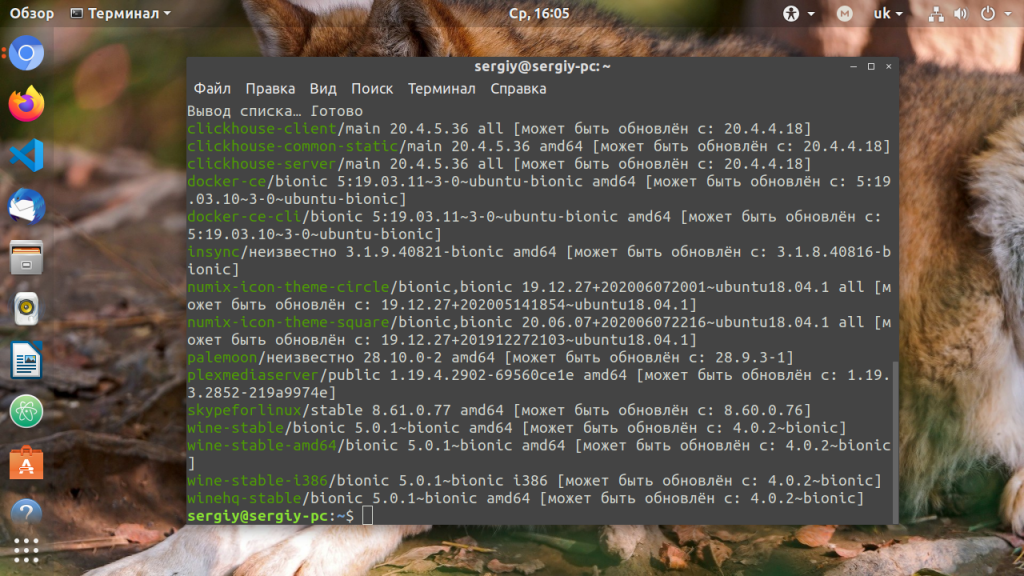
Когда кэш обновлен вы можете посмотреть для каких пакетов доступны обновления:
sudo apt list --upgradable
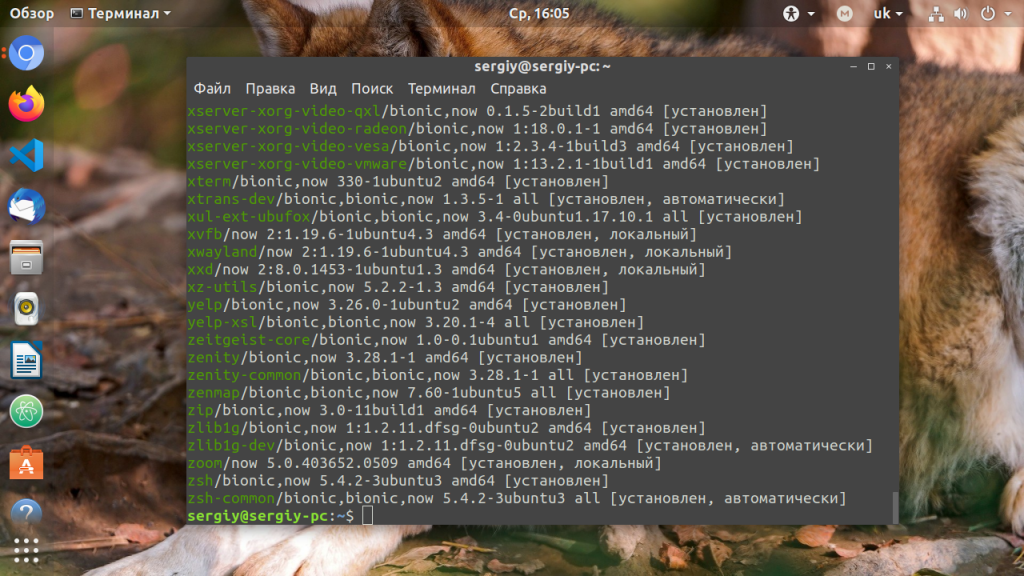
Аналогично можно посмотреть установленные пакеты apt:
sudo apt list --installed
Или всех доступных:
sudo apt list --all-versions
Затем можно обновить все пакеты в системе:
sudo apt full-upgrade

2. Установка пакетов
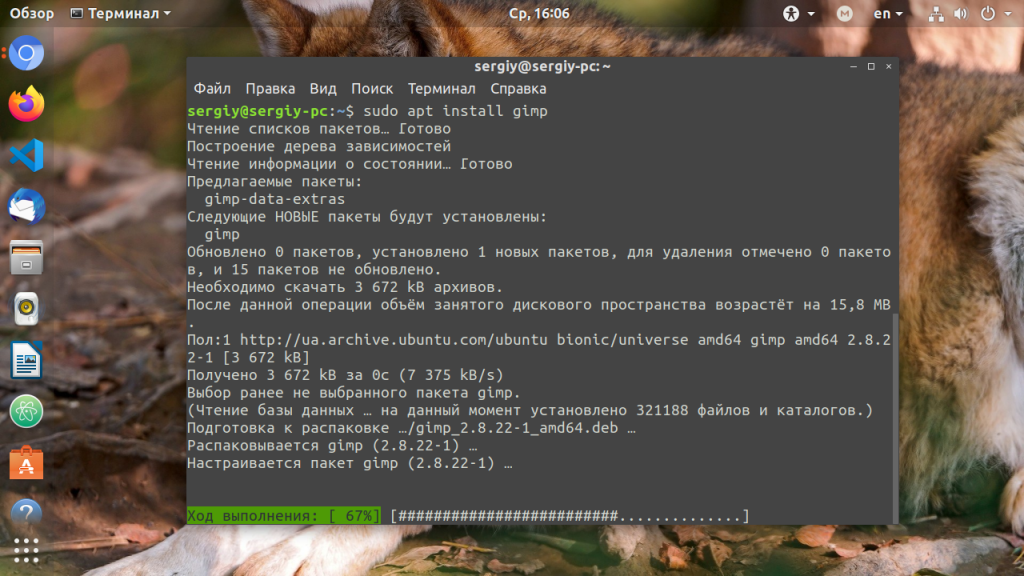
Чтобы установить пакет apt используйте команду install, например, для установки программы Gimp используйте команду install:
sudo apt install gimp
Если пакет установился неверно и вы хотите его переустановить, можно использовать опцию –reinstall:
sudo apt install gimp --reinstall
Как видите, опции можно указывать не только перед командой, но и после неё, аналогично можно установить несколько пакетов сразу, например:
sudo apt install gimp inkskape -y
Чтобы не подтверждать установку вручную используем опцию -y. Допустим вы установили пакет с помощью dpkg и теперь хотите установить для него зависимости, запустите команду install без параметров с опцией -f или –fix-broken:
sudo apt install --fix-broken
Можно скачать deb пакет в текущую папку без установки:
apt download gimp
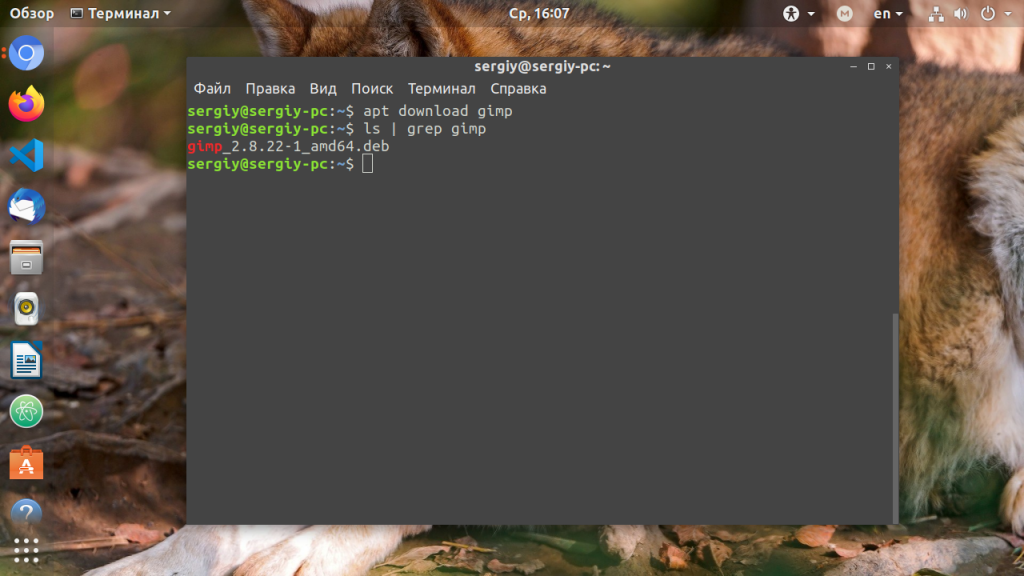
Скачивать пакеты надо от имени обычного пользователя, иначе тогда они не будут доступны для работы с ними. Если вам нужно установить пакет из файла, просто передайте путь к файлу команде install:
sudo apt install gimp_2.8.22-1_amd64.deb
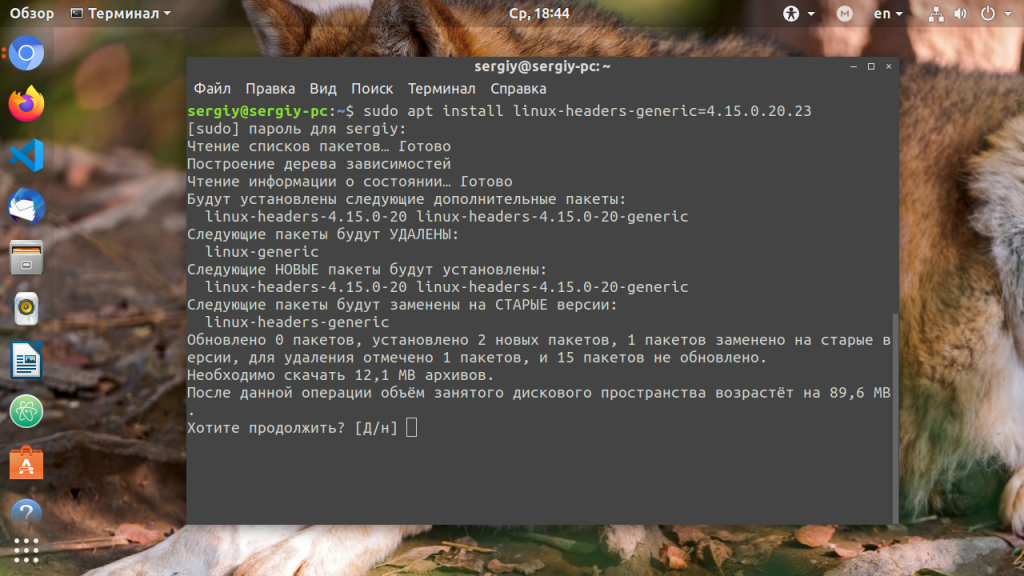
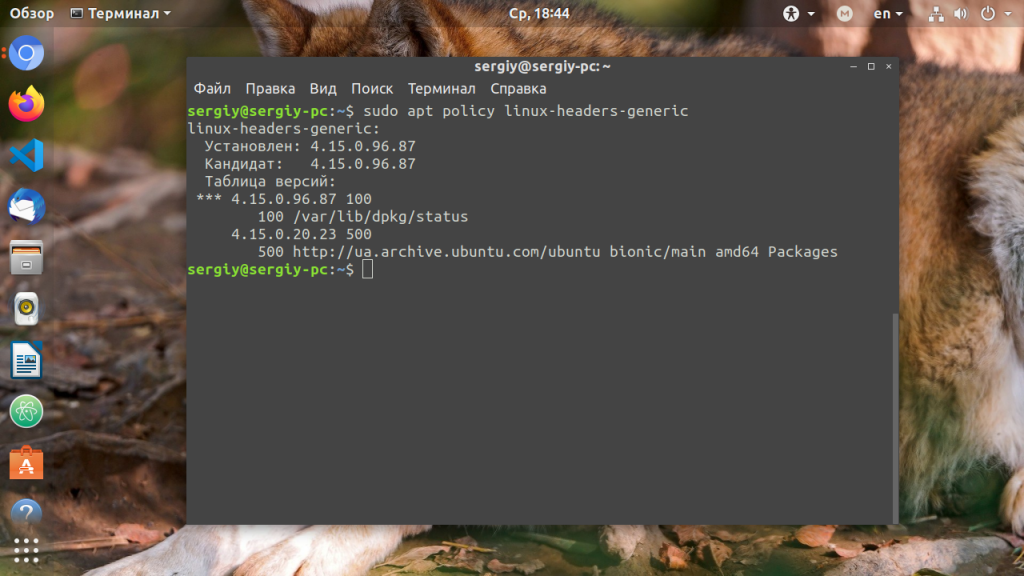
Чтобы установить определенную версию пакета просто укажите нужную версию после имени пакета через знак =, например:
sudo apt install linux-headers-generic=4.15.0.20.23
Чтобы найти доступные версии можно использовать команду policy. Она отображает информацию о том какая версия установлена, а также какие версии доступны:
sudo apt policy linux-headers-generic
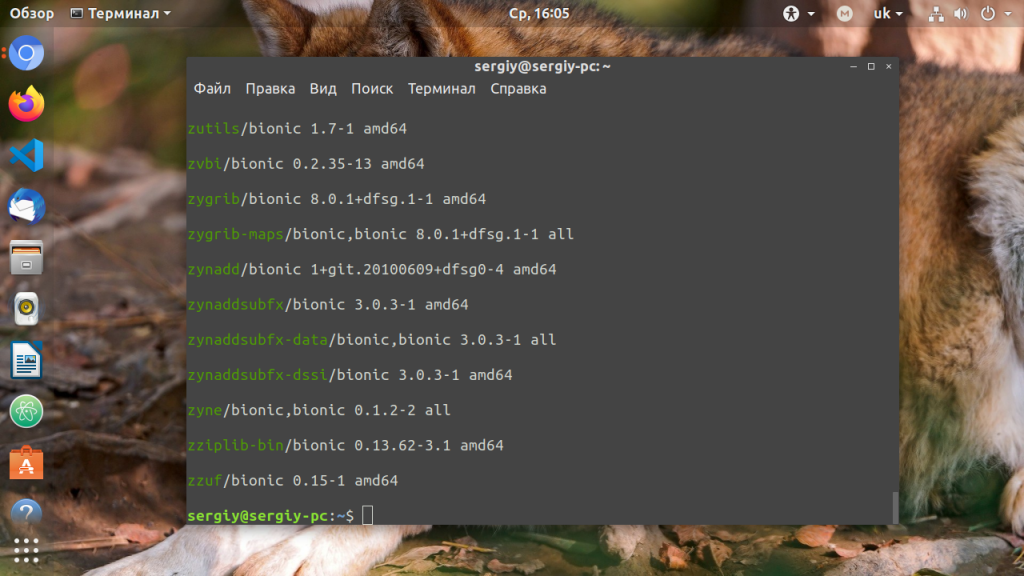
Если вы не знаете как точно называется пакет, можно выполнить поиск пакетов apt с помощью команды search:
sudo apt search gimp
3. Удаление пакетов
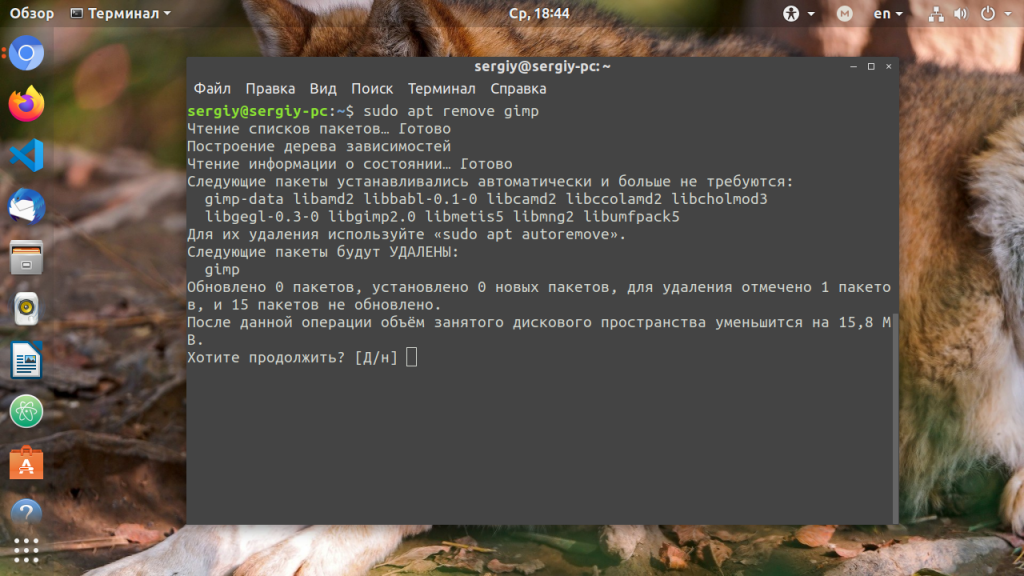
Чтобы удалить ненужный пакет используйте команду remove:
sudo apt remove gimp
Однако если вы изменяли какие-либо конфигурационные файлы из состава пакета, то при таком способе удаления они останутся в системе, чтобы удалить всё полностью используйте команду purge:
sudo apt purge gimp
Чтобы удалить лишние пакеты, которые в системе больше не нужны выполните команду autoremove:
sudo apt autoremove
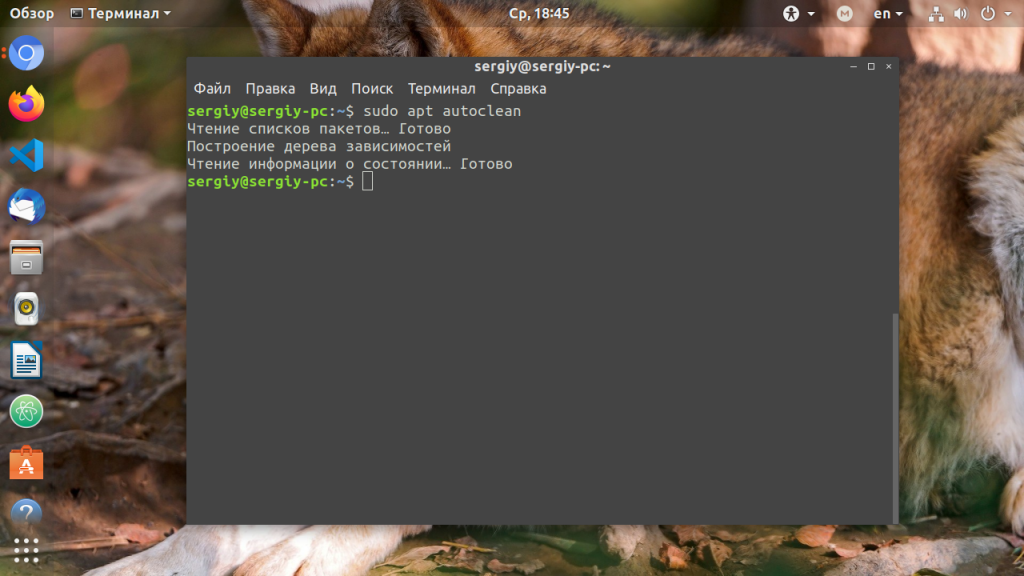
А для очистки кэша пакетов – autoclean:
sudo apt autoclean
Выводы
В этой статье мы рассмотрели примеры использования и основные команды apt Ubuntu, как видите, команд у этой утилиты хватает на все случаи жизни. Но, как видите, всё очень просто если разобраться. Я не рассказал только об одной команде, попробуйте ввести в терминале apt moo, увидите что будет. Это небольшая пасхалка от разработчиков.
Обнаружили ошибку в тексте? Сообщите мне об этом. Выделите текст с ошибкой и нажмите Ctrl+Enter.

Статья распространяется под лицензией Creative Commons ShareAlike 4.0 при копировании материала ссылка на источник обязательна .
APT — это инструмент командной строки в Ubuntu. Это один из наиболее часто используемых и чрезвычайно мощных инструментов командной строки в Ubuntu. APT можно использовать для установки новых программных пакетов, обновления пакетов, которые уже установлены в вашей системе, или даже обновления. Этот инструмент командной строки, безусловно, один из первых, который все новички изучают в Linux. APT можно разделить на APT-GET, APT-CACHE и APT-CONFIG. В этом руководстве мы рассмотрим различные способы использования APT-GET.
Apt-get source и Apt-get build-dep
Apt-get source <package>
Когда вы имеете дело с пакетами с открытым исходным кодом или исходным кодом, программисты обычно хотят изучить исходный код и/или исправить ошибки в исходном коде. Здесь в дело вступает исходный код. Исходный код используется для захвата пакета с исходным кодом.
Чтобы это работало, укажите запись deb-src в /etc/apt/sources.list в нестабильном (она также должна быть раскомментирована). И запустите обновление после изменения файла sources.list.
cd /etc/apt

nano sources.list
Затем раскомментируйте строки deb-src.
Затем выполните обновление:
sudo apt-get update
Загрузите исходный пакет:
cd ~
cd Downloads
mkdir imagemagick_source
cd imagemagick_source
sudo apt-get source imagemagick
Вот что находится в папке imagemagick_source:
Sudo apt-get build-dep <package>
Последний используется для установки всех зависимостей для конкретного пакета, которые позволят его собрать. Другими словами, зависимости — это библиотеки/программы, необходимые для компиляции пакета. И последний получит зависимости для вас.
Sudo apt-get install <package>
Sudo apt-get install <package>
Это команда, которую вынуждены использовать большинство людей, и поэтому она наиболее известна и часто используется. Она загружает и устанавливает любой пакет по вашему выбору. Итак, давайте посмотрим, что он делает:
andreyex@ubuntu: $ sudo apt-get install python3
[sudo] password for kalyani: Reading package lists… Done
Building dependency tree
Reading state information… Done python3 is already the newest version (3.8.2-Oubuntu2).
0 upgraded, 0 newly installed, 0 to remove and 92 not upgraded.
andreyex@ubuntu: - $
В этом случае мы решили установить пакет, который уже есть в моей системе. Но то, что вы должны отметить, это первые две строки.
“Reading package lists… Done” — прошелся по репозиторию ПО и проверил все доступные пакеты.
“Building dependency tree” — здесь apt-get строит другие необходимые пакеты для запуска интересующего пакета.
APT извлечет все требования и также установит их. /etc/apt/sources.list используется для точного определения пакетов. Чтобы установить конкретную версию пакета, вы можете написать:
Sudo apt-get install <package name>=<package version>
Если, с другой стороны, вы просто хотели загрузить пакет, но не устанавливать его, вы можете сделать это, добавив переключатель d. Последний загрузит файл и поместит его в /var/cache/apt/archives.
Sudo apt-get -d install <package>
d, --download-only
   Download only; package files are only retrieved, not unpacked or installed. Configuration Item: APT:: Get:: Download-Only.
Вы можете имитировать установку также с помощью переключателя s (-s, –simulate, –just-print, –dry-run, –recon, –no-act)
Sudo apt-get -s installl <package>
Последний никоим образом не изменяет систему, форму или форму, а скорее имитирует установку. Если и когда пользователь без полномочий root имитирует установку, она может выглядеть искаженной из-за отсутствия доступа к определенным конфигурациям.
Следующим, что мы собираемся рассмотреть, является исправление сломанного (-f, –fix-broken):
Sudo apt-get -f install <package>
В этом случае он попытается исправить сломанные зависимости.
Sudo apt-get autoclean/clean
Sudo apt-get clean
Эта команда — clean — используется для очистки локального репозитория пакетов. Он удаляет все из /var/cache/apt/archives, что в основном освобождает место в системе.
Автоочистка, с другой стороны, используется для удаления бесполезных файлов.
Sudo apt-get --purge remove <package>
Sudo apt-get --purge remove <package>
Здесь, чтобы удалить пакет с помощью APT, вы можете использовать либо чистку, либо удаление, либо и то, и другое. Remove используется для удаления пакета, но НЕ файлов конфигурации. Purge также удалит все файлы конфигурации.
Sudo apt-get autoremove
Sudo apt-get autoremove <package>
Всякий раз, когда вы устанавливаете определенный пакет, все его зависимости также устанавливаются автоматически. С другой стороны, когда вы удаляете пакет, пакет удаляется, но зависимости остаются. Здесь на помощь приходит apt-get autoremove. Autoremove удалит не только установленный пакет, но и установленные зависимости.
Sudo apt-get update
Sudo apt-get update
Как говорится в термине, эта команда используется для обновления. Теперь, что он обновляет и что делает команда? В этом случае выполняется обращение к файлу /etc/apt/sources.list и обновляется база данных пакетов, доступных пользователю. Если файл sources.list когда-либо изменялся, вам обязательно нужно выполнить эту команду.
Итак, если запустить команду обновления, то мы видим, что она выбрасывает несколько строк. Эти строки говорят «Hit», «Get» или «Ign».
- Hit: нет изменений в версии пакета
- Get: доступна новая версия, и APT получает ее для вас
- Ign: игнорировать пакет
Обновление APT не будет загружать и устанавливать все новые доступные пакеты. Но вы можете ввести следующее, чтобы увидеть, какие из них имеют новую доступную версию:
Здесь, как вы можете видеть, будет отображаться текущая версия (в вашей системе), которая у вас есть, и новая доступная версия.
Sudo apt-get upgrade
Sudo apt-get upgrade
Следующая команда, похожая на команду обновления, — это команда upgrade. Последняя команда (upgrade) используется для обновления или установки более новых версий всех различных пакетов, которые уже установлены в системе. Он получает новейшие версии из источников, которые находятся в файле etc/apt/sources.list. Пакеты, уже установленные в системе, НИКОГДА не удаляются, а новые, не установленные в данный момент пакеты никогда не устанавливаются. Но скорее «upgrade» предназначено для ВСЕХ пакетов, которые в настоящее время установлены в системе. Если и когда пакет не может быть обновлен без изменения статуса другого пакета, он остается UN-UPGRADED (не обновлен). Обычно команде обновления предшествует команда обновления. Это делается для того, чтобы APT знал, что на самом деле существуют новые пакеты.
Sudo apt-get dist-upgrade
Sudo apt-get dist-upgrade
Эта конкретная команда используется для обновления системы до новой версии. В этом случае некоторые пакеты могут быть удалены. Различие между командами upgrade и dist-upgrade заключается в том, что dist-upgrade удаляет определенные пакеты. Но для обновления нет удаления пакетов.
Sudo apt-get download
Sudo apt-get download <package>
Это похоже на -d install. Apt-get -d install загрузит файл в /var/cache/apt/archives, а apt-get download загрузит файл deb в текущий рабочий каталог. Apt-get download загрузит файл deb, но не зависимости. Кроме того, apt-get download не установит пакет.
Sudo apt-get check
Sudo apt-get check <package>
Проверка Sudo apt-get используется для обновления кеша пакетов, а также для проверки неработающих зависимостей.
Для получения дополнительной информации и дополнительных параметров введите:
Заключение
Команды APT-GET очень мощные и в то же время очень простые. В этом руководстве мы узнали о том, как использовать команды APT-GET: источник, сборка-деп, установка, очистка, автоматическая очистка, очистка, удаление, автоматическое удаление, обновление, обновление, дистрибутивное обновление, загрузка и проверка были рассмотрены в этой статье.
Если вы нашли ошибку, пожалуйста, выделите фрагмент текста и нажмите Ctrl+Enter.
Brief: This beginner’s guide shows you what you can do with apt-get commands in Linux, how to use them to find new packages, install and upgrade new packages, and clean your system.
If you have started using Ubuntu or any Ubuntu-based Linux distribution, such as Linux Mint, elementary OS, etc., you must have come across the apt-get command by now.
In fact, first in the list of things to do after installing Ubuntu is to use apt-get update and apt-get upgrade. Now, you might be aware of a few apt-get commands and their usage, but you might not be aware of some others.
In this guide for beginners, I am going to explain various of apt-get commands with examples so that you can use them as well as an expert Linux user.
Exclusive bonus:
Download apt-get command cheatsheet
for future reference. You can print it or save it for offline viewing.
What is apt-get?
Ubuntu is derived from Debian Linux. Debian uses the dpkg packaging system. A packaging system is a way to provide programs and applications for installation. This way, you don’t have to build a program from the source code.
APT (Advanced Package Tool) is the command-line tool to interact with this packaging system. There are already dpkg commands to manage it, but apt is a more user-friendly way to handle packages. You can use it to find and install new packages, upgrade packages, clean your packages, etc.
There are two main tools around APT: apt-get and apt-cache. apt-get is for installing, upgrading, and cleaning packages, while apt-cache command is used for finding new packages. We’ll see all of these commands with examples later in this guide.
There is also a newer apt command on the scene which is a simpler version of apt-get. Read this article to know more details about apt and apt-get commands.
I am using Linux Mint in this tutorial, but you can use any other Ubuntu-based Linux distribution, such as elementary OS, Linux Lite, etc.
Using apt-get commands
Let’s start with apt-get commands. You just cannot escape this command. It’s better to have an understanding of it so that you can handle your Linux system in a slightly better way.
Update the package database with apt-get
apt-get basically works on a database of available packages. If you don’t update this database, the system won’t know if there are newer packages available or not. In fact, this is the first command you need to run on any Debian-based Linux system after a fresh install.
Updating the package database requires superuser privileges, so you’ll need to use sudo.
sudo apt-get updateWhen you run this command, you’ll see the information being retrieved from various servers.
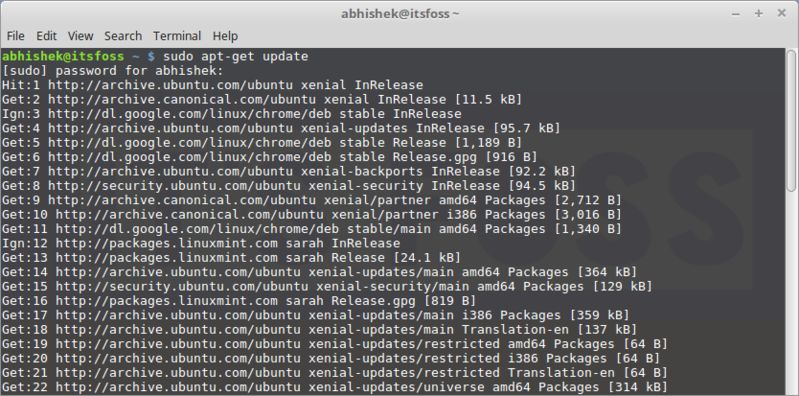
You’ll see three types of lines here: hit, get, and ign. Let me explain them to you:
- hit: there is no change in the package version
- ign: the package is being ignored. There could be various reasons for that. Either the package is so recent that it doesn’t even bother to check for a new version, or there was an error in retrieving the file but error was trivial and thus it is being ignored. This is not an error. There is no need to be worried.
- get: There is a new version of the package available. apt-get will download this information (not the package itself). You can see that there is downloaded information on the ‘get’ lines in the screenshot above.
Upgrade installed packages with apt-get
Once you have updated the package database, you can upgrade the installed packages. The most convenient way is to upgrade all the packages that have updates available. You can use the command below for this purpose:
sudo apt-get upgrade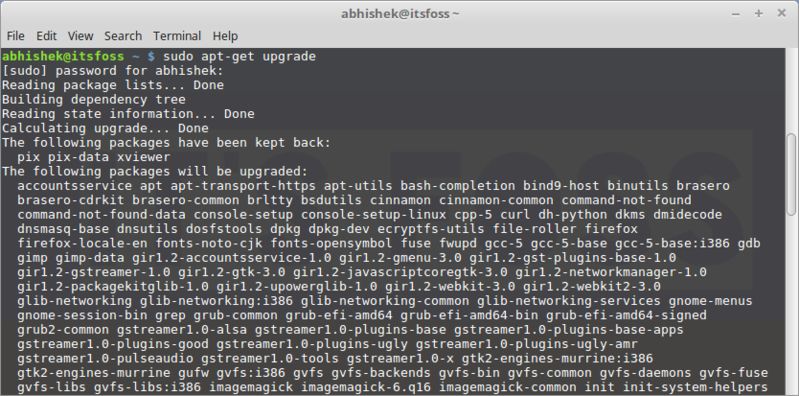
To upgrade only a specific program, use the command below:
sudo apt-get upgrade <package_name>There is another way to perform a complete upgrade, by using the command below:
sudo apt-get dist-upgradeBut you should avoid using this command. I’ll explain why in the next section.
Difference between upgrade and dist-upgrade
The command apt-get upgrade is very obedient. It never tries to remove any packages or tries to install a new package on its own.
The command apt-get dist-upgrade, on the other hand, is proactive. It looks for dependencies with the newer version of the package being installed and it tries to install new packages or remove an existing ones on its own.
It sounds like dist-upgrade is more powerful and intelligent, doesn’t it? But there is a risk with it.
See, it has a “smart” conflict resolution system. It will attempt to upgrade the most important packages, at the expense of the less important ones. This may lead to the removal of some packages, which you might not want. This is the main reason why dist-upgrade should be avoided on production machines.
What is the difference between apt-get update and apt-get upgrade?
This is a very common confusion. You are not the only one to be confused by the terms update and upgrade.
Though it sounds like apt-get update should update the packages, that’s not true. apt-get update only updates the database of available packages. For example, if you have XYX package version 1.3 installed, after apt-get update, the database will be reflect that the newer version 1.4 is available.
When you do an apt-get upgrade after apt-get update, it upgrades the installed packages to the newer version.
This is the reason why the fastest and the most convenient way to update Ubuntu is to use this command:
sudo apt-get update && sudo apt-get upgrade -yUsing apt-cache commands to search for packages
I’ll be honest with you, this is not my preferred way of searching for packages. But this comes in pretty handy when you are looking for some specific library.
All you need to do is to use the following command (you don’t even need sudo here):
apt-cache search <search term>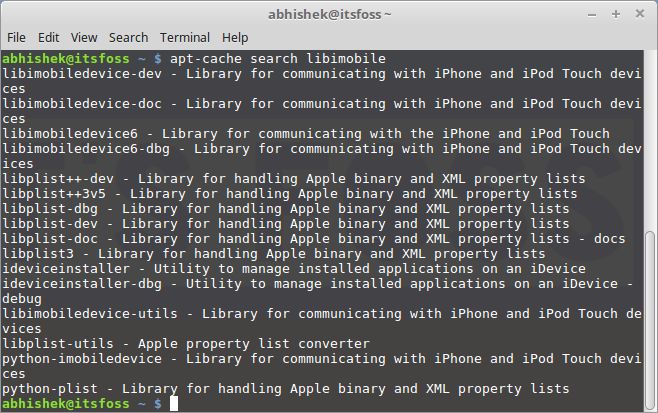
You don’t need to know the exact name of the package. It searches in package names and their short descriptions, and shows result based on that.
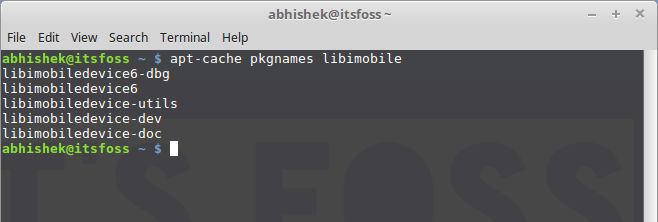
If you just want to search the apt packages with specific package names, you can use the command below:
apt-cache pkgnames <search_term>This gives you the list of all the packages starting with your search term.
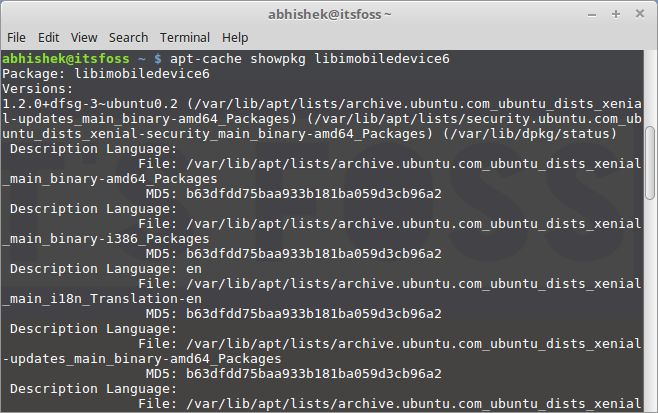
Once you know the exact package name, you can get more information about it, such as version, dependencies, etc., by using the command below:
apt-cache showpkg <package_name>
How to install new packages with apt-get
If you know the name of the package, you can easily install it using the command below:
sudo apt-get install <package_name>Just replace the <package_name> with your desired package. Suppose I wanted to install the Pinta image editor. All I’d need to do is use the command below:
sudo apt-get install pintaThe good thing about this command is that it has auto-completion. So if you are not sure about the exact package name, you can type a few letters and press the tab, and it will suggest all the packages available with those letters. For example:
How to install multiple packages
You are not restricted to installing just one package at a time. You can install several packages at a time by providing their names:
sudo apt-get install <package_1> <package_2> <package_3>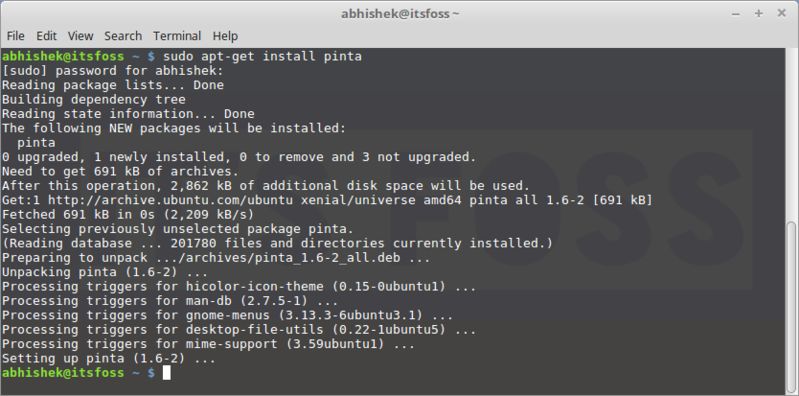
What if you run install on an already installed package?
Suppose you already have a package installed, but you used the install command for it anyway. apt-get will actually look into the database, and if a newer version is available, it will upgrade the installed package to the newer one. So no harm is done by using this command — unless you don’t want the package to be upgraded.
How to install packages without upgrading
Suppose for some reason you want to install a package but don’t want to upgrade it if it is already installed. It sounds weird, but you may have reasons to do that.
For that case, you can use the no-upgrade flag in the following manner:
sudo apt-get install <package_name> --no-upgrade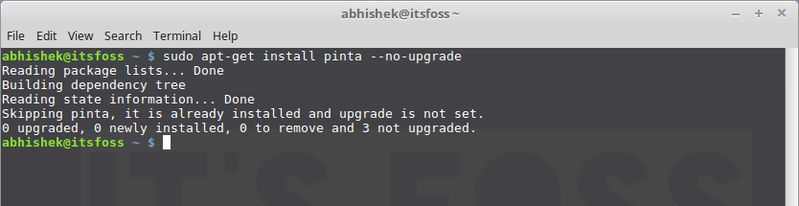
How to only upgrade a package, not install it
In case you want to upgrade a package provided it’s already installed, but don’t want to install it if it’s not, you can do that with the following command:
sudo apt-get install <package_name> --only-upgrade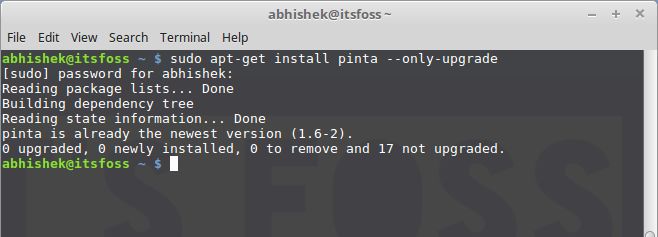
How to install a specific version of an application
By default, the latest version available in the repository will be installed for any application. But if, for some reason, you don’t want to install the latest version, you can specify the package version number. (You would need to know the exact version number that you wanted to install).
All you need to do is to add the version number to the name of the package:
sudo apt-get install <package_name>=<version_number>How to remove installed packages with apt-get
Installing packages isn’t the only thing you can do with apt-get. You can also remove packages with it. All you need to do is to use the command in this manner:
sudo apt-get remove <package_name>Auto-completion works here as well. So just start typing package name and press tab, and it will suggest all the installed packages starting with those letters.
Another way of uninstalling packages is to use purge. The command is used in the following manner:
sudo apt-get purge <package_name>What is the difference between apt-get remove and apt-get purge?
- apt-get remove just removes the binaries of a package. It doesn’t touch the configuration files
- apt-get purge removes everything related to a package, including the configuration files
So if you have “removed” a particular piece of software and then install it again, your system will have the same configuration files. Of course, you will be asked to override the existing configuration files when you install it again.
Purge is particularly useful when you have messed up with the configuration of a program, when you want to completely erase its traces from the system and start afresh.
Most of the time, a simple remove is more than enough for uninstalling a package.
How to clean your system with apt-get
Oh yes! You can also clean your system with apt-get and free up some disk space.
You can use the command below to clear apt cache (locally saved retrieved package files):
sudo apt-get cleanAnother way is to use autoclean. Unlike the above clean command, autoclean only removes those retrieved package files that have a newer version now, and so won’t be used anymore.
sudo apt-get autocleanAnother way to free up disk space is to use autoremove. It removes libraries and packages that were installed automatically to satisfy the dependencies of another installed package. If that package is removed, these automatically installed packages are useless in the system. This command removes such packages.
sudo apt-get autoremoveThis is a command-line way of cleaning a Linux system. If you prefer a GUI, here are some CCleaner alternatives for Linux which you can use on Ubuntu and Ubuntu-based Linux distributions.
Your input
There is more to apt-get, but this much should give you a pretty good start. You can always look up the man pages to get more information.

How do you like this guide to apt-get commands in Linux? Was it helpful to you and clear enough to understand? Your feedback will help in creating more such guides in the near future.
