Брии [Bree].
Предупрежден – значит вооружен [Forewarned Is Forearmed].
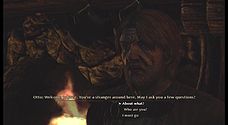
В таверне «Гарцующий пони» [Prancing Pony] у камина стоит Отто Астер [Otto]. Поговорите с ним и согласитесь на просьбу побеседовать с Грофом [Grof] о поставках оружия в город. Гроф находится на улице у телеги со скарбом. Как только гном согласится торговать, возвращаемся назад к Отто.
Задание выполнено.
Арсенал Отто [Otto’s Arsenal].
Отто обеспокоен тем, что оружие в город будет добираться слишком долго и попросит принести хоть что-нибудь для защиты. Всего нужно передать около 12 предметов. После этого Отто предложит награду: кольцо или ожерелье.
Задание выполнено.
Загадки Теддера.
В таверне у стойки есть хоббит, который любит загадывать загадки за деньги. Можно немножко подзаработать, отгадывая их. С каждым правильным ответом деньги, поставленные на кон, удваиваются.
Загадки и ответы:
- Чем больше ты их сделаешь, тем больше оставишь за спиной. Ответ: шаги.
- По ночам они являются без зова. Днем пропадают, хотя и не украдены. Ответ: звезды.
- Что настолько хрупко, что его можно разрушить, даже назвав по имени. Ответ: тишина.
- Бежит, а без ног. Шумит, бормочет, ничего сказать не хочет. Ответ: ручей.
- Живу пока горю, догораю – умираю. Чем я толще, тем живу дольше. Ответ: свеча.
- Я вечно голоден, жажду еды. Все пожираю, боюсь лишь воды. Ответ: огонь.
- Чем этого больше, тем меньше ты видишь. Ответ: темнота.
- Что вам принадлежит такого, чем другие пользуются чаще вас. Ответ: ваше имя.
Хоббит загадки выбирает рандомно.
Подарок Роули [Rowlie’s Gift].
У лестницы, что напротив зеркала по изменению внешности, стоит Роули Златодар. Он влюблен, а в качестве сердца хочет предложить любимой свой медальон. Правда, он поврежден. Сперва надо наведаться к кузнецу на улице. После того, как цепочку починят, отдайте медальон девушке Идоне Первоцвет, что стоит на пороге дома выше по карте. После разговора с ней, вернитесь к Роули. Он поделится деньгами и опытом.
Задание выполнено.
Форност [Fornost].
Оружие с древнего запада [Work of WesternesseEdit].
На протяжении всего Форноста в бочках и ящиках вы сможете найти три части древнего артефакта. Соединить их сможете либо в Ривенделле у местного кузнеца Ангмира [Angmir], либо у гнома Бури в Нордибанде.
Задание выполнено.
Слова Провидца [The Seer’s WordsEdit].
На локации «Внешние дворы» в сундуке найдете фолиант. Его нужно отдать Эльронду в Ривенделле. В награду он одарит вас зельями.
Задание выполнено.
Культ Багрового ока.
На стене Форноста вам повстречается гоблин-маг. У него будет свиток культа Багрового ока. Его нужно будет отнести Эльронду в Ривенделл.
Задание выполнено.

Брод Сан-Гебир [Sarn Ford].
Атэлас [Athelas].
В лагере вы увидите женщину у кровати, на которой лежит больной рейнджер. Поговорите с ней и согласитесь принести растение, что растет на Могильниках. Постарайтесь не затягивать с этим делом, т.к. рейнджер может умереть. В награду он предложит вам оружие.
Задание выполнено.
Могильники [Barrow Downs].
Последние сыны Кардолана [The Last Sons of Cardolan].
Чтобы пройти это задание нужно зачистить все три гробницы от нечисти.
Задание выполнено.

Ривенделл [Rivendell].
Эльфийские камни [Elf Stones].
Поговорите с кузнецом Ангмиром [Angmir]. Он поведает о том, что хочет наполнить камни силой и попросит их найти.
Нужно:
- Зелёные бериллы – 4 камня;
- Золотистые бериллы – 3 камня;
- Красные бериллы – 2 камня.
Камни находятся в хрупких объектах: бочках, ящиках. После того, как найдете, нужно поговорить сначала с гномом Глоином [Gloin] в Ривенделле (можно их продать гному за 2500 серебряных), а потом и с кузнецом. Он даст награду в виде камней со статами.
Задание выполнено.
Стихоплёт [The Poet].
Поговорите с Бильбо, что сидит на скамейке напротив торговца. Он попросит отнести стихи, которые вы помогли ему завершить в процессе диалога. Поговорите с эльфийкой Арвен [Arwen], что стоит на мосту.
Задание выполнено.
Летописец [The Chronicler].
Следующий квест от Бильбо будет доступен после того, как разберетесь с каменным великаном. Он его дает после того, как выполните квест «Стихоплёт». Бильбо собирается написать книгу о ваших похождениях, соответственно нужно возвращаться к нему после Гундабада, Лихолесья и чертогов дракона Ургоста. В диалогах упор делать на драконов и лести к ним. Также не забудьте польстить дракону при встрече, получите ценные подарки.
Задание выполнено.
Мирувор [Miruvor].
Поговорите с Арвен. Она попросит найти ряд ингредиентов:
- Пять цветков мирилота;
- Горный мед;
- 2-а кристалла гиливора.
Все они находятся на Эттинском мшанике. Два цветка находятся в первой пещере слева. Один цветок будет в лагере орков, где вы повстречаете орла. Еще один цветок на холме, что рядом с ручьем, недалеко от пещеры с троллем. Пятый цветок находится на поляне на выходе из пещеры, рядом будет и первый кристалл. Чтобы не пропустить пещеру, обратите внимание на небольшой водопад справа от неё. Идем дальше от пещеры наверх и огибаем её. Здесь будет второй кристалл. Напротив кристалла у баррикад будет полое поваленное дерево с ульем внутри. Последний ингредиент у нас.
Задание выполнено.
Истинное серебро. [True silver].
Следующий квест от Арвен. Нужно найти для неё немного митрила. Он находится в горе Гундабад в первой же пещере, где выходит к нам на встречу тролль в потайном гроте, вход в который может заметить только гном. Играйте за него.
Задание выполнено.
Нордибад [Nordinbad].
Благодарность Горина [Gorin’s Gratitude].
После разговора о драконе с королем Горином [Gorin] нужно обмолвиться парой слов с казначеем Галаром [Galar]. Он даст награду – экипировку.
Задание выполнено.
Мечта ювелира [A Gem No Mine Can Yield].
Поговорите с Бури [Buri], местным кузнецом. Он посетует на то, что для завершения работы над поясом ему требуется черная жемчужина. Она находится в Лихолесье [Mirkwood] в разрушаемых объектах типа бочек и ящиков. Чаще встречается рядом с пленённым эльфом. Находите и отдаёте кузнецу.
Задание выполнено.
Лихолесье [Mirkwood].
Пленник [The Captive].
В лесных топях вы сможете освободить в лагере орков пленного эльфа. Лагерь находится на скрытой опушке. После того, как Следопыт увидит паучьи следы и поймет, что Радагаста тащили по земле, держитесь правой части экрана, и вы найдете опушку. Далее, победив паучиху, не убегайте с локации раньше времени, сперва, поговорите со спасенным эльфом, он будет недалеко от Радагаста.
Задание выполнено.

Культ Багрового ока.
1. Первый свиток находится в Форносте. Его вы заберёте с трупа первого гоблина-мага.
2. Второй свиток находится на Эттинском мшанике в золотом сундуке у ручья.
3. Третий свиток падает с мага на болотах [Coldfells] недалеко от начала локации
4. Четвертый свиток находится в сундуке Гундабада [Gundabad]. Будучи внутри горы, нужно уничтожить плавильный механизм, далее пройти через открывшийся проход наверх, перебраться на другую сторону и спуститься до самого основания. Ящик будет в самом низу напротив места, куда нужно идти по сюжету.
5. Пятый свиток упадет с Волчаром [Wulfrun], как только войдете в Лихолесье [Mirkwood].
6. Шестой свиток находится у мага на мосту у водопада в Чертогах Ургоста. Важно не сбить мага в пропасть.
7. Перед встречей с драконом вы сразитесь с капитаном-магом стражи, свиток будет у него.
Хинт: можно получить свитки проще. Вам нужно возвращаться на Эттинский мшаник и каждый раз в сундуке будет свиток. Повторить, пока не соберёте все.
Список всех бутыльков с зельями, которые может создать Ведунья:
Примечание: баф – время действия эффекта.
Эликсир здоровья
$45
Ввосстанавливает % здоровья.
Эликсир возрождения
$50
Однократное возрождение.
Баф на 2 минуты.
Эликсир благословения
$50
Поглощение 50% урона.
Баф на 1 минуту.
Эликсир омоложения
$50
Восстанавливает хп и могущество.
Эликсир скорости
$50
При получении урона возможно увеличение скорости движений.
Баф 5 минут.
Эликсир силы
$50
Сила х2.
Баф на 1 минуту.
Эликсир могущества
$40
Восстанавливает процент вашего здоровья (на самом деле могущества, это баг локализации)
Эликсир мощи
$50
Все удары наносят небольшой урон по площади и замедляют врагов.
Баф на 1 минуту.
Эликсир героизма
$50
Урон от каждого удара в режиме героя +1000
Баф на 2 минуты.
Зелье премудрости
$50
Получаемый опыт х2.
Баф на 1 минуту.
Лечебный пирожок
$50
Ускоренное восстановление здоровья.
Баф на 1 минуту.
Восстанавливающий пирожок
$50
Ускоренное восстановление могущества.
Баф на 1 минуту.
Омолаживающий пирожок
$50
Ускоренное восстановление здоровья и могущества.
Баф на 1 минуту.
Напиток победителя
$50
Получение сфер при убийстве врагов.
Баф на 1 минуту.
Есть в игре, но, похоже, нельзя скрафтить. (даются за квесты или находятся в ящиках):
Зелье превосходства
$50
Расход могущества -80%
Баф на 10 минут.
Эликсир возмездия
$50
Возвращает противнику 30% нанесённого вам урона.
Баф на 10 минут.
Эликсир разящих стрел
$50
Оглушение противников, поражённых обычными выстрелами.
Баф на 10 минут.
Зелье смертельных ударов (выпадает из ящиков и бочек)
$50
Врагам наносятся глубокие раны.
Баф на 10 минут.
Мирувор (можно получить только в награду за квест Арвен)
$50
Полное здоровье и могущество, сила и ловкость +20%, выносливость +30%
Баф на 5 минут.
Орочье пойло
$20
+5 выносливости, +50 урон в ближнем бою.
Баф на 2,5 минуты.
Сушёная рыба
$4
Восстановление 40 ХП.
Крепкий эль
$30
Восстанавливает 40 ХП.
Целительный настой
$35
Восстанавливает 200 ХП.
Чёрствый серый хлеб
$1
Восстанавливает 5 ХП.
Горючее масло для стрел
$50
Воспламеняет врагов при выстрелах по ним.
Баф на 2 минуты.
Начало
 После открытия, вы будете иметь контроль над выбранным вами персонажем в Гарцующем пони. Вы можете бегать и говорить с посетителями. Лучше всего сразу начать говорить с Арагорном, чтобы получить некоторую информацию, хотя если вы читали книгу или смотрели фильм (а вы наверняка его смотрели), то из разговора вы не вынесите ничего нового.
Обратите внимание, что разговор может тонко меняться в зависимости от того, кто ваш персонаж. Это не значит, что нужно проходить игру тремя персонажами, чтобы получить новые фрагменты разговора, но Арагорн будет реагировать немного по-разному в зависимости от того, кто вы есть.
Среди людей, с которыми вы можете говорить, есть Отто Астер. Поговорите с ним и получите квест “Предупрежден – значит вооружен”. В противоположной стороне, в углу рядом с лестницей, стоит Роули Златодор, который даст вам квест “Подарок Роули”.
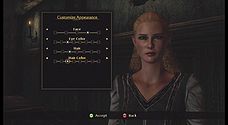 Кроме того, недалеко от Роули есть зеркало, и вы можете изучить его, чтобы изменить внешний вид вашего персонажа. Это не полнофункциональный редактор лица, однако, можно поменять некоторые черты лица, которые вам не нравятся, например, сделать Андриэль блондинкой. Вы можете изменить внешний вид вашего текущего персонажа, однако, если вы переключитесь на другого персонажа, то измененный персонаж будет ходить с внешним видом по умолчанию. Зеркала вы найдете в различных областях, на протяжении всей игры.
Загадки Теддера Изгородника
 У Пивовара Масленника вы можете получить некоторую информацию о Бри. А еще лучше, поговорить с хоббитом Теддером Изгородником, который сидит в дальнем конце бара. Он даст вам загадки, правильно ответив, вы получить немного денег. Обратите внимание, что Теддер – одноразовый
гандон
npc, как только вы закончите говорить с ним, он станет недоступен для диалога, поэтому выбейте из него как можно больше денег в первый раз.
Теддер предложит вам до 5 загадок, большинство из которых довольно легкие. Они идут рандомно, на каждую дается 6 вариантов ответа. Делайте максимальную ставку (50 монет), потому что ниже lid2pro даст шпаргалку с ответами на загадки, а вы, ответив на все вопросы, получите 800 монет профита.
“Всегда бежит, никогда не идет. Часто ропочет, но никогда не говорит. Имеет кровать, но никогда не спит. Имеет рот, но никогда не ест. Что это такое?” Реки.
“По ночам они являются без зова. Днем они теряются, хотя и не украдены. Кто они?” Звезды.
“Я свожу мужчин с ума, за неимением меня. Меня просто избили, но не бесплатно. Кто я?” Золото.
“Я всегда голоден, меня нужно кормить. Когда пальцев я касаюсь, вскоре они становятся красными. Кто я?” Огонь.
“Живу я глубоко под землей, но выйдя наружу и пройдя сквозь удары и пламя, я могу стать кровожадным убийцей. Кто я?” Железо.
“Живу пока горю, догораю – умираю. Чем я толще, тем живу дольше. Кто я?” Свеча.
“Чем больше из них вы берете, тем больше вы оставляете позади. Что это такое?” Следы.
“С утра к твоим ногам я подползаю, и следую повсюду за тобой, но в полдень я почти что исчезаю. Скажи, кто я такой?” Тень.
“Что принадлежит вам такого, чем другие пользуются чаще вас?” Ваше имя.
“Что это такое, что такое хрупкое даже назвав его имя может разорвать его?” Молчание.
“Что это вы должны держать после предоставления его кому-то еще?” Ваше слово.
Бри
После того, как вы легально ограбили Теддера, выйдите из Гарцующего пони и поверните направо, чтобы попасть в деревню Бри. Изучите здесь, где находится кузнец и т.д. В общем, Бри – это такая линейная локация с одной дорогой, двери в дома – просто для красоты, вы не можете туда заходить. Все, с кем вы можете взаимодействовать, стоят либо на улице, либо перед зданиями.
 Вы можете наблюдать сцену, как два парня разговаривают о чем-то подозрительном позади магазина Elmund Brushwood. Вы можете говорить только с парнем по имени Пришелец с юга, и ударить его по лицу (не волнуйтесь, он этого заслуживает).
После того, как вы сделаете свои дела в Бри, отправляйтесь дальше по улице, пока не дойдете до городских ворот. В передней части ворот светится символ, и после активации вы увидите карту, с местами, куда можно перемещаться. Наша цель – Форност.
Форност
Форност – ваше первое “подземелье”, которое предстоит изучить и ваш первый вкус боя. Хотя вид довольно симпотичный и перспектива позволяет увидеть горы на заднем плане, сама область достаточно линейна. Просто идите по пути, читая учебные сообщения, и мочите всех на своем пути.
Обратите внимание, что AI-контроллируемые члены отряда будут ровняться по себе, а вы держите все награбленное. Они будут сами вооружаться и использовать те или иные навыки. При переходе на другого персонажа, вам нужно выбрать способности (с повышением уровня) и экипировать его по своему усмотрению. Также вы можете передавать членам отряда предметы, которые может использовать только их класс. Поэтому держите в инвентаре предметы не только для себя, но и для передачи и обмундирования ваших членов отряда.
 Как только вы дойдете до второй области, вы будете атакованы лучниками со всех сторон. Это лишь одна из многих схваток, когда вы будете попадать в засаду. Практически вся игра будет такой. Ваша задача выжить, убивая всех на своем пути. Когда достаточное количество врагов будет убито, ворота откроются, на это будут указывать диалоги членов отряда или вы можете центрировать камеру на том, куда дальше идти. Убейте оставшихся врагов и пройдите к следующей области через ворота.
Ваши AI-товарищи по команде не будут автоматически координировать свои атаки с вашими. Вы можете приказывать им как атаковать, так и защищаться. Но я не использовал защиту, пусть лучше атакуют сами.
 В общем, вы должны видеть с кем борются члены вашего отряда, и помогать им в случае чего (даже Фарина могут легко свалить), тем самым поддерживать темп сражения. Как только станет чисто, осмотрие сундук с сокровищами до более дальней стороне за рухнувшей стеной (это крайне левое положение, если смотреть относительно входной двери).
Подземные тоннели
 Вы, вероятно, пройдете через небольшие ворота, которые ведут вверх по лестнице… но сейчас вы попадете в яму под землей. Справа вы увидите светящийся символ на стене. С помощью Андриэль вы можете бросить заклинание и получить некоторые спрятанные ништяки.
Вы попадете во вторую область в подземных тоннелях, оказавшись под каменным мостом. На вас нападут десятки гоблинов, таких же, как и на улице. Как только вы их убьете, дальние ворота откроются. По пути старайтесь собирать все что можно. Так в противоположном углу есть сундук. Тем не менее, пройдите через ворота, чтобы продолжить.
Освобождение Белерама
 Вы окажетесь на улице с кучей гоблинов и прокованному в центре двора орлу. Ваша цель – спасти орла, сломав 4 цепи. Скоординируйте действия со своими товарищами таким образом, чтобы пока те атакуют гоблинов, вы сломали цепи. Или сначала всех уничтожьте, потом освободите орла. Не важно. Необходимо сломать каждую цепь один ударом.
Как только орел окажется в воздухе, вернитесь к вашим товарищам по команде и приготовьтесь к новой партии гоблинов. Два типа гоблинов нападут на вас здесь: бронированные и обычные, которые могут быть уничтожены в ближнем бою или на расстоянии. Сосредоточьтесь на первом типе, так как они наиболее сильные и могут стать неприятностью. Если вы убьете всех бронированных гоблинов, то остальные не будут представлять большой угрозы.
 Когда все гоблины будут уничтожены начнется кат-сцена и вы будете говорить с орлом. После этого закончите разбивание ящиков и прочие грабежи, и пройдите через арки. Прямо вы увидите белое свечение на земле. Это позволяет делать некоторые покупки или можно телепортироваться в Бри. Вы можете отправиться туда, чтобы принести Отто некоторое ненужное вам оружие, для выполнения квеста “Арсенал Отто”. Обратно же вы телепортируетесь в эту точку, у вас не будет необходимости проходить всю локацию снова.
От свечения поднимитесь по лестнице. Вы получите отчет о проделанной работе и сможете поменять персонажа.
Зубчатые стены
 Идите вдоль стены, Белерам будет летать вокруг, а ваше цель убивать всех и скидывать катапульты. Вскоре после начала, вы встретитесь с вашим первым боевым магом и с несколькими его приятелями. Очистите область и скиньте с обрыва военную машину слева. Сделайте так, чтобы продолжить.
Следующий бой (на второй военной машине) будет немного сложнее, потому что вы будете иметь дело с двумя гоблинами-магами. Убейте их в первую очередь, затем тех, кто пришел к ним на помощь. Скиньте вторую катапульту, для продолжения.
Далее вы узнаете, что нужно сделать, чтобы призвать Белерама, когда дела пойдут совсем худо. Орла можно призвать только на открытой местности, но не слишком полагайтесь на него.
Внешняя помощь
Настало время найти сыновей Эльронда. Путь является линейным, и вы скоро пройдете вглубь руин. Призовите Белерама, когда будете иметь дело с деревянными воротами, чтобы тот помог зачистить территорию. Перед тем, как пройти через большие деревянные ворота, идите в противоположном направлении, чтобы найти небольшую площадь во дворе с некоторой добычей.
 Продолжайте идти дальше, пока не столкнетесь с другой засадой, когда противник стреляет из катапульты. Используйте Белерама, чтобы разобраться с ней, сами в этот момент уничтожайте других гоблинов. Вы можете захватить осадное оружие и стрелять и врагам. Взрывная волна наносит больше урона и избавит вас от необходимости тратить могущество Андриэль, если вы играете за нее.
Когда местность будет зачищена, вам не дадут конкретных указаний о том, куда надо идти. Вы заметите башню со множеством лестниц, ведущих в другое здание. Так вот вам туда.
Убейте тролля
 Оказавшись внутри, вы сталкнетесь с вашим первым серьезным противником. Это большой и ужасный тролль. Он сражается достаточно агрессивно, чтобы нападать на него вот так вот в лоб. Если вы играете за Эрадина, то отойдите в сторону и стреляйте из лука по троллю хоть целый день. С Андриэль вы можете сделать тоже самое, пока у нее заполнена шкала могущества.
Между тем Фарин будет атаковать в ближнем бою, да и Андриэль когда закончится могущество. В любом случае атакуйте, но следите за движениями тролля. Когда он размахивается рукой, чтобы ударить, делайте перекат (по умолчанию пробел на ПК, B на X360 или круг на PS3). Когда вы в анимации переката, вы неуязвимы. Как только вы снова на ногах, продолжайте бить врага. Фарин и Андриэль (да и Эрадин, если вам из лука стрелять скучно) могут делать перекат-атака-перекат и т.д., пока не запинаете тролля толпой. Бедный тролль.
Внутренняя помощь
После убийства тролля появится кат-сцена, и вы окажетесь во внутренних палатах Форноста. Сыновья Эльронда помогут вам справиться с первой волной врагов, но потом они оторвутся от вас, в поисках маршрута. К счастью, здесь есть военная машины, садитесь поудобнее, начинается тир.
Перед третьей волной, два орка попытаются ударить тебя с тыла. Уничтожьте их, затем снова берите под управление катапульту, расстреляйте всех остальных.
 Следуйте в область за открытыми воротами. Появится новый тип врагов – взрывающиеся гоблины. Они уничтожаются любым оружием дальнего боя, достаточно одного выстрела.
В конце этого пути, казалось бы, тупик, но есть небольшой красный шар рядом со стеной. Выстрелите по нему оружием дальнего боя, и он взорвется (не стой слишком близко, иначе придется собирать куски брони и ваши почки). Идите через появившееся отверстие.
В следующей зоне вы будете иметь дело с военной машиной, но враг, который ей управляет, защищен сферой мага. Так что либо звоните Белераму, либо как-то уклоняйтесь, пока не достигните лестницы, а затем вручную всех там перебейте. Потяните за рычаг, чтобы открыть ворота.
Садитесь за катапульту, стреляйте по всему что движется. Очевидно, некоторые враги все равно будут проскакивать, чтобы ударить вас со спины, поэтому время от времени придется покидать катапульту и сражаться вручную.
После того, как достаточное количество врагов будет убито, ворота полностью откроются. В этот момент оставшиеся враги волшебным образом исчезают, так что вы можете свободно продолжить идти.
Очередная засада
Далее вы окажетесь в ловушке на мосту. Около шести врагов будет в ближнем бою. К счастью, вы можете отстрелять их, когда они только карабкаются по стенам, это занимает около 5 секунд, чтобы добраться до вас. Один выстрел, один труп за пять секунд? Да легко!
 После трех волн (слева, справа, одновременно с двух сторон), появится новая волна гоблинов и орков. Уничтожайте всех, кто рядом с вами, применяйте навыки. Как только волна будет уничтожена, вы сможете свободно продолжать идти через мост.
Далее будут какие-то два нелепых врага на башне для лучников слева. Что делать вы знаете. Перед тем, как взорвать красную штуку, обойдите башню лучника, там будет луч для телепорта. Если нужно починить оружие – сгоняйте в Бри.
 Взорвите башню и идите к рычагу и воротам. Как только ворота закроются, садитесь за катапульту и стреляйте по вновь прибывшим врагам (они лезут из того места, где ворота закрылись). Если ваши кореши попадают под обстрел катапульты, ничего страшного, вы их не повредите.
Вторая волна почти такая же, а вот третья снова пришлет взырвающихся тварей. Но вы же за катапультой? Стреляйте по всему, что движется, а если кто проскочил и пытается ударить вас с тыла, покидайте катапульту и сражайтесь.
Если эта волна останавливается, а следующая не запускается, возможно, это из-за того, что остался один лучник за колонной над воротами. Проверьте это.
Пятая волна не должна доставить трудностей. Будет несколько лучников в диапазоне башни, но вы быстро с ними справитесь. Далее сыновья Эльронда поднимут ворота, и вы сможете двигаться дальше.
 Еще одна засада, и вы, наконец, сможете покинуть эту область. Здесь сложность лишь в гоблине-маге, который под магическим щитом. Или сами пробирайтесь к нему, либо воспользуйтесь Белерамом, что намного безопаснее. Кроме того, здесь нет катапульты, поэтому вас никто не сможет обстрелять. Уничтожьте всех, и ворота в цитатедль откроются. Появятся трое врагов, убейте их и идите внутрь.
Цитадель
 Сначала все довольно просто. Вы столкнетесь с одной военной машиной, которая расположена таким образом, что Белерама туда не послать. Придется действовать вручную: либо оружием дальнего боя, либо подбираться к врагам поближе и драться в ближнем бою.
После этого продолжайте идти вперед, пока не появятся враги на дальней стене. Здесь много пылающих врагов, поэтому рекомендую заняться ими в первую очередь. Одна из тактик, которую вы можете попробовать, это, когда они приближаются к вам, чтобы взорвать, удерживайте блок и делайте кувырок.
Когда волна завершится, двери Цитадели откроются. Появится еще несколько врагов, включая мага, который укроется под защитным барьером, но это для вас уже не проблема.
Защитите эльфов
Когда вы подойдете к главным воротам Цитадели, сыновья Эльронда попытаются снять заклинание и разблокировать вход внутрь.
Десятки врагов будут пытаться убить эльфов, кторые, в отличие от вас, не могут быть возрождены. Ваш отряд должен защищать их, шкала их здоровья расположена в верхней центральной части экрана. В течение первых нескольких волн старайтесь сражаться с противником как можно агрессивнее, не подпуская их к нашим союзникам.
Начиная с четвертой волны, перемещайтесь в разные углы, чтобы отражать нападение с двух сторон. Вы можете находиться рядом с эльфами, но имейте ввиду, что если вы находитесь к ним слишком близко, а враг вас бьет, то удары могут достаться и эльфам. Если враги направляются к эльфам, бейте их сзади, это привлечет их к вам.
 Последним врагом здесь будет тролль. К этому времени большинство более слабых врагов будет уничтожено. Тролль обычно действует противоположно своим предшественникам, он будет игнорировать вас и направится к эльфам. Отличная возможность призвать Белерама, который пусть и не убьет вражину, но сможет нанести серьезный урон, прежде чем вы переведете дух и броситесь в атаку.
Используйте ту же тактику, что и раньше. На этот раз дело должно пойти быстрее, не потому что Белерам сделает часть работы, а потому что ваш уровень будет выше, чем в прошлый раз. Используйте любую атаку, и если вы находитесь слишком близко, готовьтесь сделать перекат, когда тролль начинает замахиваться. Все просто.
Как только тролль и все остальные будут мертвы, вы получите кат-сцену. В основном в ней Белерам будет говорить, что не сможет следовать за вами внутри Цитадели. Так что можете не расчитывать на его помощь. Идите внутрь Цитадели.
Победите Тарзога
Сразу слева от вас, будет телепорт, где вы сможете сбыть награбленное. Путь является линейным, так что просто следуйте за сыновьями Эльронда вверх по лестнице.
После кат-сцены, вы будете иметь дело с боссом по имени Тарзог. Он довольно сильный, так что его уничтожение займет некоторое время. Начните с обстрела из оружия дальнего боя, прежде чем он спрыгнет с балкона.
Если вы не гном, то сосредоточьтесь на дальних атаках, а когда появится желтая метка, воспользуйтесь этим, чтобы провести специальную атаку и нанести больший урон.
 Если вы сражаетесь в ближнем бою, то, как только Тарзог поднимает свое оружие над головой и кричит, то это значит, что пора уворачиваться. В общем, то же самое что и с троллем. Уворачивайтесь от ударов и бейте когда есть возможность.
Он начнет вызывать других орков примерно после первых тяжелых атак. В этот момент, пусть ваши товарищи возьмут их на себя, вы же сосредоточьтесь на Тарзоге, ведь, чем быстрее он ляжет, тем меньше подкреплений призовет.
Тарзог имеет 3 основные атаки, которые он будет использовать: AoE атака, прыжок и сброс. Первая атака самая опасная, поэтому старайтесь уклоняться, когда он поднял свой меч и пытается размахнуться.
Продолжайте атаку-кувырок-атаку, пока не убьете босса. До этого просто игнорируйте его помощников, но убедитесь, что члены вашего отряда в строю. После того, как вы убьете Тарзога, разберитесь со всеми остальными.
Table of Contents
- Introduction
- Author’s Note 09/05/15
- Gameplay
- Controls
- Combat Tips
- Character Information
- Eradan, the Ranger
- Farin, the Champion
- Andriel, the Lore-master
- Walkthrough
- Chapter 1 – Fornost
- Chapter 2 – The Barrow-downs
- Chapter 3 – The Ettenmoors
- Chapter 4 – Mount Gundabad
- Chapter 5 – Mirkwood
- Chapter 6 – Urgost’s Lair
- Chapter 7 – The Siege of Nordinbad
- Complete Quest List
- Main Quests
- Side Quests
- Challenge Missions
- Osgiliath
- Lorien
- Equipment and Items
- Weapons
- Armor
- Armor Sets
- Items
- Further Studies
- Beastiary
- Achievements/Trophies
- FAQs
- Copyright & Disclaimer
Introduction
Version History
- Version: 0.75 – 1/9/15
- Submitted to GameFAQs
- Completed Game Walkthrough Chapters 1-6
- Completed Chapters 1-6 Quest Lists
- Completed Character Stats and Initial Equipment
- Completed Achievements/Trophies
Future Updates
- Planned Updates
- Game Walkthrough Remaining Chapters
- Challenge Missions
- More Equipment and Item Detail
- Character Ability Trees
- Improved Beastiary
- FAQ Section
- Considered Updates
- Improved Gameplay Section
- Heroic/Legendary Side Quest Experience Reward Data
Hello! Welcome to my complete walkthrough and guide to Lord of the Rings: War in the North. When I started replaying this game after some time, I wanted to find a quick guide that would help me keep track of all the Side Quests within the game, but was unable to find something I liked. As a result, I planned on making one of my one. So, this began as a list of Side Quests, how to begin them, their objectives, and rewards. I came to realize there weren’t any guides or walkthroughs either that I liked, so I then decided I might as well try my luck at creating a complete guide which which would meet my approval.
I tried making this guide multi-platform to cover the Xbox 360, Playstation 3, and PC versions where I could, though the guide was written while playing through the 360 version. Mentioning this just in case there are any minor differences between platform versions, though I doubt it, and in case any controls are mentioned during the walkthrough. The Tutorial Messages were taken directly from the 360 version of the game, and so they may mention 360 controls. The Walkthrough and Quest Guide was written with new players in mind and takes information (such as experience rewards) from the Easy/Normal difficulties. However, experienced players may still find many sections of this fairly useful.
Thanks for reading.
Author’s Note 09/05/15
I’m sorry for not updating this recently, I haven’t had much time available to work on this. I do plan on improving and finishing this up, especially the walkthrough of the final 3 chapters of the game. Thanks for being patient!
Gameplay
In Lord of the Rings: War in the North, you are part of a small group of warriors who combat the forces of evil in the northern reaches of Middle-Earth. You control one character at a time, though you are able to choose between 3 and switch at the conclusion of a level, and fight your way through the story. As you progress, your characters can level up, increasing their abilities. Another key aspect to the game is finding equipment. There are many weapons and armor pieces found in the game and the player must continually search for better equipment to continue fighting their enemies.
Controls
| Controls (360 and PS3) | ||
|---|---|---|
| Button (360) | Button (PS3) | Effect |
| X | Square | Basic melee attack |
| Y | Triangle | Heavy melee attack |
| B | Circle | Dodge |
| A | X | Interaction, item selection, proceeding through checkpoints, revival |
| Left Stick | Left Stick | Moving |
| L3 | L3 | Reset the camera |
| Right Stick | Right Stick | Rotate camera |
| R3 | R3 | Hold to view compass and current objective |
| LB | L1 | Block |
| RB | R1 | Sprint |
| LT | L2 | Hold to enter ranged mode |
| RT | R2 | Display unlocked melee skills, fire while in ranged mode |
| Start | Start | Access the pause menu |
| Back | Select | Access your Inventory, Items, Skills, Quests, and Stats |
| D-Pad Right | D-Pad Right | Use health potion |
| D-Pad Left | D-Pad Left | Use power potion |
| D-Pad Up | D-Pad Up | Call an ally to attack |
| D-Pad Down | D-Pad Down | Call an ally to defend |
| Controls (PC) | |||
|---|---|---|---|
| Button | Effect | Button | Effect |
| Left Click | Basic melee attack | 1 | Use character skill |
| Right Click | Heavy melee attack | 2 | Use character skill |
| Spacebar | Dodge | 3 | Use character skill |
| Enter | Interaction, item selection | 4 | Summon Beleram |
| WASD | Moving | 5 | Use health potion |
| G | Reset the camera | 6 | Use power potion |
| Mouse | Rotate camera | C | Call an ally to attack |
| T | Chat | Z | Call an ally to defend |
| Q | Hold to view compass and current objective | U | Open Equipment Inventory |
| Left Ctrl | Block | I | Open Items Inventory |
| Left Shift | Sprint | K | Open Skills Page |
| Left Alt | Hold to enter ranged mode | L | Open Quest Log |
| Esc | Access the pause menu | O | Open Stats Page |
| Tab | Access your Inventory, Items, Skills, Quests, and Stats | E | Interaction, revival |
Combat Tips
Character Information
A character has numerous stats which affect their combat ability. Upon level up, a player may place 3 stat points in any way onto their Strength, Dexterity, Stamina, and Will stats, which all affect different things. A list of stats is listed below.
| Stat | Description |
|---|---|
| Health | The amount of damage a character can take before being defeated. |
| Power | Used to perform special skills, which deplete it. |
| Strength | Increases melee weapon damage. Certain equipment may require high Strength levels. |
| Dexterity | Increases ranged weapon damage. Certain equipment may require high Dexterity levels. |
| Stamina | Increases your maximum Health. Certain equipment may require high Stamina levels. |
| Will | Increases your maximum Power. Certain equipment may require high Will levels. |
| Melee | Damage your current melee attacks will do. Determined by Strength stat and current equipment. |
| Ranged | Damage your current ranged attacks will do. Determined by Dexterity stat and current equipment. |
| Armor | A character’s resilience to damage. Determined by current equipment. |
Eradan, the Ranger
One of the Rangers of the North, secret protectors of the lands once ruled by their ancestors. The life of a Ranger is a hard one; to survive he has mastered many skills. Always outnumbered, he has learned evasion tactics, allowing him to take enemies by surprise or to escape from a tight spot. Eradan is a master archer, able to bring down foes from afar. And when stealth and archery are of no avail, he is more than capable with weapon and shield, dual-weapons, or two-handed swords.
Weapons: 1-Handed Sword, 1-Handed Axe, 1-Handed Blunt, 2-Handed Sword, Shield, Bow
Eradan is a more balanced character than his companions, Farin and Andriel. He is often considered weaker, but is capable of using a variety of weapons and is useful with a bow. He starts with a higher Dexterity stat than the other characters. Eradan is also capable of dual-wielding one-handed weapons, which allows for fast attacks and more elf-stone slots. Though often overlooked, Eradan’s Evasion ability really starts to shine on the harder difficulties. Eradan is able to find hidden Ranger cache’s throughout the world, or ‘track’ previous visitors to an area to find chests or hidden areas, which Farin and Andriel are unable to do.
Initial Stats
| Stat | Points |
|---|---|
| Health | 100 |
| Power | 70 |
| Strength | 11 |
| Dexterity | 12 |
| Stamina | 10 |
| Will | 9 |
| Melee | 56-70 |
| Ranged | 97-113 |
| Armor | 44 |
Initial Equipment
| Slot | Equipment |
|---|---|
| Headpiece | None |
| Shoulders | None |
| Body | Light Leather Armor |
| Amulets | None |
| Gloves | None |
| Ranged Weapons | Light Bow |
| Right Hand Weapon | Battleworn Longblade (2-handed) |
| Left Hand Weapon | Battleworn Longblade (2-handed) |
| Right Hand Ring | None |
| Left Hand Ring | None |
| Leggings | Leather Leggings |
| Boots | Travel-worn Boots |
| Items | Arrows x40, Health Potion x2, Power Potion x2 |
Ability Trees
Farin, the Champion
A Champion of the Dwarf-realm of Erebor. From his first taste of war at the Battle of Five Armies, he has been one of the foremost defenders of his homeland. A true son of a warlike race, Farin is skilled in the use of all melee weapons and adept with a crossbow as well. While he strikes punishing blows, his greatest strength lies in his ability to endure harm. In battle, Farin is an unyielding rock upon which waves of enemies break. The sound of his fierce war-cry bolsters his allies, even as it strikes fear into the heart of his enemies.
Weapons: 1-Handed Sword, 1-Handed Axe, 1-Handed Blunt, 2-Handed Sword, 2-Handed Axe, 2-Handed Blunt, Shield, Crossbow
Farin is the melee expert character of the group, capable of using any melee weapons in the game, aside from staffs. He starts with slightly more Health than the other characters and has the highest Strength Stat. Farin seems to be a player favorite due to his in your face combat style and strong combat skills, such as War Cry and Explosive Bolt. However, on Legendary difficulty, he seems to be one of the high risk, high reward style characters. He has no means of protection from powerful Legendary enemies and utilizes kill or be killed strategies. Farin can break down certain walls to reveal secret areas, which often have chests or other item containers. He can also find Ore in some areas, which can be sold to obtain fast money.
Initial Stats
| Stat | Points |
|---|---|
| Health | 105 |
| Power | 73 |
| Strength | 12 |
| Dexterity | 9 |
| Stamina | 11 |
| Will | 10 |
| Melee | 58-73 |
| Ranged | 88-106 |
| Armor | 44 |
Initial Equipment
| Slot | Equipment |
|---|---|
| Headpiece | None |
| Shoulders | None |
| Body | Worn Leather Armor |
| Amulets | None |
| Gloves | None |
| Ranged Weapons | Light Crossbow |
| Right Hand Weapon | Dwarf-axe (2-handed) |
| Left Hand Weapon | Dwarf-axe (2-handed) |
| Right Hand Ring | None |
| Left Hand Ring | None |
| Leggings | Worn Leather Leggings |
| Boots | Dwarf-boots |
| Items | Bolts x40, Health Potion x2, Power Potion x2 |
Ability Trees
Andriel, the Lore-master
An Elven Lore-master, schooled in ancient wisdom by Elrond himself; yet she is no meek scholar. In her hands a simple staff becomes a deadly weapon, not only because she wields it with Elven-skill, but also because she can use it to focus her power, striking down enemies near and far. But as capable as she is in combat, Andriel’s true strength lies in her power to preserve and protect her allies, and with her arts she can create shields of light which heal and restore those within.
Weapons: Staff, 1-Handed Sword, 1-Handed Axe, 1-Handed Blunt
Andriel is the magic specialist of the group, with powerful magic spells. She has the most limited weapon pool of the 3 characters and the lowest Health, but she has the highest Power rating and the highest Will. Andriel can be surprisingly versatile and tough, capable of both aggressive and support styles of gameplay. Her Sanctuary skill is probably her most famous, offering protection and health recovery and can also be a deadly and powerful attack. Unlike the other two, Andriel is unable to equip a ranged weapon, but instead uses magic spells which use up her Power. This means she never has to worry about arrow or bolt ammunition, but needs to keep a better eye on her Power. Andriel is capable of finding alchemic ingredients to create potions and can sometimes find glyphs on walls, which she can use her magic to remove and reveal hidden areas.
Initial Stats
| Stat | Points |
|---|---|
| Health | 95 |
| Power | 125 |
| Strength | 10 |
| Dexterity | 11 |
| Stamina | 9 |
| Will | 12 |
| Melee | 49-59 |
| Ranged | 57-69 |
| Armor | 44 |
Initial Equipment
| Slot | Equipment |
|---|---|
| Headpiece | None |
| Shoulders | None |
| Body | Light Woven Robe |
| Amulets | None |
| Gloves | None |
| Ranged Weapons | None |
| Right Hand Weapon | Traveller’s Staff (2-handed) |
| Left Hand Weapon | Traveller’s Staff (2-handed) |
| Right Hand Ring | None |
| Left Hand Ring | None |
| Leggings | Woven Leggings |
| Boots | Padded Boots |
| Items | Health Potion x2, Power Potion x2 |
Ability Trees
Walkthrough
These walkthroughs parts will be organized so that each town/prologue part and each level have their own subsection. The game considers each section between the glowing blue walls that you must proceed through as a “Part,” so there could be up to 30 for each Chapter. My way makes the amount of sections drop in number to 3-7, generally.
Main and Side Quests are listed for each section, but only the objectives involved with each level. For a complete quest list in one place, check here.
Experience rewards for Side Quests are difficulty dependant. The rewards currently listed are for the Easy and Normal difficulties. Maybe, in time, I will record what the experience rewards are on Heroic and Legendary difficulty settings.
Chapter 1 – Fornost
Part 1: Bree
Bree is an isolated, but important village west of the Misty Mountains and east of the Shire.
Built at the intersection of two roads, the Great East Road and the North Road, Bree has been an important stopping place for travelers for some three thousand years. It is the only settlement where Men and Hobbits live side by side in harmony and is famous for its ancient inn, the Prancing Pony.
Characters
- Aragorn
- Otto Aster
- Rowlie Appledore
- Tedder Hedgerow
- Barliman Butterbur
- Elmund Brushwood [smith]
- Adalgar Oldbank [shop]
- Grof
- Idona Bellflower
- The Southerner
- Harley Bramble
Walkthrough
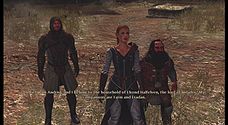
The game begins with an introduction by Gandalf, mentioning famous heroes such as himself, Aragorn, and Frodo. He mentions that there are other heroes as well, such as those who fought the battles in the northern parts of Middle Earth.
You find yourself in Bree, speaking to Aragorn. You have just arrived after your band of Rangers was defeated by nine Black Riders on their way to the Shire. You fill in Aragorn with the news and also mention a shady character you witnessed one of the Black Riders speaking to, a man named Agandaur. Aragorn immediately tasks your group with foiling Agandaur’s plans in the nearby ruins of Fornost. Thus begins the quest of Eradan, Farin, and Andriel.
Now in control of your character, you start the game in the Prancing Pony, the inn in Bree. You start with 252 silver coins (strange number). The inn, more specifically, the bar, is full of people. Aragorn is sitting at a table in front of you, where you can sit back down and speak to him some more, if you wish, to gain a better understanding of the events taking place. You can also speak to Barliman Butterbur, the bartender/innkeeper, about various subjects and recent events.
Sitting on a stool at the bar is a Hobbit named Tedder Hedgerow, who will offer to play a riddle game with you. He wants to bet money, expecting you will be easy to beat. However, you can win up to 800 silver coins from him. Refer to the Side Quests section for his riddles and their answers.
Otto Aster is standing by the fireplace, who will begin the Side Quests Forewarned is Forearmed and Otto’s Arsenal. Near the door is a floating white glowy thing, where you can hit A to “Inspect.” Inspect spots will often give you slightly more insight on your surroundings. On the opposite side of the doorway and down the hall, there is a mirror hanging on the wall which will let you change the appearance of your currently controlled character. Standing in front of the stairway is Rowlie Appledore, who will give you the Rowlie’s Gift Side Quest.
The Forewarned is Forearmed and Rowlie’s Gift Side Quests can be completed immediately. Follow the instructions below to finish them. Outside of the inn, after leaving the alley, you will be on the road in the middle of town. To the left, you can find Elmund Brushwood, a smith who can repair your equipment. Weapons and armor have a durability rating which decreases as it is being used. When low, the equipment will need repair. On the opposite side of the street, there is a building with another Hobbit inside, Adalgar Oldbank, who functions as a merchant and lets you buy or sell items.
Up the hill and to the left, you can find Harley Bramble and The Southerner talking. Speaking to The Southerner will show that he is trying to recruit Harley into some gang and he mentioned being able to hurt people. As we are the good guys, we intrude in this conversation. Choosing the more direct and hostile sounding answers such as “What was that about hurting people?” and “I don’t like your tone” will cause you to punch the Southerner in the face, causing him to threaten the town and then walk away. This will give you 50 experience points. If you save and reload the game, it seems you can continually redo this event to obtain free experience points, though its such a small amount and takes some time that it probably isn’t worth doing after reaching level 2. The game uses an autosave feature, so you have to do something which causes the game to save (so you don’t lose the experience by quitting). This can be done by speaking to the smith, bringing up the repair menu, exiting the menu, and walking away.
After punching The Southerner and doing the Side Quests you desire, there is nothing else to do in Bree other than shop, so head up the hill and down the road until you reach a glowing, sparkly, blue wall. These walls let you advance to the next level or part of a level by hitting A when your party is near. I will call them checkpoints. This one will take you to the map. Select Fornost, as its the only option aside from Bree.
Main Quests
Fornost – Aragorn has asked you to distract the enemy forces gathered at Fornost to prevent them from joining the hunt for the Hobbit he is seeking. It is an imposing task for just the three of you, but Aragorn has assured you it is a mission of vital importance.
- START: Automatically started as you speak to Aragorn at the start of the game
- Travel to the ruined city of Fornost
Side Quests
Rowlie’s Gift – Rowlie Appledore’s childhood sweetheart, Idona is betrothed to the smith, Elmund Brushwood; Rowlie wishes to present Idona with his mother’s locket and his declaration of love. Unfortunately the locket is broken and can only be repaired by Elmund. As a stranger in town, Rowlie believes you will be able to get the locket repaired and present it to Idona without arousing suspicion.
- START: Speak to Rowlie Appledore inside The Prancing Pony in Bree
- Take the locket to Elmund Brushwood for repairs (costs 1 silver coin)
- Present Rowlie’s locket to Idona Bellflower
- Return to Rowlie with Idona’s answer
- Rewards: 100 experience, 50 silver coins
Forewarned is Forearmed – Otto Aster is concerned by rumors of growing danger in the outside world. Fearing Bree is ill-prepared to face trouble, he has asked you to persuade a Dwarf-merchant to supply the town with weapons.
- START: Speak to Otto Aster inside The Prancing Pony in Bree
- Speak to Grof
- Return to Otto Aster
- Rewards: 100 experience, Begin Side Quest – Otto’s Arsenal
Otto’s Arsenal – Otto Aster is concerned Bree could face trouble before Grof returns with arms; he has offered to buy any spare weapons you may find.
- START: Complete Side Quest – Forewarned is Forearmed and speak to Otto Aster
- Bring extra weapons to Otto Aster [10 melee weapons, ranged weapons, or shields]
- Rewards: Very small payment for every weapon brought to Otto Aster, 100 experience, Choice of Reward from Otto Aster item
Tedder Hedgerow’s Riddles – Tedder Hedgerow loves riddles, but all the townsfolk of Bree have already heard his. Since you are a stranger and have not heard them, he believes he can stump you. He is willing to bet money on this claim. This is not an official Side Quest and does not appear in the quest log, but it is a good way to earn some money at the start of the game.
- START: Speak to Tedder Hedgerow in The Prancing Pony in Bree
- Choose the amount to wager, and then answer the riddles. He can ask you up to five riddles, offering double or nothing each time you answer correctly.
| Riddle | Answer |
|---|---|
| What belongs to you that others use more than you do? | Your name |
| I’m found deep in the earth. When beaten and burned I can become a blood thirsty killer. What am I? | Iron |
| The more of these you take, the more you leave behind. What are they? | Footsteps |
| Always running, never walking, Often murmuring, never talking. Has a bed but never sleeps, Has a mouth but never eats. What is it? | A river |
| What is it that’s so fragile even saying its name can break it? | Silence |
| My life can be measured in hours, I serve by being devoured. Thin, I am quick, Fat, I am slow, Wind is my foe. What am I? | A candle |
| Each morning I appear to lie at your feet, All day I will follow no matter how fast you run, Yet I nearly perish in the midday sun. What am I? | My shadow |
| At night they come without being called. By day they are lost without being stolen. What are they? | The stars |
| What is it that you must keep after giving it to someone else? | Your word |
| The more you have of it, the less you see. What is it? | Darkness |
| I’m always hungry, I need to be fed. The finger I touch, will soon turn red. What am I? | Fire |
- Rewards: Up to 800 silver coins
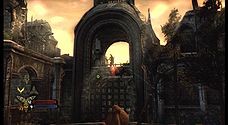
Part 2: Main Gate
Long the chief city of the northern Dunedain kingdom of Arnor, Fornost was conquered by the Witch-king of Angmar over a thousand years ago. His dominion was short lived however and he was in turn driven from the city by the forces of Gondor.
Fornost was never reoccupied and fell into ruin, becoming a place of dread. The people of Bree know it as Deadman’s Dike and they believe the ruins to be haunted. Only Rangers dare to tread there now.
Walkthrough
Secrets:  0/2 Eradan
          0/2 Farin
          0/1 Andriel
Enemies: Goblin Swordsmen, Goblin Archers, Feral Goblins
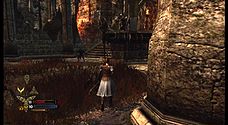
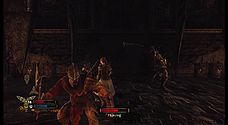
Now that we’ve entered Fornost and out of the town, we will be in combat quite often. If you run forward and up the stairs, you will quickly come across 2 Goblin Swordsmen. They aren’t difficult and should be dispatched easily. Dead enemies often drop some loot, so run over their bodies to pick it up. When you reach the top of the stairs, 2 more Goblin Swordsmen will attack you.
From this point onwards, there will be barrels and boxes around the maps that you can break by attacking them. When broken, these can drop silver coins and various items. I recommend smashing every barrel and crate you can find, not only for the basic items, but in Fornost (and later, the Barrow-downs), you will be able to find Westernesse Artifacts, which will begin the Work of Westernesse Side Quest. You will need to find three of these artifacts, so smash everything you can! Starting on this level as well, if playing as Andriel, you will be able to pick up flowers and mushrooms, which can be used to create various items such as potions. There is an Achievement for creating potions, so be sure to find as many as you can!
Go around the ruined well and to the stairs. There will be a checkpoint. When you click to proceed, you will be in a courtyard. Numerous Goblin Archers will begin to fire at you from the opposite side, from within the ruins and by the stairs. Goblin Swordsmen and more Goblin Archers will appear on your left as well. More goblins will come for a while as you kill them off. Eventually Eradan will mention a gate opening which you can then go through after defeated what’s left of the Goblins. Before you go, if you are playing as Eradan, you will see blue footsteps to the right of the stairs which lead into the building. Follow these footsteps to find an Eradan specific secret, a hidden supply left by another Ranger! Each character has secret areas or supply caches which only they can find. Inside the building on the left, if you are playing as Farin, you will be able to see some golden cracks in one of the walls. When inspected, Farin will smash the wall open and reveal a chest. If playing multiplayer, other players will also now have access to this chest.
Secrets:  1/2 Eradan
          1/2 Farin
          0/1 Andriel
Throughout the courtyard and buildings, there are many barrels and crates, and also several chests which can be opened to find equipment, items, and coin. Once you have collected everything, move through the now opened gates on the left side of the area. It takes you through a building. It is a single path down a hallway, but the floor will crumble beneath you and you will fall into a lower level. Down the next hallway, if you are playing as Andriel, a portion of the wall will be pulsing with a blue light. When inspected, Andriel will reveal that she can move through it. This is Andriel’s first secret of the game. There will be barrels and crates to destroy, mushrooms to collect, and a chest to loot.
Secrets:  1/2 Eradan
          1/2 Farin
          1/1 Andriel
Down the hallway a little further there will be more golden cracks for Farin to destroy. Gather the items from behind the wall.
Secrets:  1/2 Eradan
          2/2 Farin
          1/1 Andriel
At the end of the hallway, you will come to a large open chamber with 2 floors. The lower floor is in the center while the upper floor goes around on the outside, with several bridges passing through. There are also several staircases traversing between the two. Follow the path around the room until you are blocked by rocks and turn left towards the bridge and staircase. A small Feral Goblin will appear and attack. He is easy to defeat and will hardly put up a fight. Downstairs, there will be a checkpoint which you need to pass through.
Once through, a large number of Feral Goblins and Goblin Archers will begin to attack you from all directions. The Feral Goblin from before was only foreshadowing the danger to come, and this is where they prove their deadliness, by attacking in large numbers. Around the room, there will be what looks like piles of bones and dirt. These can be looted similarly to chests and typically have silver coins, potions, and arrow/bolts. The goblins will continue to attack until Andriel mentions that a gate has been opened. Finish off what’s left of the goblins and search around the room for all of the loot they left behind, as well as the bone piles and barrels. There is even a Gilded Chest in the room. These chests may offer better items and give an achievement when five of them have been opened. Opposite the entranceway, on the 2nd floor, there will be another ranger supply cache for Eradan to find. The exit is at the far end of the room, on the right side of the 2nd floor. Pressing in the right stick will point your camera in the direction of the exit, where there is a short hallway and a checkpoint, with strange sounds coming from outside. On the right, there is a small room with a chest. When ready, proceed through the wall.
Secrets:  2/2 Eradan
          2/2 Farin
          1/1 Andriel
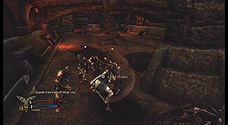
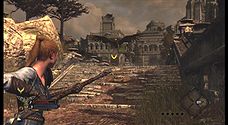
Outside at last, but what a horrible sight! The Goblins have managed to capture a Great Eagle! As you approach, the Goblins will spot you, distracting them enough for the chained down Eagle to tear one apart. Fight the Goblin Swordsmen and Feral Goblins in the courtyard and free the Eagle by attacking the chains that are keeping it in place. After defeating the initial Goblin Horde, there will be several waves of Feral Goblins who attack you and then a mix of Goblin Swordsmen, Archers, and Feral Goblins. If you are having trouble breaking the chains while fighting the Goblins, you can focus on the Goblins; they will stop coming eventually. In fact, it’s recommended as the Eagle won’t help with the fight after being freed.
After being freed, a few more Goblin Swordsmen and Feral Goblins will appear. After they are defeated, it will show a few more appear in a cutscene, but the Eagle flies down and defeats them easily. He then approaches you and begins to speak, introducing himself as Beleram. After speaking to him, search the area for loot, barrels, and crates. If playing as Eradan, you will spot blue footsteps to the right of the gate, which will lead you to a hidden chest. It’s not a secret area and all characters can access it. There is a broken wall on the left side and you can climb the rubble to enter the building. Inside this building you will be attacked by a few Feral Goblins, but not enough of them to be a real problem. There will be crates and a gilded chest inside for you to loot.
When ready, go through the gate. Straight ahead, up the stairs, there will be a thin sparkly light blue strip, similar to the walls. When close to this one, however, you are able to buy and sell items as if you were at a shop in town and allow you to teleport back to Bree if you need to. Sell any unneeded equipment and miscellaneous items to free up inventory space and then continue on, proceeding through the checkpoint up the stairs. Level completed.
Main Quests
Fornost – Aragorn has asked you to distract the enemy forces gathered at Fornost to prevent them from joining the hunt for the Hobbit he is seeking. It is an imposing task for just the three of you, but Aragorn has assured you it is a mission of vital importance.
- Find and disrupt enemy forces
- Escape the underground tunnels
- Free the captive Eagle
- Clear the courtyard of enemies
- Make your way to the battlements
Side Quests
Work of Westernesse – You have found an artifact of such quality that it is likely a relic of another age. It appears to be a component of a fine weapon; if you were to find more such artifacts a skilled smith might be able to fashion something exceptional from them.
- START: Find a Westernesse Artifact in Fornost or the Barrow-downs
- Find a second artifact
- Find a third artifact
- Show the artifacts to a master smith [Angmir or Buri]
Part 3: Battlements
Walkthrough
Secrets: 0/1 Everyone
Enemies: Goblin Swordsmen, Goblin Archers, Feral Goblins, Goblin Sorcerers
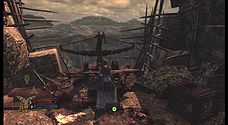
This level is quite short and can be completed quickly. At the start there will be barrels and crates to destroy. When you advance forward, a Goblin war horn will sound and you will be attacked by several Goblin Swordsmen and Feral Goblins and a new enemy, the Goblin Sorcerer! This guy likes to shoot fireballs at you from a distance, so at the first chance you get, get in close and stop him. There will be some Archers firing at you from the other side of the bridge as well. When the immediate enemies are defeated, run over the Goblin Sorcerer’s body to pick up an item he dropped, the Malignant Scroll. Finding this item begins the Side Quest Cult of the Lidless Eye. This item is the secret for the level. When clear, run over to the war machine on the ledge and repeatedly tap A to push it off.
Cross the bridge and you will run into more Goblin Swordsmen and another Goblin Sorcerer. Feral Goblins will also move in down the wall. When it is clear, push the war machine off the edge and collect items. There are some crates, a chest, and a dirt pile to loot.
Proceed forward, through the doorway and the checkpoint. There will be Goblins on the opposite side of the bridge. If you want the easy way out, at this point the game is telling you about calling Beleram to attack enemies. You receive 3 free Great Feathers, which are used to call Beleram to attack. When you hold LT or RT and then press A when targeting an enemy, Beleram will swoop down and attack. This is helpful as you will be attacked by Goblin Swordsmen while crossing the bridge, and there’s a pesky Goblin Sorcerer atop a ledge on the other side, as well as a few Goblin Archers.
When the coast is clear, smash the barrels and crates and loot the chest in the area. Proceed through the doorway to finish the level.
Main Quests
Fornost – Aragorn has asked you to distract the enemy forces gathered at Fornost to prevent them from joining the hunt for the Hobbit he is seeking. It is an imposing task for just the three of you, but Aragorn has assured you it is a mission of vital importance.
- Destroy the war machines
- Make your way to the end of the battlements
Side Quests
Cult of the Lidless Eye – You took this scroll from a Goblin Sorcerer at Fornost. Although you cannot decipher the language, there is a clear aura of menace surrounding this writing. Perhaps it would be wise to seek the advice of one learned in such matters.
- START: Find and retrieve the Malignant Scroll dropped by a Goblin Sorcerer in Fornost
- Seek counsel regarding this scroll’s strange text
Part 4: Outer Wards
Walkthrough
Secrets:  0/2 Eradan
          0/1 Farin
          0/1 Everyone
Enemies: Goblin Swordsmen, Goblin Archers, Feral Goblins, Hill Troll
At the start of the level, run down the stairs and speak with Beleram. There will be another shopping point a tad further down the path. Hopefully by now you’ve found 10 weapons or shields which you can sell to Otto. If you have, return to Bree and sell them to him, when you exit the selling menu he will thank you you and give you the item Choice of Reward from Otto Aster, the first Choice of Reward item in the game. You will be able to choose between an Amulet or a Ring with some neat little bonuses. However, these items require you to be level 9 (or 33 if playing on a later difficulty) to equip and you may need to level up some before you can use them. If you haven’t found enough weapons yet, you can finish the quest later. Return to Fornost when ready.
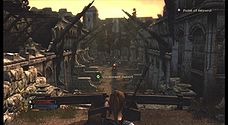
Follow the path to the right of the shopping point and you will spot 2 elves in the distance. The group decides to try and catch up with them. Following the path up the stairs, you will be attacked by Goblin Swordsmen and some Goblin Archers on top of a bridge that is above a closed gate. Summon Beleram to attack the gate, which will smash it open and kill the archers. Then finish off the Warriors that are attacking you.
After going up the last set of stairs, you can go left to find a somewhat hidden staircase and go downwards for some additional chests and loot. Eradan will see blue footsteps which will lead him to a Gilded Chest.
To the right of the large gate Beleram destroyed, there will be more blue footsteps for Eradan to follow, this time leading to a secret cache of Ranger supplies! There is also a chest nearby.
Secrets:  1/2 Eradan
          0/1 Farin
          0/1 Everyone
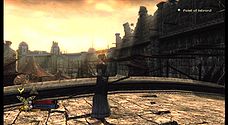
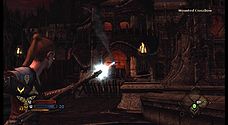
Go through the gate. You’ll hear some dangerous sounding growling, but there won’t be anything to fight. Proceed around the corner and up the stairs. There will be a Goblin manning a Mounted Crossbow, which fires dangerous exploding bolts. 3 Goblin Swordsmen and 3 Goblin Archers will also charge down the pathway at you. It would be a good idea to have Beleram take out the Goblin on the crossbow so it doesn’t blow you up while you’re fighting. Once these Goblins are defeated, more Warriors will attack and there will be several Archers firing at you from the towers and rooftops around the area. You will need to either shoot them down with a ranged attack yourself or have Beleram deal with them. You will be able to hop on to the Mounted Crossbow yourself, which can help deal with them.
There will be a fork in the road here, but continue straight towards the crossbow and clear the courtyard of Goblins. Running up the rubble of a destroyed building will let you inside to find a Gilded Chest which contains an item called Mysterious Aged Tome, which begins the Side Quest The Seer’s Words. This counts as a secret which every character can find. Near this chest is a secret cache for Eradan. In the same building, there will be some gold cracks for Farin to destroy and find a secret room. There will also be a fair amount of barrels and crates around the building courtyard.
Secrets:  2/2 Eradan
          1/1 Farin
          1/1 Everyone
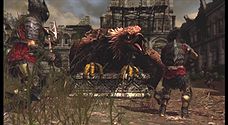
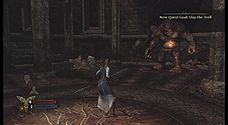
Once everything is looted, return to the fork in the road and take the unexplored path. Go up the stairs and proceed through the checkpoint, jumping down into the circular room. Once you hit the floor, a Troll will smash through the wall. This fight may be a bit tough. He wields a hammer, which he uses to attack. The Troll’s attacks will knock you down all over the place and deal a large amount of damage. It may be best to use ranged weapons to bring this giant down. Be careful though, as sometimes he can move surprisingly fast across the room when you think you’re safe with a charging attack. It may take a while, but eventually the Troll will fall. After defeating him, press the interact button to continue.
In a cutscene, the troll will attempt to get up again, only to have Farin crush his head. You will then be approached by the two elves you had been searching for, Elrond’s twin sons, who help you out of the room. Level completed.
Main Quests
Fornost – Aragorn has asked you to distract the enemy forces gathered at Fornost to prevent them from joining the hunt for the Hobbit he is seeking. It is an imposing task for just the three of you, but Aragorn has assured you it is a mission of vital importance.
- Find the sons of Elrond
- Summon Beleram to destroy the gate
- Continue the search for Elrond’s sons
- Slay the Troll
- Seek out Agandaur
Side Quests
The Seer’s Words – You discovered this aged tome amid the ruins of Fornost. It is so cracked and faded the writing is nearly illegible, but perhaps it would be of interest to one with the time and skill to decipher it.
- START: Find the Mysterious Aged Tome amidst a Gilded Chest in Fornost: Outer Wards
- Show the tome to a learned scholar
Part 5: Inner Wards
Walkthrough
Secrets:  0/2 Eradan
          0/1 Farin
          0/1 Andriel
          0/1 Everyone
Enemies: Goblin Swordsmen, Goblin Archers, Feral Goblins, Goblin Sorcerers, Goblin Sappers, Orc Soldiers
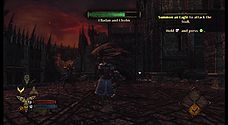
Follow the elves down the path. You will quickly run into the firing range of a Mounted Crossbow. Either shoot the Goblin or have Beleram take care of him to advance. 4 Goblin Archers will attack you from the stairs. Once defeated and you enter the courtyard, Goblin Swordsmen will begin climbing down the walls. There will be quite a few of them. If you dare, you can try using the mounted crossbow, but it does not spin in a full circle and if you are playing by yourself, you won’t have another player to watch your back.
Once this initial group of Goblins are defeated, you will be separated from the elves, goblin horns will blow, and more Goblins will come in force. They tell you to man the crossbow. It will work well for the first few waves, who all come from the same path you did, and the archer atop the roof, but once the Goblins start attacking from other directions it becomes difficult to use without someone watching your back. Eventually, a gate in the back of the courtyard will open and a few Goblin Swordsmen and an Orc Soldier will charge out. Orc Soldiers are slightly larger than the Goblin Swordsmen, but aren’t too much tougher. They fight very similarly to the Goblin Swordsmen, have a bit more health, and they may even survive a critical hit, which sometimes will only knock them to the ground, but will allow for another critical finishing move before they get up.
Once they are defeated, you are free to gather items all of the Goblins left behind. Down the pathway you came from, which heads to the Mounted Crossbow, there is a secret room for Andriel on the wall. Behind the wall is a chest and also a secret Ranger cache for Eradan. Proceed through the gate the Orc came through to continue.
Secrets:  1/2 Eradan
          0/1 Farin
          1/1 Andriel
          0/1 Everyone
Around the corner, you will be warned about seeing something. If you look, you’ll see a Goblin with a bomb strapped to its back. These are Goblin Sappers. They will attempt to get in close and explode, tossing you around and dealing heavy damage. This can work to your advantage though, as shooting them with an arrow will also cause them to explode and damage their allies.
When you pass into the next room, Goblin Sappers will begin crawling down the walls. Shoot them with your ranged attacks so they don’t get close. Once the room is clear, there is a hidden Ranger cache for Eradan on the wall.
Secrets:  2/2 Eradan
          0/1 Farin
          1/1 Andriel
          0/1 Everyone
Continuing on, more Sappers will charge at you when you turn the corner. Shoot them down. Watch out, as there is also a red bomb lying on the ground in this room. Continue up the hill. When you reach the top, there will be another bomb against the wall. Shoot the bomb, but make sure you are far enough away, and the wall will be destroyed, allowing you to move forward.
Once through the wall, you will be in range of another Mounted Crossbow. This time, however, there’s a Goblin Sorcerer who created a large circular barrier around it so you can’t hit it with your ranged attacks. Belaram can still get at it, so if you want to easy way out, summon Belaram to take out the Goblin on the turret. Run up the stairs and to the crossbow, taking out the Goblin Sorcerer if he survived Belaram’s attack and the Archers alongside him. Clear out any Goblins that are left and then pull the lever found near the mounted crossbow. This opens the gate beneath you, but the gate jams and Goblins begin to attack in force. Hop on the crossbow and take out everyone coming at you. Feral Goblins and Sappers will begin charging you from the opposite side of the area, and Archers will move onto the nearby walls to fire at you. The Sapper’s are the biggest threat, so target them first and make sure none get to you. It will be okay if a few Feral Goblins get through, your allies can take care of them. Once all of the Goblins are gone, the gate will unjam and finish opening.
You can now finally search this area for items. Up towards the beginning, where you and the Sappers came from, Eradan can spot some footsteps which will lead you through the bushes to a Gilded Chest. This counts as the secret for everyone.
Secrets:  2/2 Eradan
          0/1 Farin
          1/1 Andriel
          1/1 Everyone
Pass through the gate once everything is picked up. When you get to the bridge, the gate will close behind you. Quickly run to the far side of the bridge. This gate will be closed to, but turn around so you can see the ledges along the walls. Enemies will charge towards the bridge using these ledges, but the first enemy will appear directly above the gate and a few Feral Goblins will climb up the side of the bridge. Once these enemies are vanquished, Sappers will begin running across the ledges towards the bridge. Do not let them reach the bridge, as they will be very hard for everyone in your party to avoid should they make it. Once they are gone, more Feral Goblins will appear, distracting you from the Sappers that will continue from the ledges. Once the area is cleared, the Elves will appear to open the gate for you, allowing you through.
Head up the stairs and a Goblin Archer will fire at you from the tower. Luckily there is an explosive about halfway up the tower and if you shoot it, the whole tower comes crashing down. This also opens up a pathway for you to travel, but first, go straight ahead into a building, where there will be a shopping point. When done, climb up the ramp created by what’s left of the destroyed tower. There will be a wall which Farin can destroy to the left. Then head up to the roof to find a chest. Cross over the top of the gate and you’ll find some barrels and another chest. Head back to the gate. There will be a lever which, when pulled, will open the gate below. Head back down and through the gate.
Secrets:  2/2 Eradan
          1/1 Farin
          1/1 Andriel
          1/1 Everyone
The gate will close behind you (AGAIN!) and Goblins will attack in force. However, there’s a Mounted Crossbow directly in front of you. Hop on and prepare for some Goblin-blasting. Feral Goblins will begin crawling down the walls on the left side and an Archer will be standing on top of the ruins. Once those are taken care of, more Feral Goblins will crawl down around the gate, with more archers on top. Once this second wave is finished, Feral Goblins, Sappers, and Swordsmen will begin coming from several directions at once. Blast what you can with the crossbow but you will probably need to finish some off that got behind you on your own. The fourth wave attacks from all sides again, this time including Archers on top of the ruins. This time without the Sappers. However, a fifth wave will attack once the fourth is finished, which includes Swordsmen, Feral Goblins, Sappers, and Archers. This wave will attack with a very large number of enemies, be careful not to get surrounded! Once cleared, the elves will appear and open the gate for you. Collect all the items you can and go through the gate, crossing the following bridge.
The next area has a group of Goblin Swordsmen and Goblin Archers and a Goblin Sorcerer up the stairs. The Goblin Sorcerer creates a barrier once he spots you, so run straight towards him and finish him enough before he gets too annoying with his fireballs. You will also find some Feral Goblins and Orc Soldiers in this area. Once this area is cleared, the next gate will open and an Orc Soldier with 2 Goblin Swordsmen will attack. Once they are finished off, proceed through the gate. Level cleared.
Main Quests
Fornost – Aragorn has asked you to distract the enemy forces gathered at Fornost to prevent them from joining the hunt for the Hobbit he is seeking. It is an imposing task for just the three of you, but Aragorn has assured you it is a mission of vital importance.
- Find a route to the citadel
- Defend yourselves!
- Continue on to the citadel
- Find a way through the gate
- Proceed to the citadel
Part 6: The Citadel
Walkthrough
Enemies: Goblin Swordsmen, Goblin Archers, Feral Goblins, Goblin Sorcerers, Goblin Sappers, Orc Soldiers
When the level begins, there are several barrels and crates around the area, as well as two piles which can be looted for items. Once collected, move down the only path available to you. There will be a Mounted Crossbow targeting you. You will also be attacked by a few Goblin Swordsmen and Feral Goblins. Once cleared, a horde of Feral Goblins and Sappers will attack from the left. Shoot the Sappers from a distance and hopefully they will explode and kill the Feral Goblins as well. Once this group is defeated, a gate at the top of the stairs will open and some Goblin Swordsmen and a Goblin Sorcerer will come out. The Sorcerer will create a barrier. Charge in and take them out.
When you go through the gate, there will be some barrels and crates on your left, as well a chest with some items. To the right is a bridge. Goblin Archer will attempt to fire at you from atop the ruins on the opposite side. When you cross the bridge, a Goblin Sorcerer will appear and immediately create a barrier. He will also then summon reinforcements and more enemies will appear out of thin air! He will summon some Goblin Archers and Orc Soldiers. Once defeated, Feral Goblins and Sappers will climb down the walls and attack. Then, an Orc Soldier will open up a gate and attack, allowing you through. Go through the gate and up the stairs. There will be some barrels and a chest. Proceed through the checkpoint at the next staircase.
You will be reunited with Elrond’s sons, who attempt to open a door which is sealed by some Goblin spell. While they work on removing the seal, more Goblins attack, tasking you with defending the elves. A health bar for the elves will appear at the top of the screen. As enemies hit them, this health will drop. If it hits zero, you lose! The battle starts off with some Feral Goblins in front of you and some Goblin Swordsmen quickly join in. They will be followed by more Feral Goblins, Swordsmen, and Orc Soldiers. After a few waves of these enemies, a Hill Troll will appear. He can be easily damaged by Beleram, who won’t instantly kill him, but will severely damage him. If you don’t summon Beleram, the Troll will likely attack the elves. Some Goblin Swordsmen accompany the him. Once these enemies are defeated, someone will mention that the enemies are retreating. You won!
The elves get the gate open and you separate from Beleram, who can’t assist you indoors. When you go through the gate, the level will be completed.
Main Quests
Fornost – Aragorn has asked you to distract the enemy forces gathered at Fornost to prevent them from joining the hunt for the Hobbit he is seeking. It is an imposing task for just the three of you, but Aragorn has assured you it is a mission of vital importance.
- Fight your way to the citadel gate
- Defend the sons of Elrond
- Enter the citadel
Part 7: Citadel Tower
Walkthrough
Enemies: Tharzog, Goblin Swordsmen, Orc Soldiers
Now that you’re inside the citadel, you must begin searching for Agandaur! There is a shopping point to your left immediately once the level begins. Follow the speedy elves up the stairs and around the room until you get to a checkpoint. When ready, proceed through the wall and prepare for the first boss fight! You will be attacked by Tharzog, a powerful Orc, and his guard, a band which consists of Goblin Swordsmen and Orc Soldiers. Tharzog’s health bar will appear on the bottom of your screen. Make sure you have assigned all of your Skill Points!
| Tharzog | |
|---|---|
| Attack | Description |
| Melee Attacks | Tharzog will attack with normal melee strikes. |
| Spinning Attack | Tharzog will spin to swing his sword completely around him. |
| Jumping Attack | Tharzog will jump upwards and swing his sword downwards to attack. |
The fight with Tharzog isn’t difficult for experienced players, and although Tharzog can do some heavy damage, he is easy enough to avoid so long as you aren’t surrounded by his guard. The Goblins and Orcs which make up his guard infinitely spawn, so killing them won’t make the fight any easier, but they can get you some good experience. Tharzog’s Spinning Attack always begins with him raising his sword, which is a good way to tell when you should back away. Most of his attacks will hurt and knock you down to the floor. Don’t be afraid to use potions if you need to! There are piles which can be looted in the room which may offer additional potions. Once Tharzog is dead, you can clean up what’s left of his guard.
When you find the exit, you will confront Agandaur atop the tower in a cutscene, but he will escape. Once the scene is finished you will be taken to the map, with Sarn Ford now marked. The level will be completed when you click on a location to travel to. If you haven’t already, now would be a good time to return to Bree and give any equipment you won’t be using to Otto Aster, to finish the Side Quest Otto’s Arsenal.
Main Quests
Fornost – Aragorn has asked you to distract the enemy forces gathered at Fornost to prevent them from joining the hunt for the Hobbit he is seeking. It is an imposing task for just the three of you, but Aragorn has assured you it is a mission of vital importance.
- Find Agandaur within the citadel
- Defeat Tharzog and his guard
- Join Elrond’s sons in the pursuit of Agandaur
- Journey to Sarn Ford
Chapter 2 – The Barrow-downs
Part 1: Sarn Ford
The southern border of the Shire is formed by the river Baranduin, which the Hobbits call the Brandywine. Sarn Ford is a stony, shallow crossing of the river along the southern road that leads from the Shire to the lands beyond.
As a main entry point to the Shire, Sarn Ford was strongly guarded by the Rangers who maintained a secret watch over that land. Yet even they could not resist the combined power of the Nazgul.
Characters
- Halbarad
- Silanna
- Elaran
- Hador [smith]
- Maradan [shop]
Walkthrough
Now that Agandaur’s plans with Fornost have been stopped, the gang heads to Sarn Ford, where Eradan and the other Rangers fought the Black Riders. Once there, you will automatically start speaking with Halbarad. Once the conversation is over, the Quest “Fornost” will be cleared and the Quest “The Barrow-downs” will begin. You may speak with Halbarad again for more story and background of what’s going on in the area and world.
Looking around, you can tell that you are in a Ranger camp. Moving left from Halbarad towards the path will unlock the Osgiliath and Defense of Lorien challenge missions. The play these missions, you can select Osgiliath or Lorien on your map. Behind Halbarad, in the tent, the NPC Silanna will offer you the Side Quest “Athelas.” Elaran is lying on a bed beside her, but you cannot speak with him.
To the right of their tent is Hador, a smith, and Maradan, who sells various items. Following the right wall, there will be a path which takes you to a more open area. However, this area is empty and nothing is here. Going back to camp, make sure all your equipment is repaired, as you won’t be safe when you reach the Barrow-downs. To continue to the Barrow-downs, follow the left path.
Main Quests
The Barrow-downs – Halbarad is concerned for two of his Rangers who failed to return from a patrol. Since they were to return by way of the Barrow-downs, Halbarad has asked you to travel to Rivendell by the same route. Hopefully you can discover some trace of the missing men.
- START: Automatically started when you arrive at Sarn Ford and speak to Halbarad
- Travel to the Barrow-downs
Side Quests
Athelas – The Ranger Elaran is dying of a mysterious ailment known as the Black Breath. The healer, Silanna believes his only chance for survival rests wih the herb known as Athelas. She has asked you to search the Barrow-downs for Athelas.
Silanna has warned you that Elaran has little time left!
- Gather Athelas amid the Barrow-downs
Война на севере
Елена Филатова
Ученик
(130),
на голосовании
11 лет назад
Играю во Властелин Колец Война на Севере и не могу выполнить дополнительное задание: Реликвии Древнего Запада. Нашла только 1, а 2 и 3 никак, хотя весь Форност раз 10 уже оббегала. Подскажите, в каких именно локах Форноста их надо искать.
Голосование за лучший ответ
